I provided another introductory session on Adobe Captivate for Adobe Education Trainers and others who are interested in this technology on Thursday, September 21, 2017. During this session, I focused on branching capabilities with the tool Since it has been a few months from my last presentation so I plan to keep this one introductory in nature and may end up covering some materials from earlier sessions. As with previous sessions, I will provide a link to the recording here (and also provide the example files so you can work with them as well).
For those who are interested in earlier sessions, you will find links below.
- Overview of using Captivate to record a video (March, 2017)
- Creating responsive eLearning assets with Captivate (April, 2017)
- Personalizing Captivate (May, 2017)
- Captivate software simulations (June, 2017)
Since the prior (June) session covered software simulations, I thought it appropriate to take this discussion one step further in September.
In this case, I have created a brief introduction to the fundamentals of creating a web site using Adobe Muse. I took a single pass and created a demonstration, an assessment activity (you can either follow along or actively engage with the content), and a training activity (you are evaluated on your knowledge of the software with minimal hints) using Captivate to record the steps.
I chose software simulation within Captivate 2017 and checked the appropriate boxes (see below). Note that I am recording an application. I have set a custom size. The recording is set to automatic and I am recording a demo, an assessment, and a training all at once. To me, this is one of the most powerful features of this software. By capturing all three at once, one also is able to have a consistent appearance to all three sessions.
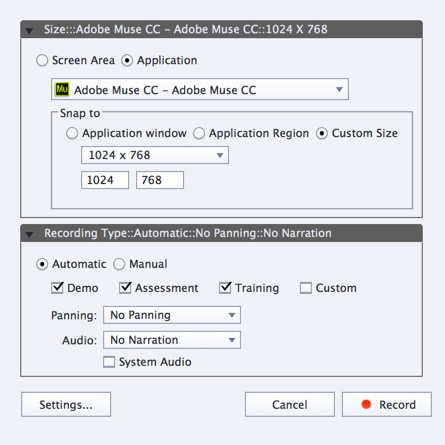
I chose to use Adobe MUSE CC as the application and to capture the basics of creating a site. Yes, I could have gone into much more detail. However, my focus is on branching within Captivate, not creating a site using MUSE.
First, let’s look at the individual recordings. No, I did not include captions as I want to focus on a single item – in this case, branching. Here are the initial recordings (and associated .cptx files – as zip archives). Keep in mind that you will need the latest version of Captivate (Captivate 2017) to open these files.
- Adobe MUSE site creation demonstration (and the .cptx file it was built from)
- Adobe MUSE site creation assessment (and the .cptx file it was built from)
- Adobe MUSE site creation training (and the .cptx file it was built from)
Of course, we could simply stop at this point. After all, we have these modules. However, we may want to present them in a coherent single module. We may want the learner to either view a demonstration, try out the assessment, or dive straight into the training to confirm their knowledge. We can do this by combining all these into a single file and setting up interactions to allow for internal navigation.
Essentially, I created a new project (it could be responsive or typical). I added some blank slides throughout and included three buttons on each of these slides. This allows for navigation between different parts of the project. Of course, it is important to keep track of which slide you want to jump to (and it is important in include a proper name).
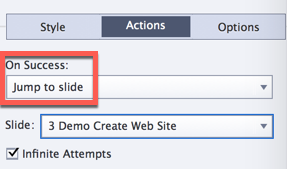
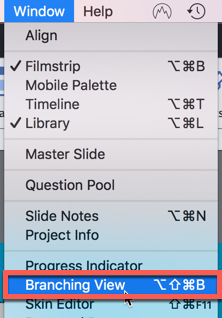
As one ads more “jumps” throughout the project, it can get rather confusing. This is where the Branching View Window is quite helpful.
In this case, the completed view looks like the following. One can adjust the size of the items to show more or less. Since this example is relatively simple, the views are easily consistent throughout.
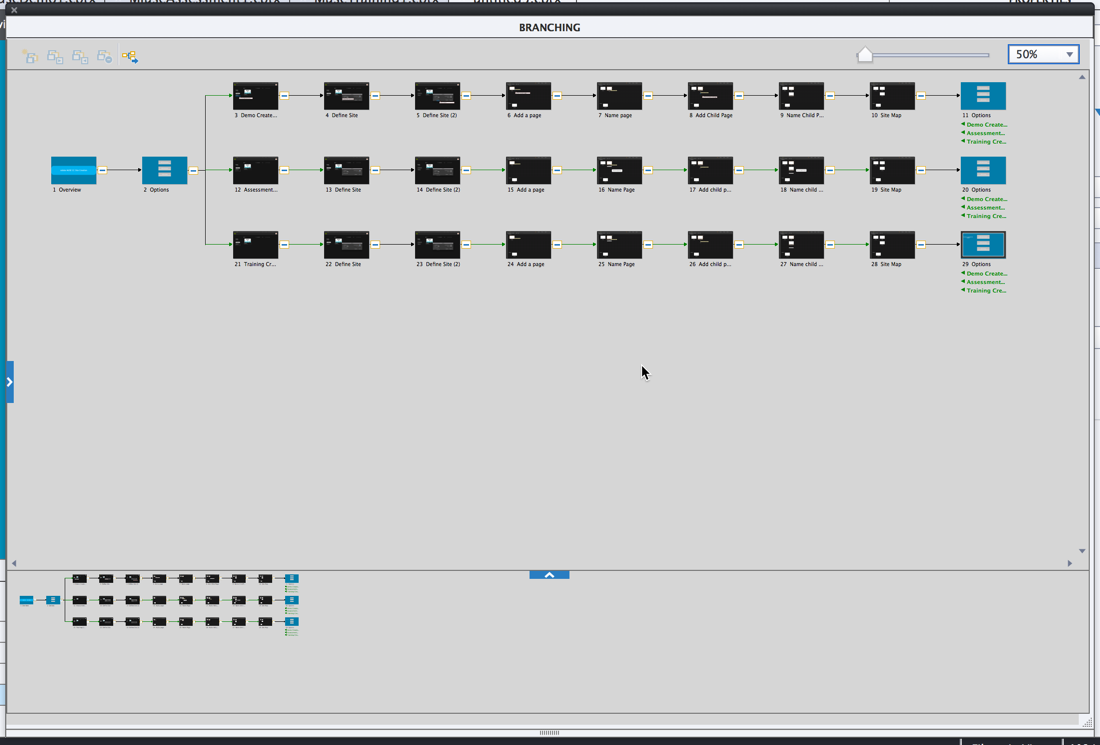
Here is the result. Combined demo, assessment and training files with branching (and the .cptx file it was built from).
The video recording is embedded below. I hope you find this helpful. I plan to continue with another session in November.