I recently reviewed the ability to create captions in Techsmith Camtasia. I thought it would be appropriate to discuss the similar capability in Adobe Captivate. Although the approach is a bit different, the end result is similar. given that we are at the end of 2016, it is imperative that we caption all our eLearning materials. After all, this has become a civil right. Assuming you have Captivate 9 available, here is what you need to know.
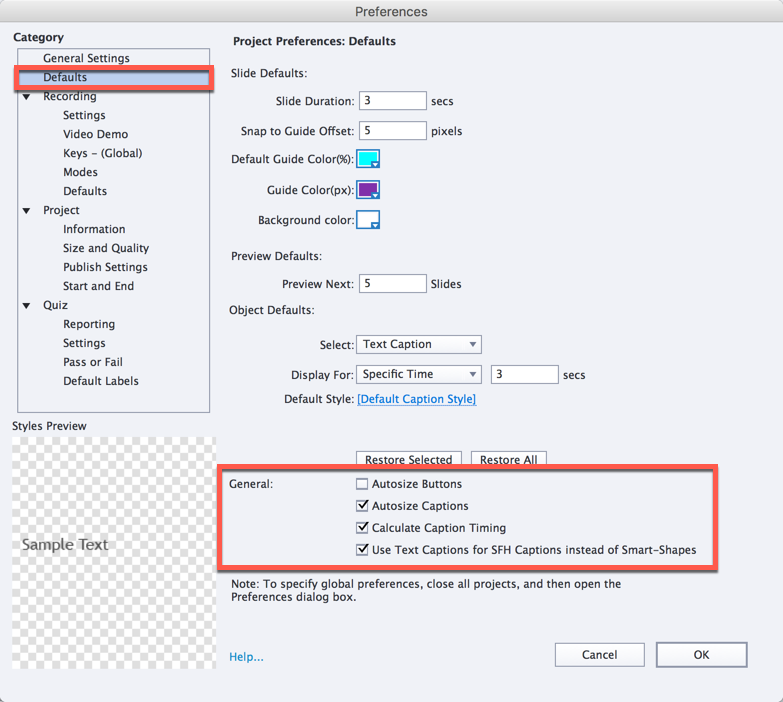
First – open a new project (perhaps a responsive project). Add the necessary slides and populate them with content as you typically would. Make certain to specify that you will be including captioning in the project settings. I highlighted the appropriate parts in the screen capture below.
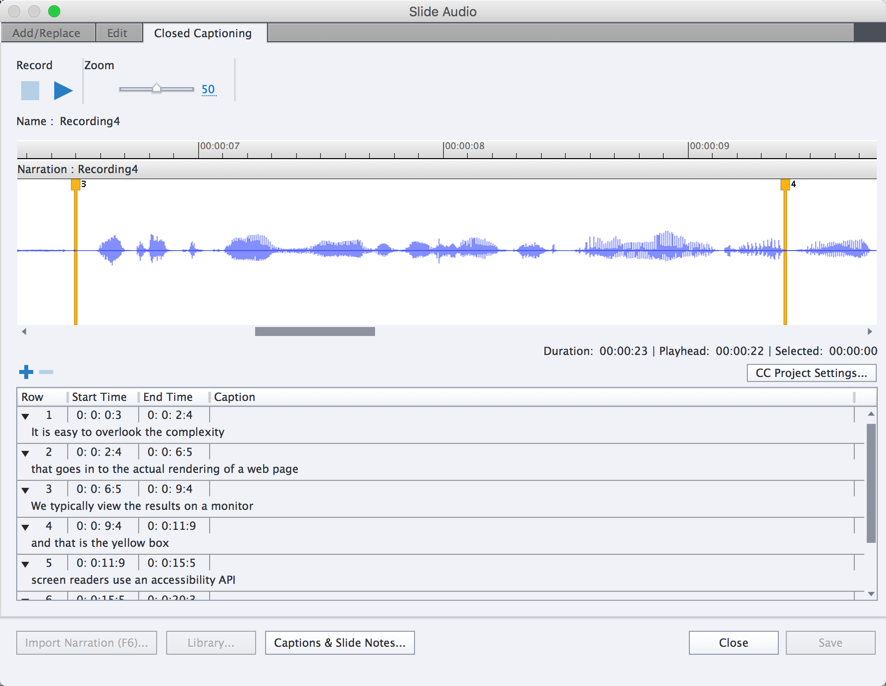
Next, make certain you place your recordings on the individual slides (not specific objects). If you do the latter, captioning may not be available. I record the audio narration, edit it, and then apply captions. This is shown in the screen capture below. After recording the content, I then select the edit tab and modify as needed (removing long pauses, coughs and so forth). I then choose the Closed Captioning tab and click the plus (+) icon when I wish to add a caption. I can play and pause as needed. Captions show up as yellow lines in the screen capture below.
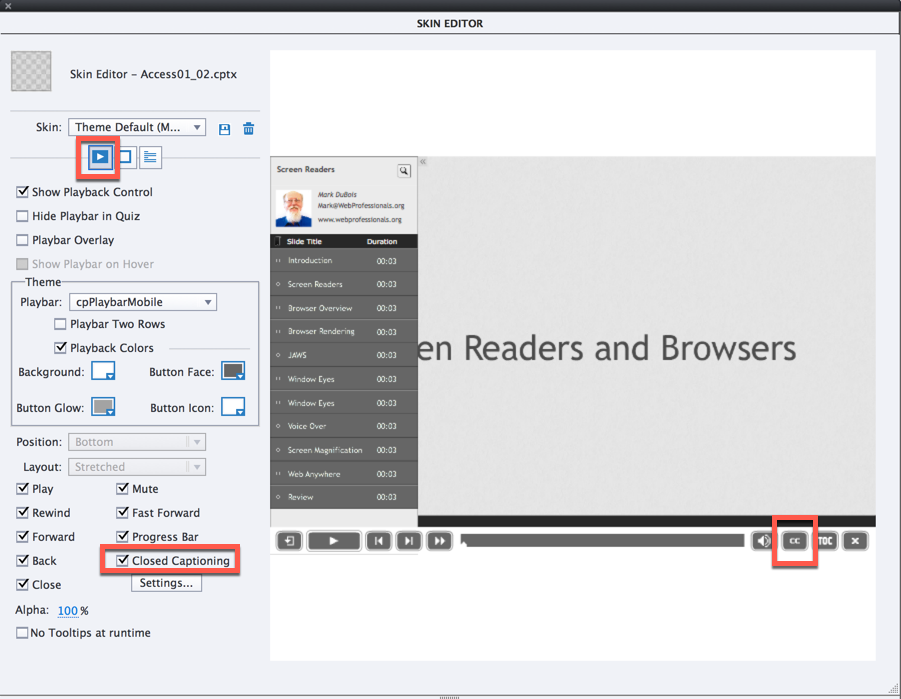
Once I am satisfied with the caption, I then save my work and move on to the next slide. Once all slides have captioned audio, I always make it a point to save my work. I then open the Table of Contents and choose the Player preferences (below). It is important to make certain the Closed Captioning box is checked (it often is not be default).
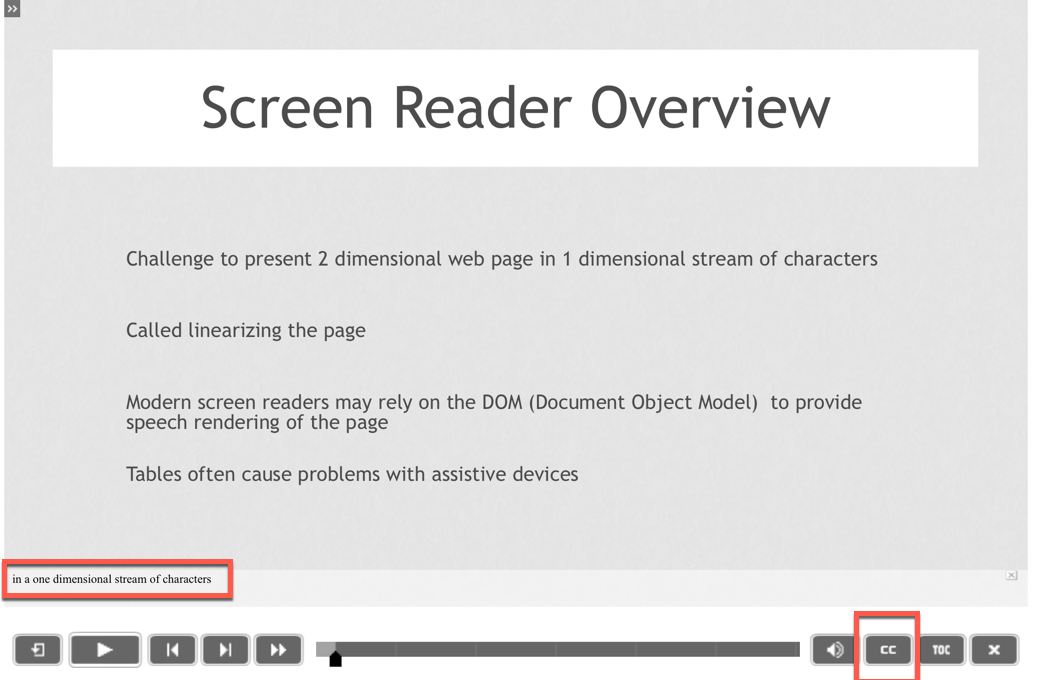
Once you have saved your work, you can then publish in a typical manner. The captioning should then be available. Yes, you can change the size of the captions, font, color and so forth. This is a screen capture of the actual presentation below (with captioning activated). One can toggle between captions (on or off). Captions will appear in the lower right of the screen.
Hopefully you now have a clearer understanding of how to include captions in your Captivate presentations. I look forward to your comments.