I recently checked for updates in Adobe Creative Cloud and discovered a new app was also available. It is called Project Felix. It is available for both Mac and Windows platforms.
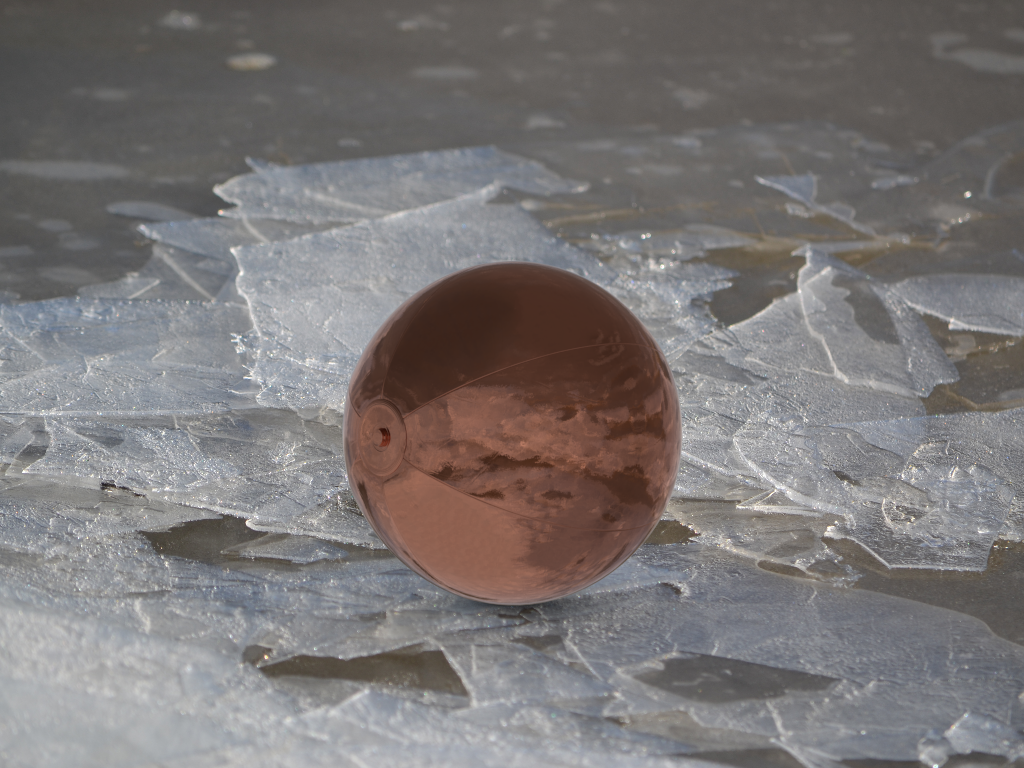
Essentially, it allows you to use a 2D background and insert a 3D object into it. You can then adjust the lighting so that the 3D object looks to be part of the 2D scene. If you think in terms of demonstrating how a product might be used or appear in a given setting, this is an incredibly powerful tool. It is also making me rethink what is real in terms of a photograph (OK, I have been pondering this for quite some time). Here is what the end result looks like (yes, I made this as artificial as possible to demonstrate what is happening). Yes, it is a copper plated beach ball. Note that the ice is reflected in the beach ball. To me this is incredibly impressive.
Let’s see what one can do with this tool (and how I created the above image composite).
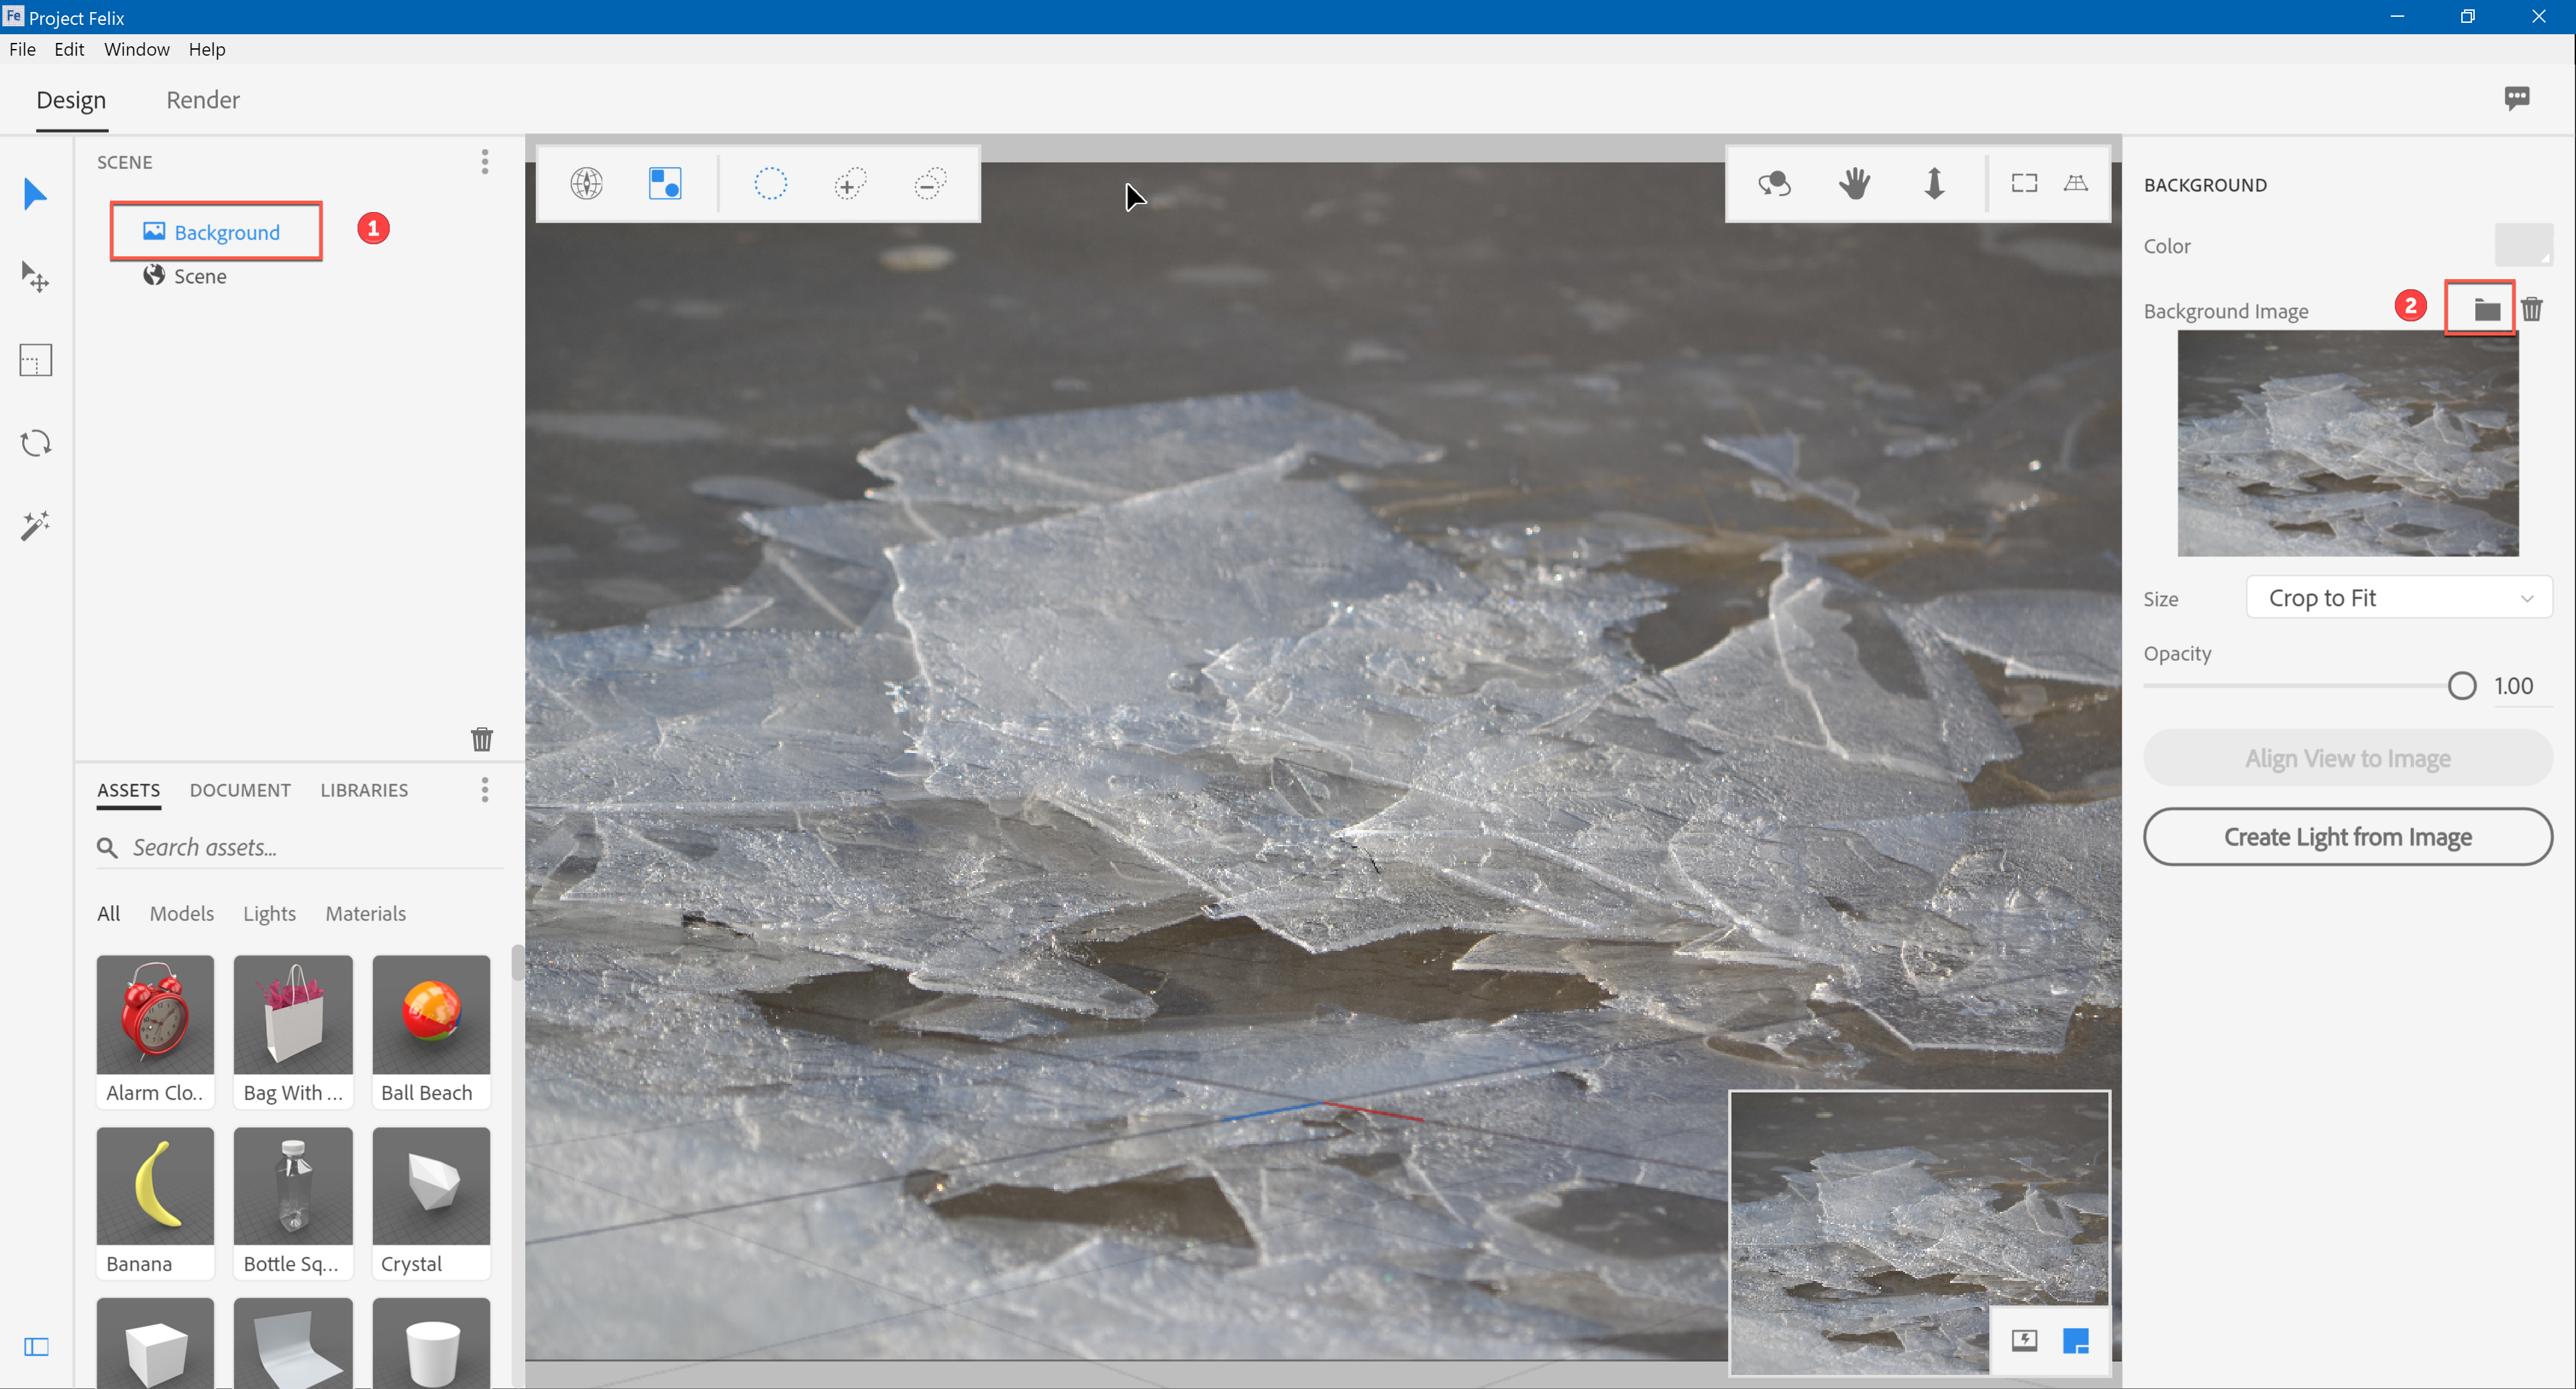
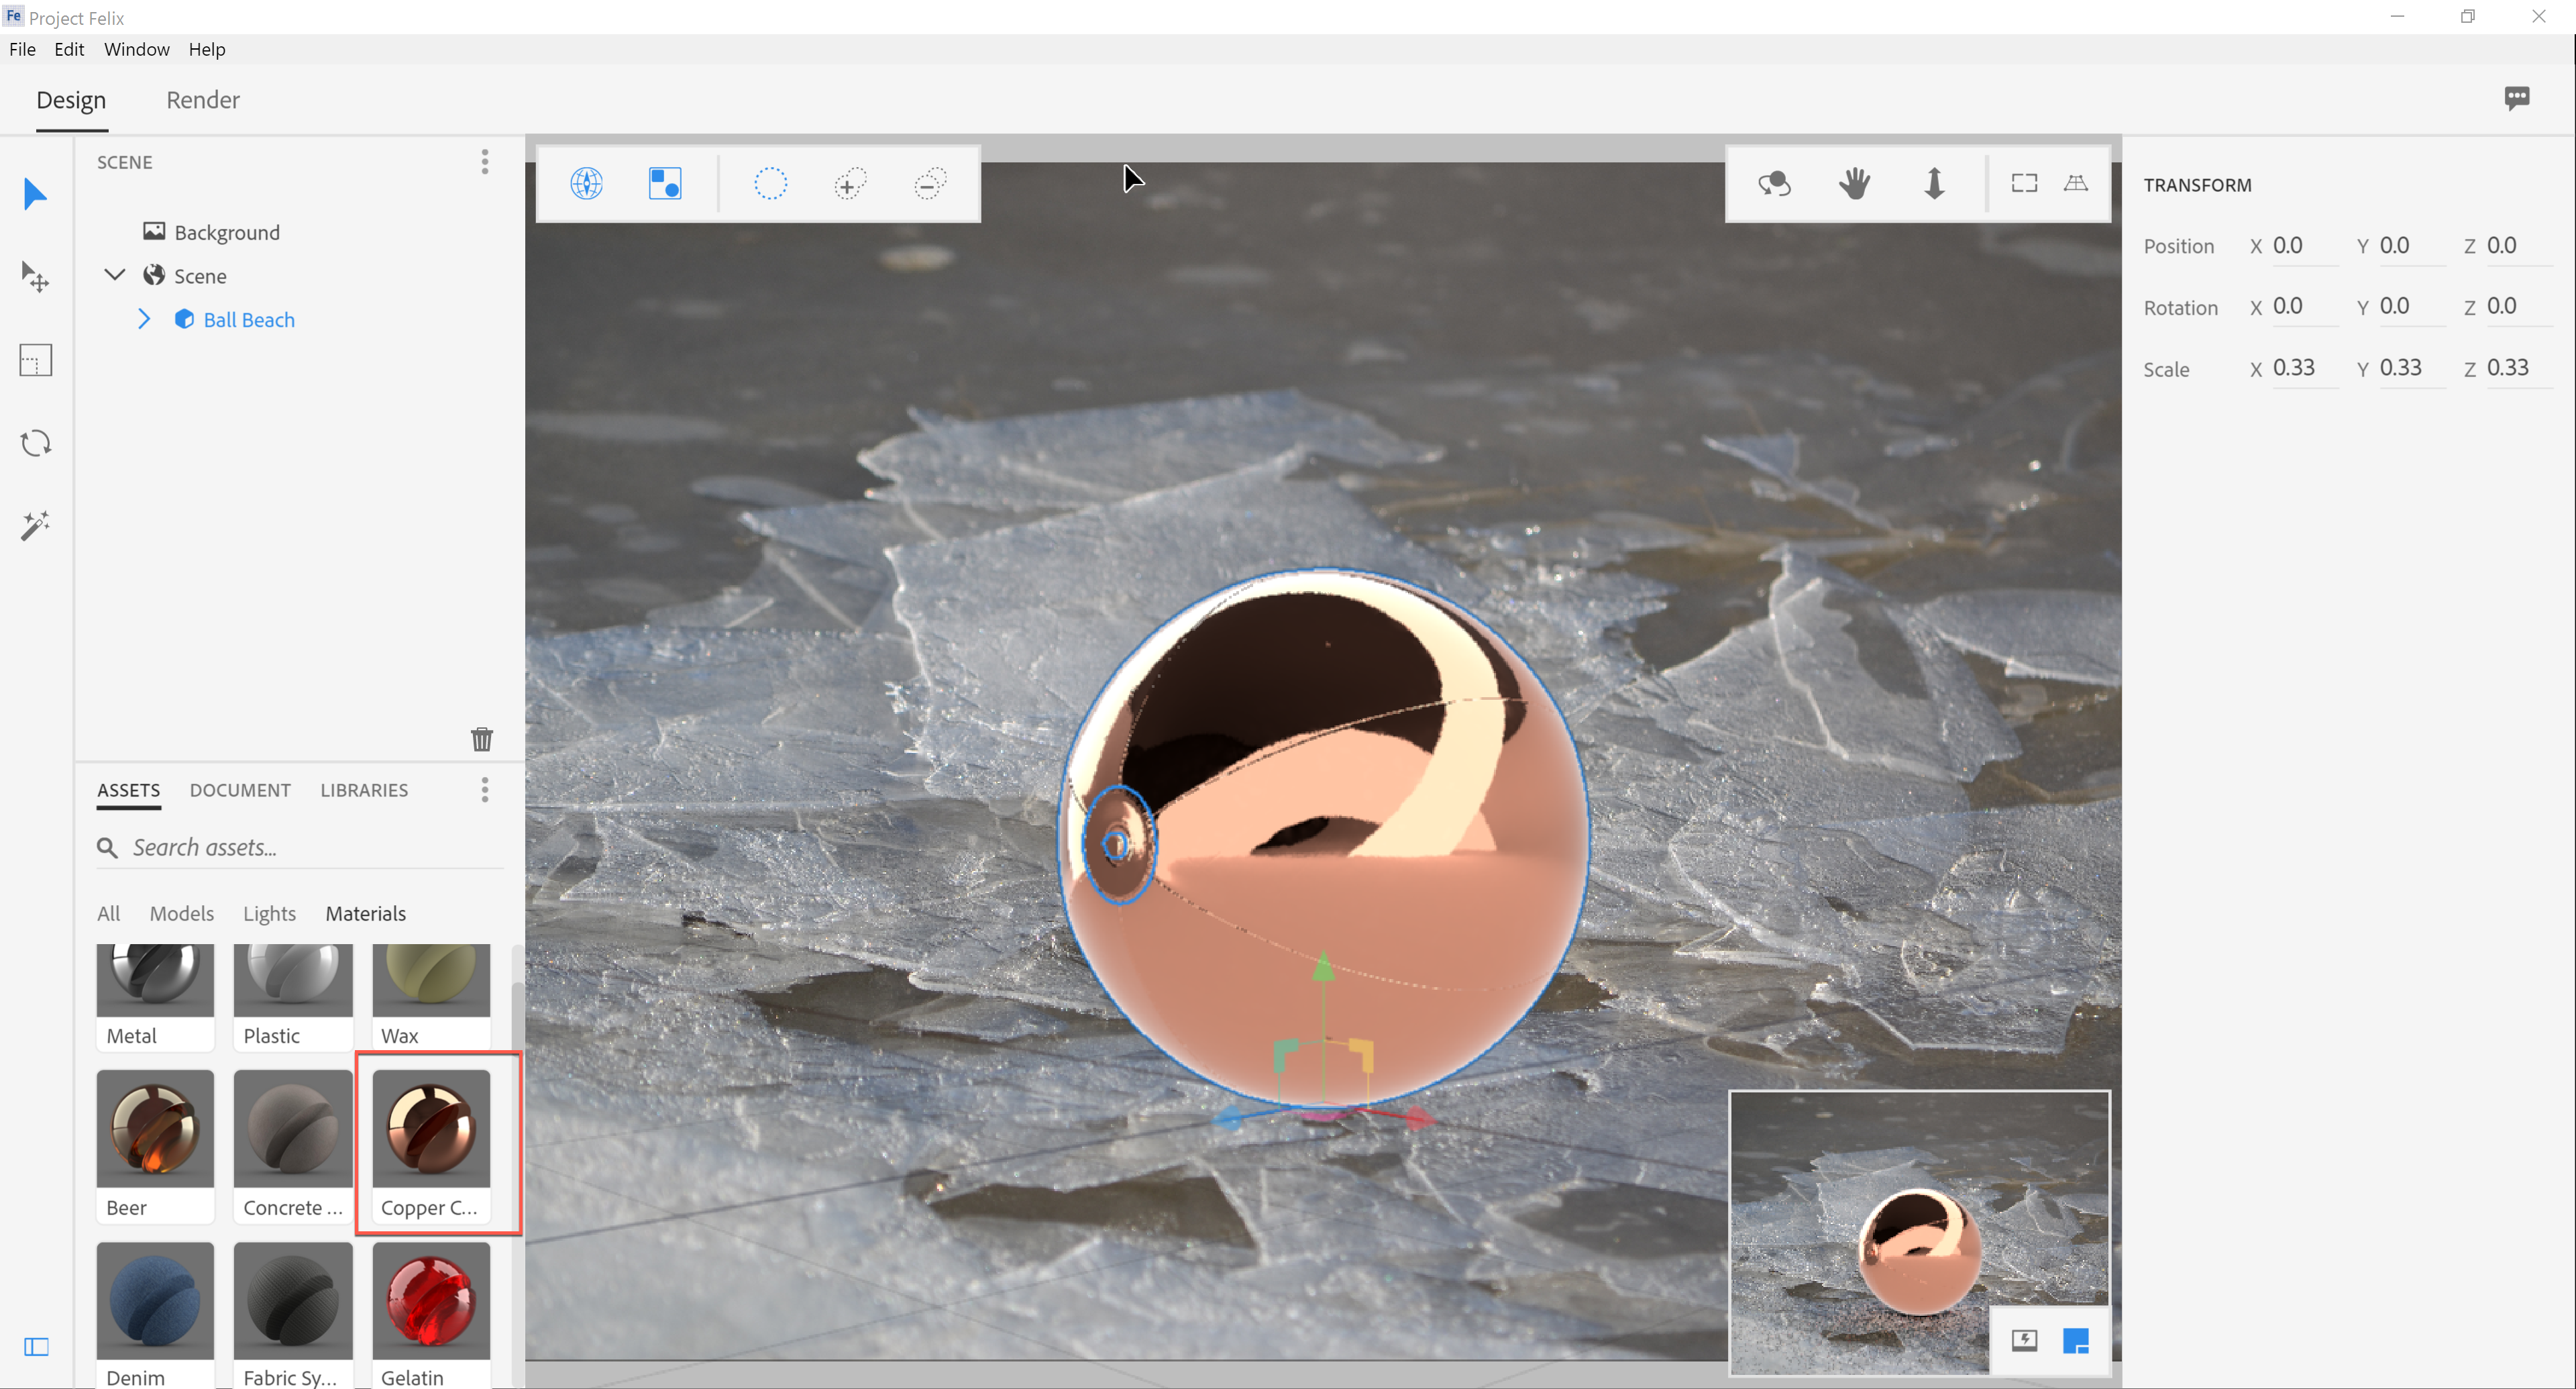
First, I opened Project Felix and added a background image (a 2D photo of some ice on the Mississippi River that I took earlier this year). Lets’ examine the screen capture below in a bit more detail. First [1 below] I selected the background. Next [2] I chose a 2D photo (ice on the Mississippi River in this case).
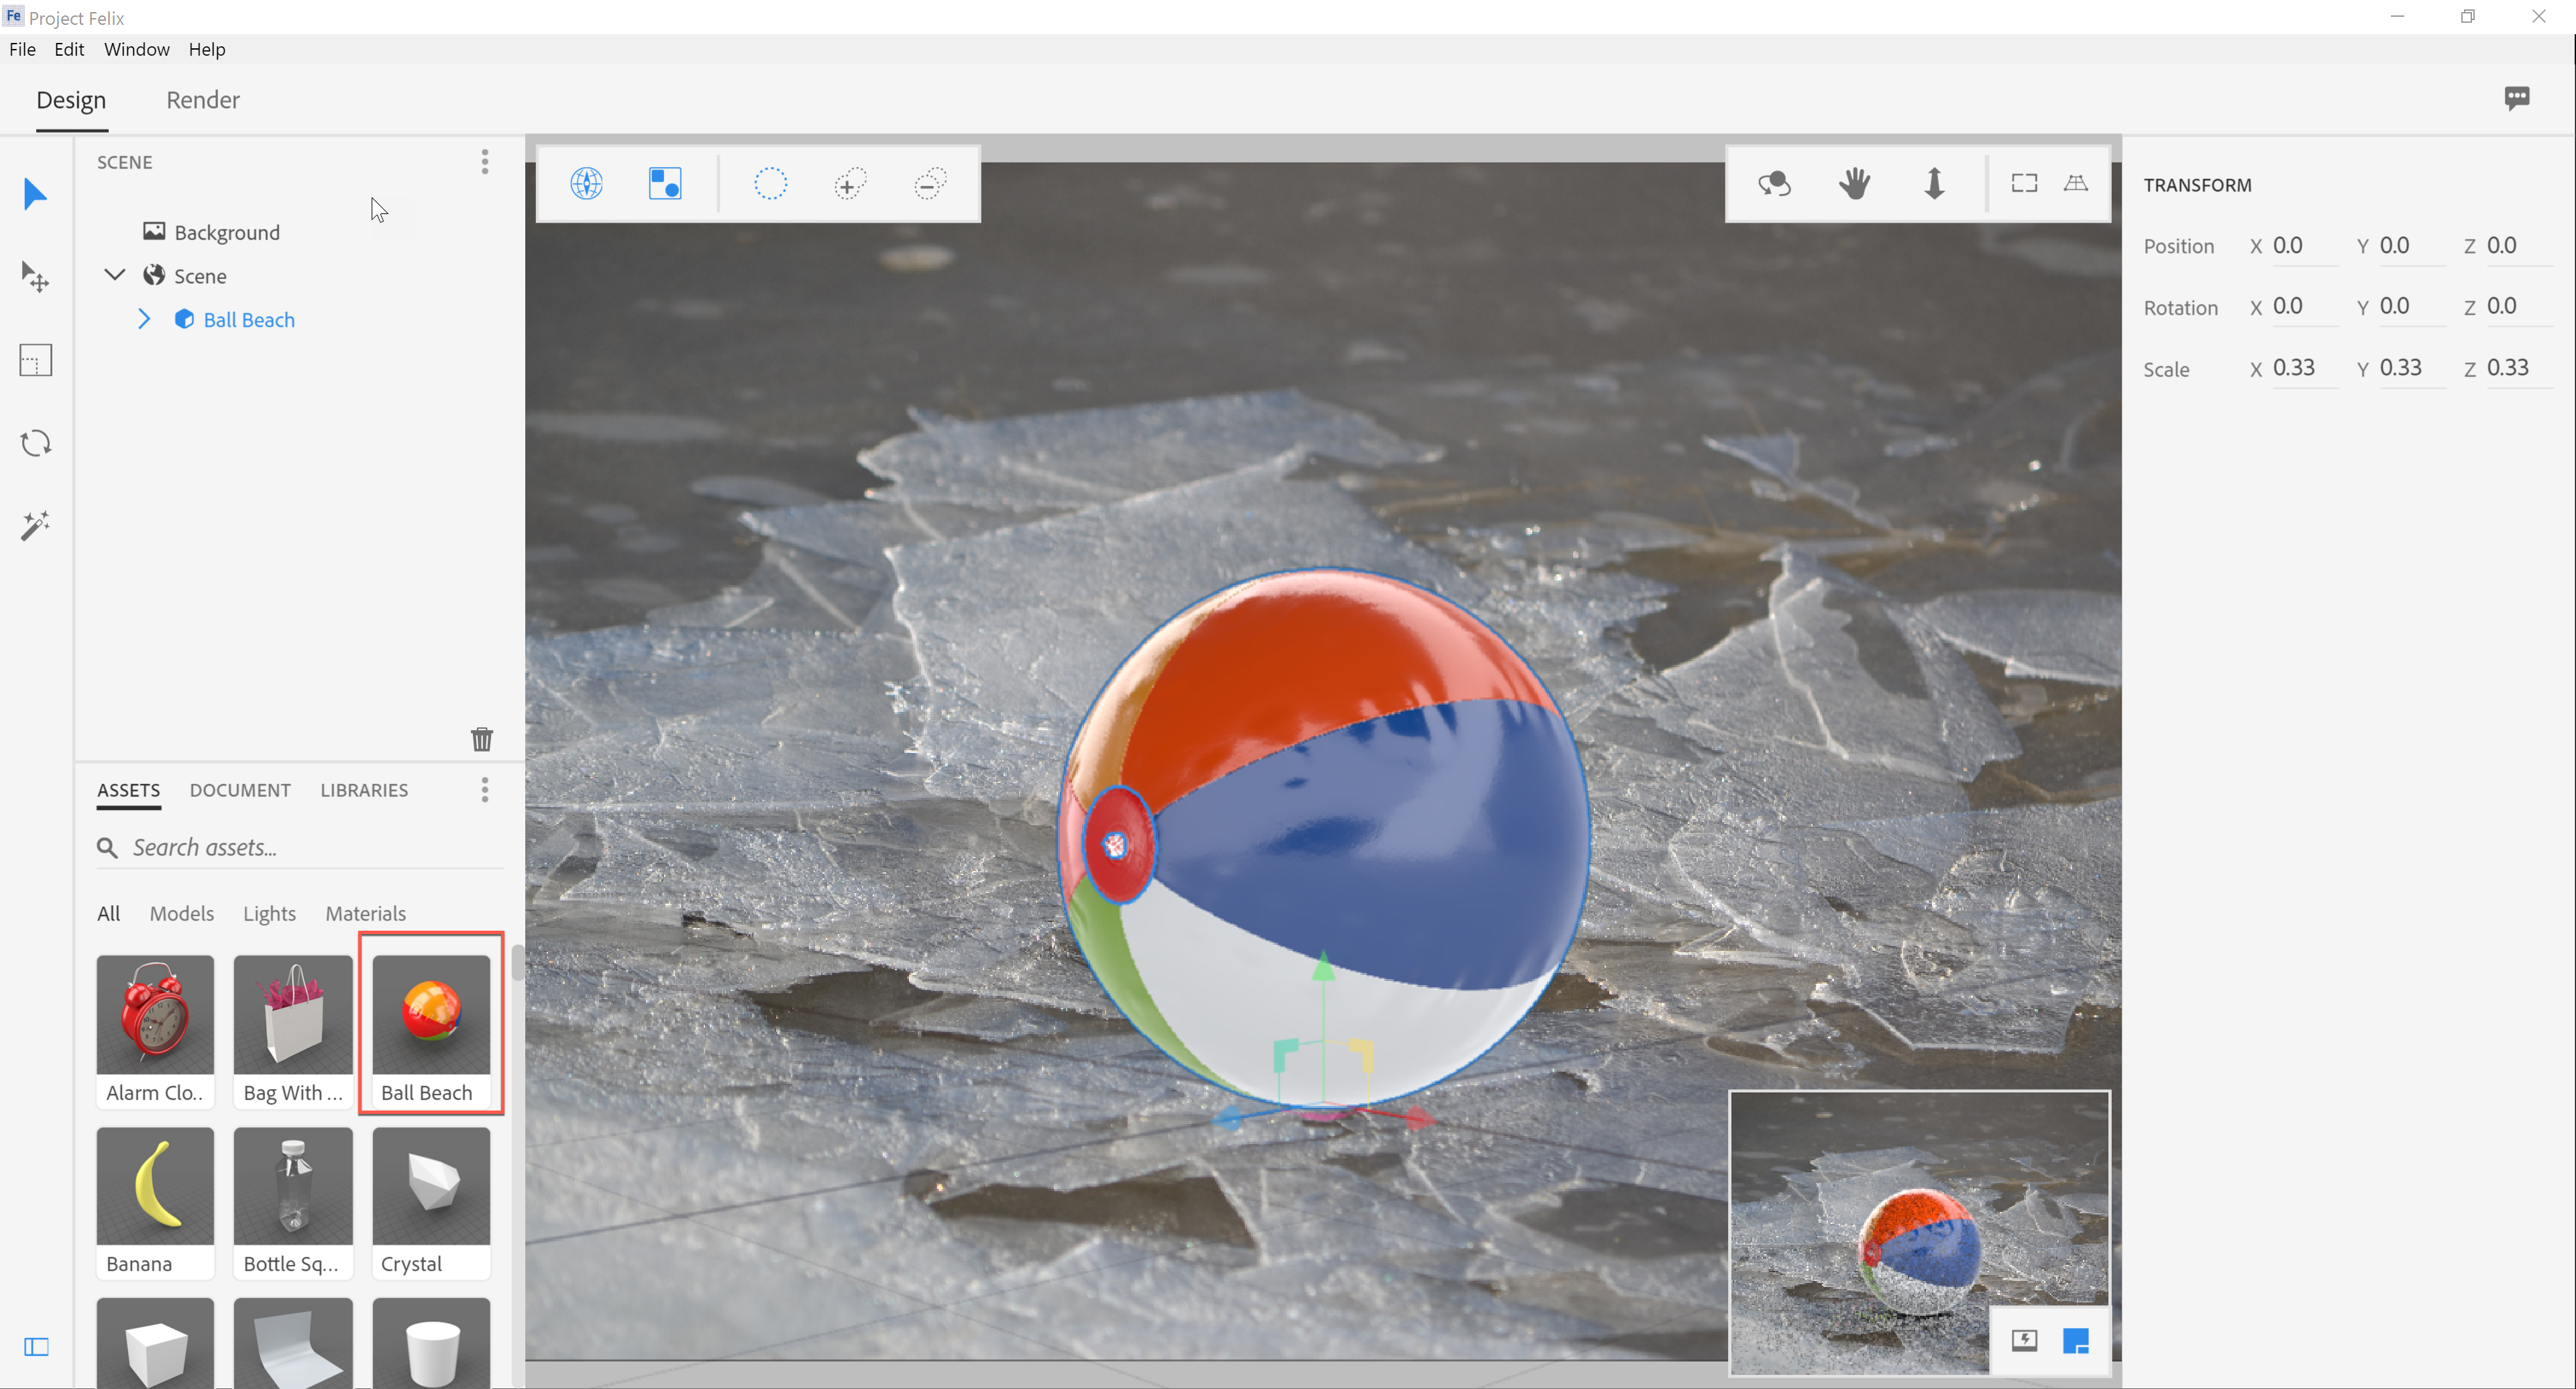
Next, I added a 3D object from the Assets library (I chose to use an existing asset rather than create a new one). I highlighted the beach ball asset below. I simply clicked on the beach ball and it was added to the scene.
I next chose to modify to material (from a plastic beach ball to a copper beach ball). After all, plastic wouldn’t hold up against the ice *grin*. Although the copper material is highlighted below, you will note there are many different kinds of materials one could apply. I also chose copper because it would reflect the lighting (more on that below).
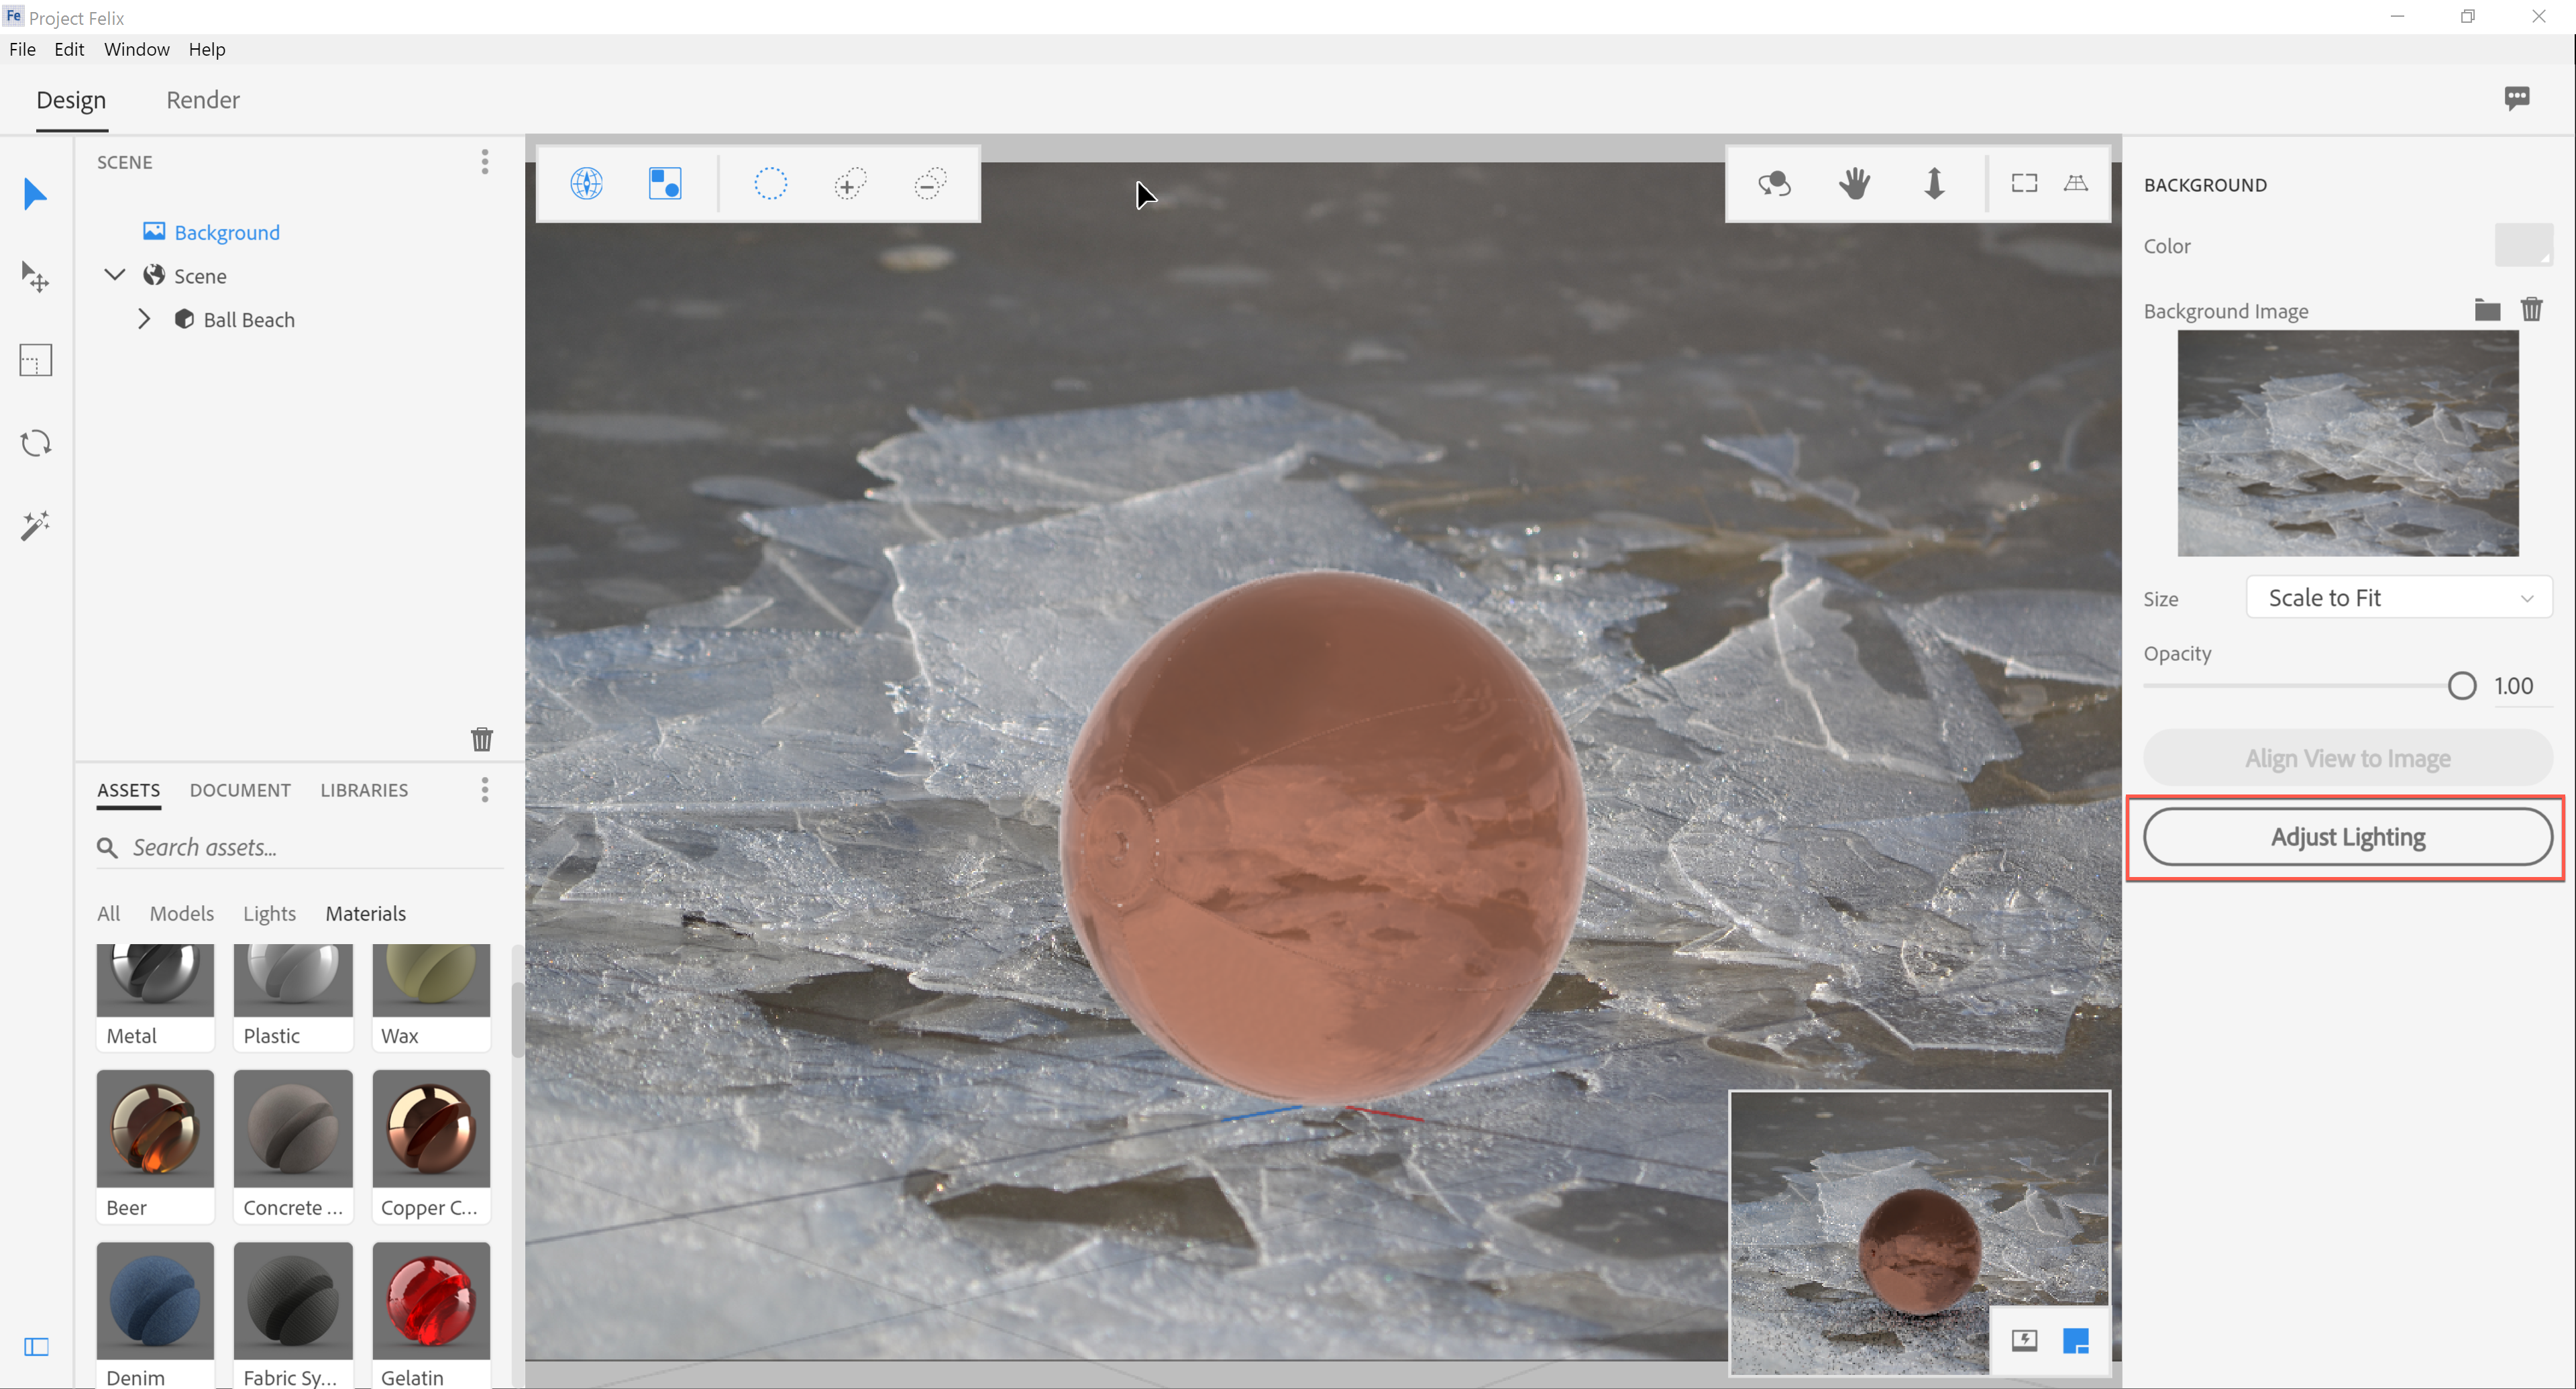
Once I had placed and sized the 3D object on the 2D background, it was time to apply the Felix “magic.” In this case, I simply chose the “Adjust Lighting” option shown in the screen capture below. Note that the ice is now reflected in the object. I think this is incredibly impressive (my mind hurts thinking of all the math involved to make this happen).
Once you have oriented the object in the desired plane, properly sized it and applied the necessary materials, you can then render the object. One chooses the Render tab (adjacent to the Design tab near the upper left in the screen capture above).
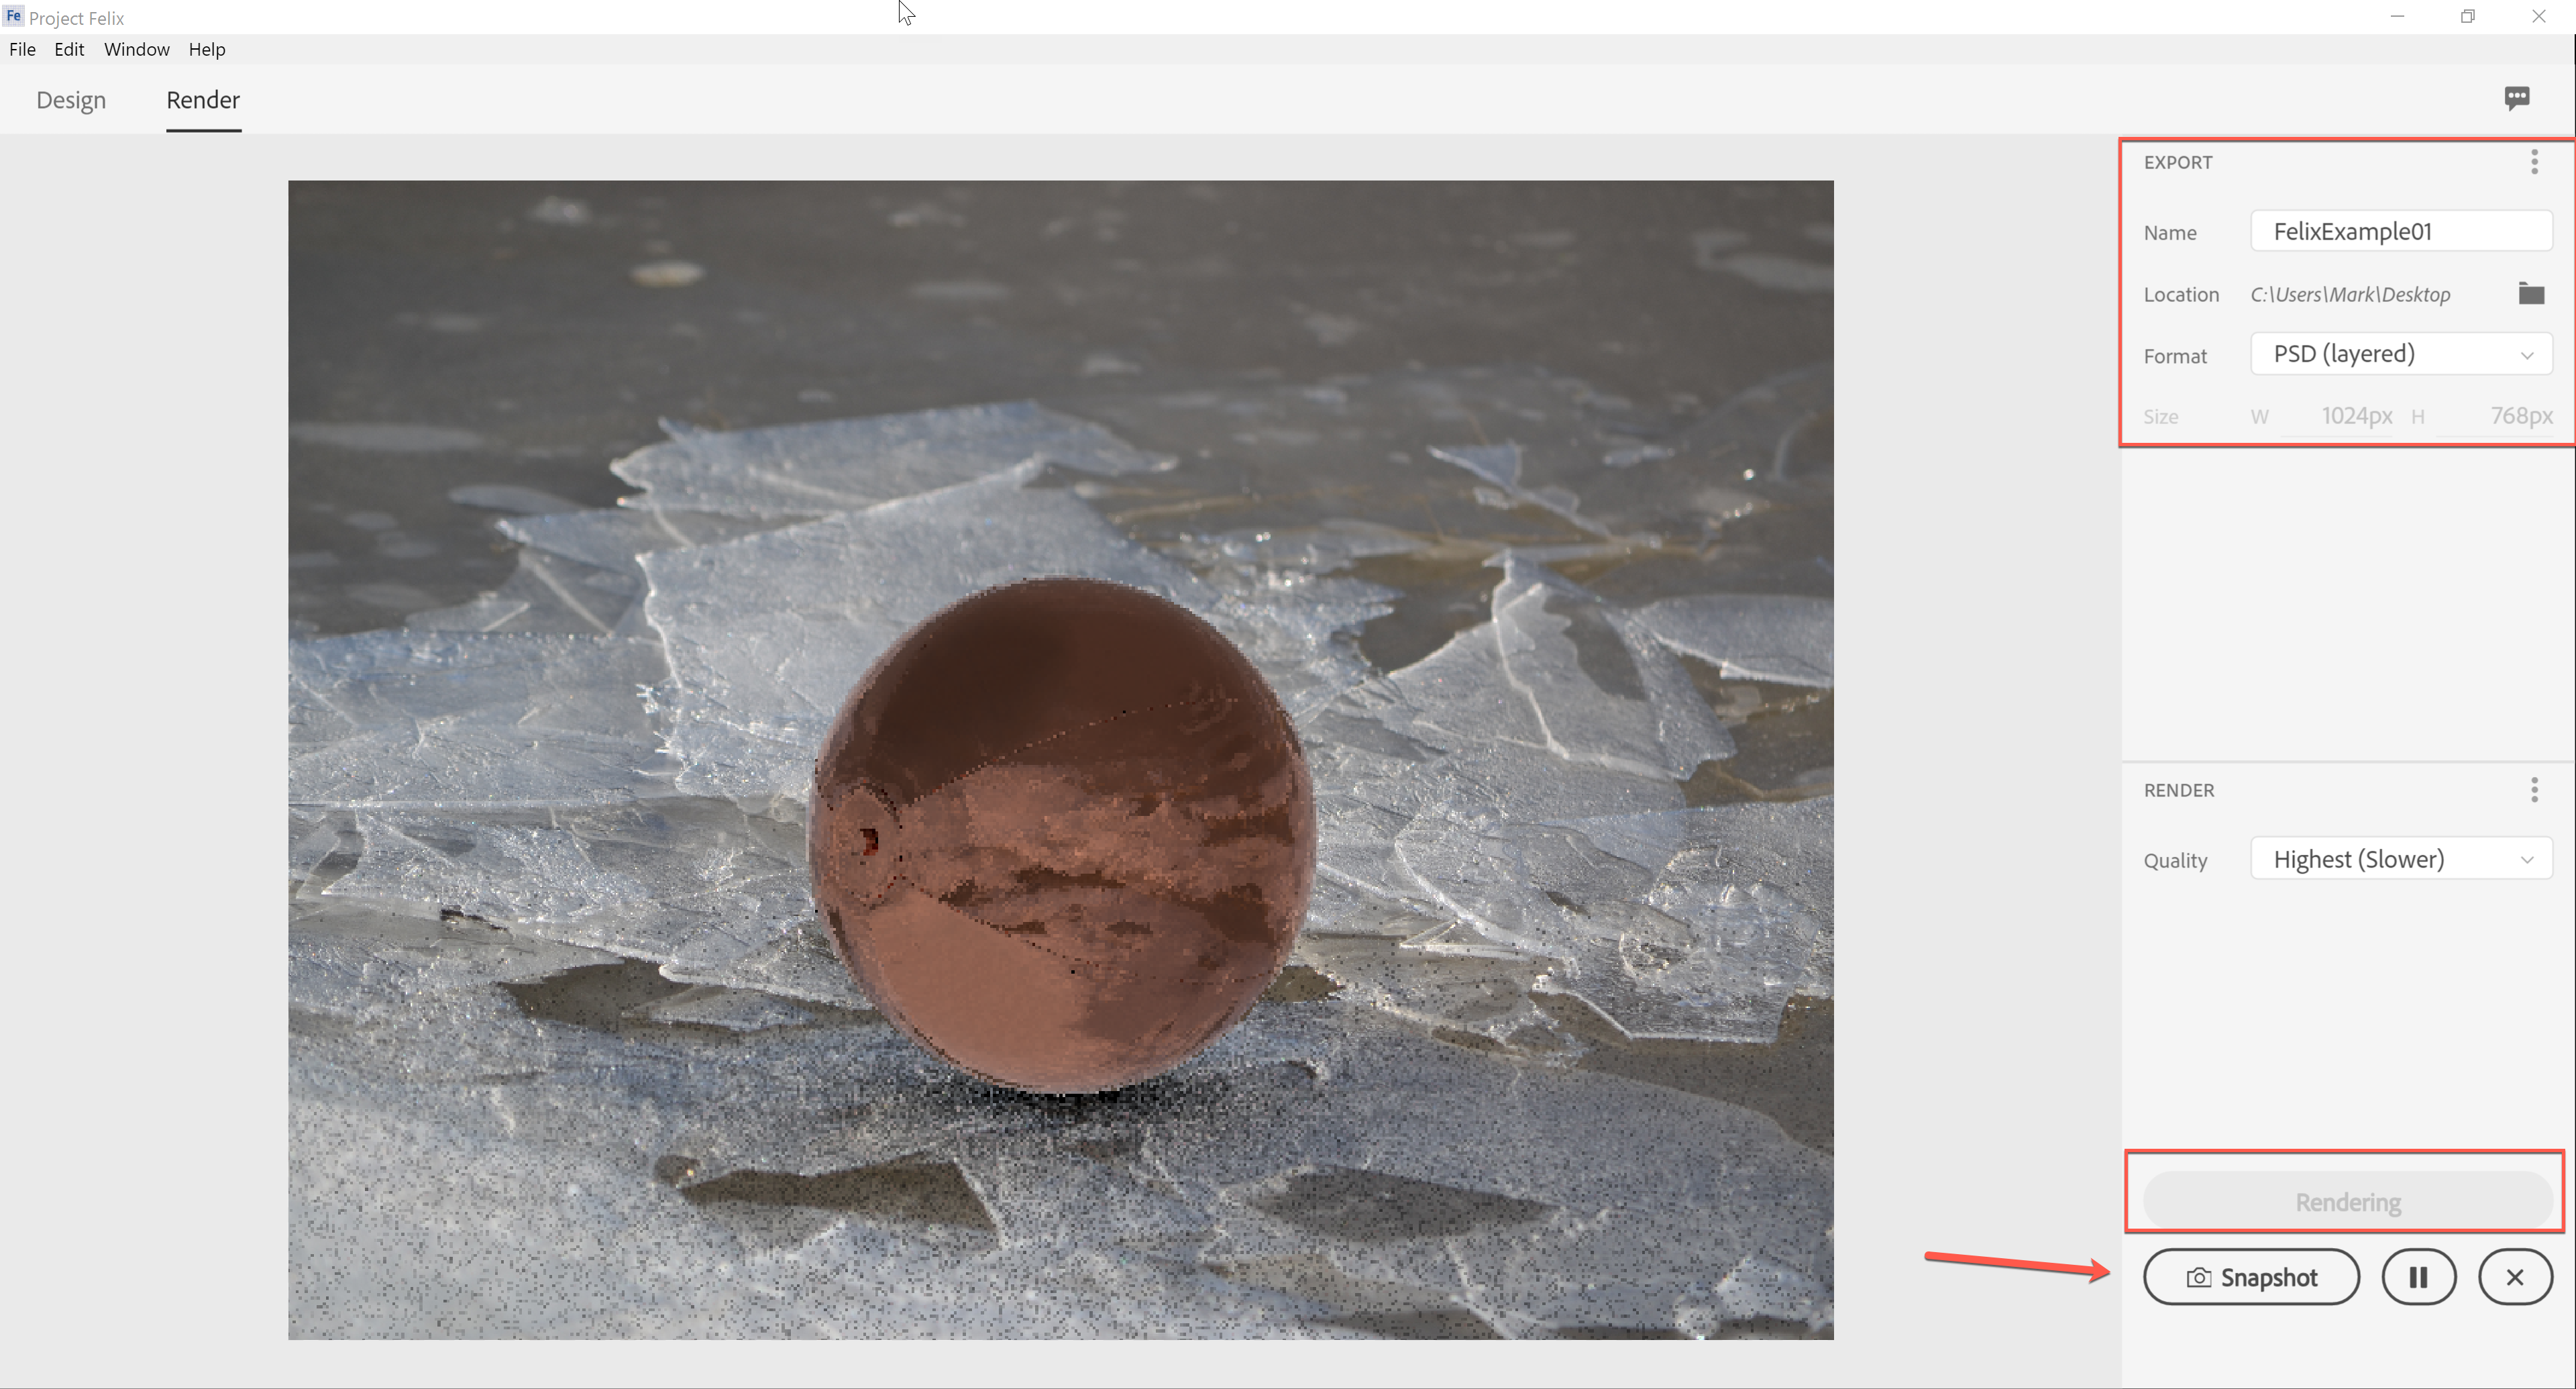
Note that I also specified the location of the end result. One can also take snapshots while the final rendering is happening. These are saved as .psd files and can be directly opened in Photoshop.
Once rendered, one can then use Photoshop to create a .png (or other format). The layers are preserved in the .psd file (so you have both the 3D object and the 2D background).
For those with access to Creative Cloud, here are the files used in the above discussion. The zip archive linked above contains the two files below (note that it is roughly 35 MB in size).
- Felix .asd file format (if you want to experiment further).
- Felix export to Photoshop .psd file format (if you want to see the resulting rendered image)
I look forward to your comments regarding this tool. Personally, I think it has immense potential in terms of marketing and advertising (for example, being able to place your product in a scene to show how it can be used). I look forward to your thoughts.