I never cease to be amazed at the capabilities and options available in tools. Options that I didn’t know about or overlooked. Yes, working with web technologies, one is constantly learning. I recently completed a course at lynda.com dealing with Adobe Generator by Chris Converse. I simply didn’t realize this feature was included in Photoshop. Essentially, you activate this feature (it is a toggle switch) and you can then seamlessly create graphics (or an Edge Reflow project) from Photoshop. We can do this from any layered Photoshop file. Let’s see how this is accomplished… First, we need the latest version of Photoshop CC. We next need to toggle this feature. We select File > Generate > Image Assets from the menu. Once this is done the first time, we will also see the ability to generate an Edge Reflow project.

For those who are curious, this feature relies on Node.js. I provided some discussion about Node.js in these earlier blog posts:
Now that we have activated this capability in Photoshop, let’s see what we can do.
From a web design perspective, we are often provided with a layered Photoshop file which is a design composition (a rendering of what a website should look like). As one of our tasks, we often need to generate assets to begin fleshing out the site. This is relatively easy to accomplish using Generate.
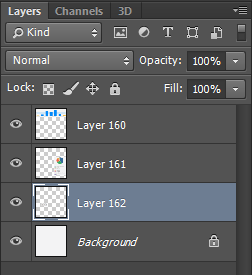
First, we verify that there are layers. Of course, we need to name these layers properly. Note that default names were applied below. Our first task is to rename these layers to the names of desired files.
Since we have already activated Generate in the File menu, we simply rename the layers to the desired names of the images. The files are automatically created in a folder named Filename-assets. In this case, I named my file Example.psd so the folder created is Example-assets. It really is that simple. I didn’t know about this. Did you?
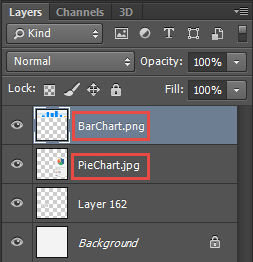
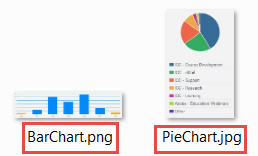
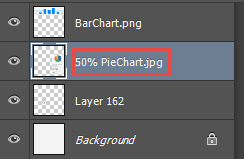
As soon as the names have been changed, the files are automatically generated. Note that I created both a png and jpeg file by simply typing the desired name. The contents appear in the associated folder. Again, the name of the folder will match the name of the PSD file with -assets added. The folder is shown below (and the contents under that).
I really wish I had access to this feature when I was provided complex design comps and had to create so many assets on my own.
Of course, we can take this a few steps further. If we preface the name of the layer with a percentage, we adjust the resulting size of the generated image. In this case, I set the value to 50%. This will create a smaller image than what is shown in Photoshop. We can also enlarge an image (but we will get dithering effects and this is not recommended). We can also work with smart objects or layer groups. I encourage you to experiment.
Lastly, we can also create an Edge Reflow project from the layered Photoshop file. File > Generate > Edge Reflow Project. This will create a separate folder with the name of the file followed by -reflow. The contents of this folder include the .rflw file which can be opened in Edge Reflow and modified as needed. I have two earlier blog posts on Edge Reflow you may want to reference.

I find this capability impressive. Frankly, I didn’t realize this capability existed in Photoshop (until I reviewed the lynda.com course). I am curious if you found this post useful (and if you already knew this capability existed). I look forward to your comments.