This is the second part of my attempt to share some of the technologies I use when teaching online classes. I previously briefly reviewed Adobe Connect. I thought it might be helpful to next focus on Adobe Presenter. I use this tool periodically to introduce a topic. Students in my classes know that I don’t believe it is appropriate to do a full hour “lecture.” Given the rapid pace of change with web technologies, I have found myself spending a tremendous amount of time just updating my materials to reflect the latest changes (in software and approaches). I prefer to point students to resources that already exist. After all, we live in the age of search engines and numerous online videos/ tutorials to help us understand a topic. Instead of spending a tremendous amount of time developing a “lecture” that few would listen to in its entirety (yes I have measured this previously), I introduce a topic and point my students to pertinent resources and usually have an associated lab or project to reinforce the concepts we are learning. Let’s examine the PowerPoint plugin part of Adobe Presenter (this is how I began using this tool). There is also a separate Presenter Video Creator tool. I may cover that in a future weblog post. Obviously, you have to purchase this tool from Adobe. The current version is 9. If you also have MS Office installed prior to installing this tool, you will be able to include the PowerPoint plugin. Once installed, you will see a ribbon like the following (you may need to click on the image to enlarge it). You see there are a lot of options (I will only cover a few).
![]()
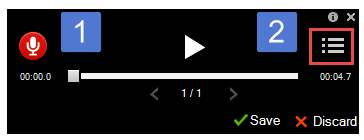
If we examine the above ribbon, there are several features. First, one can record audio (this will be associated with your PowerPoint slides by default). I typically use this capability when introducing a topic. One can also record video (I use an alternate tool for this typically). Since I have Captivate also installed, I have the ability to work with .swf files created in that tool (application simulation option). I typically choose to record audio associated with a set of slides. when the record icon is checked, the Powerpoint slides are shown in full screen mode and you can record audio for each slide (number 1 in the screen capture below). You can also refer to a script (number 2 in the screen capture below). One can play the audio and either save or discard it. I really like the ability to work with each slide (often I am interrupted by the phone).
After the audio has been created, you have the ability to edit it. You can work with each slide. The edit interface is fairly standard. If I recall correctly, closed captioning is provided by a speech to text converter.

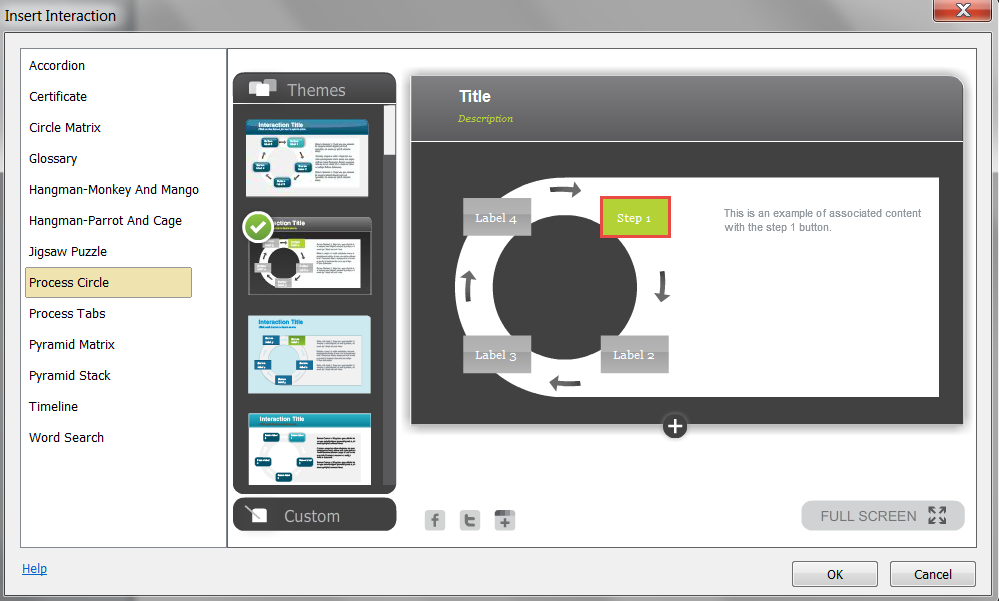
In addition to adding audio, one can also include a number of interactions. I placed a screen capture below. One chooses the appropriate interaction and then double clicks the supplied text to modify it. One can often add audio to these interactions as well.
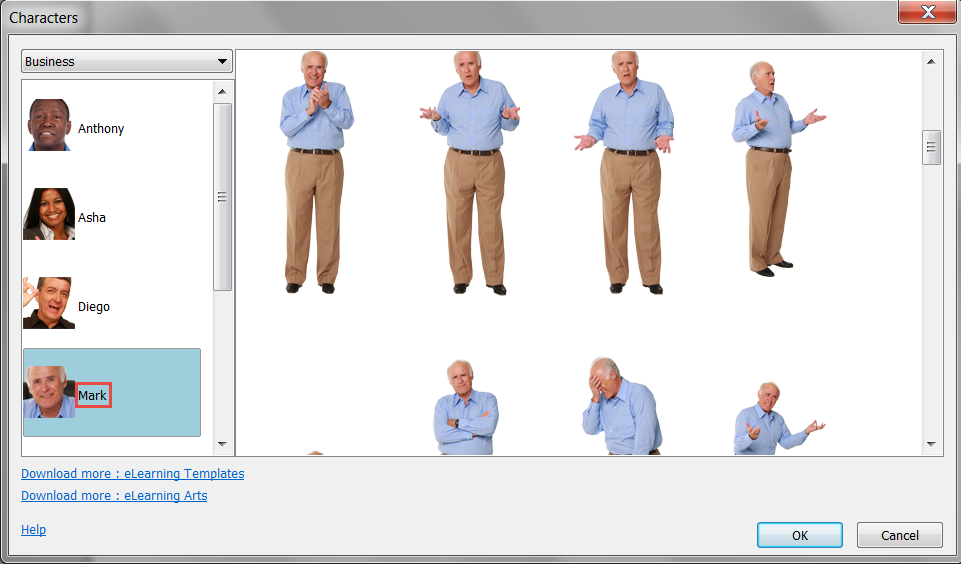
One can also add characters. These are a set of various images supplied with the product. Yes, if you look closely, you will see they named the bald headed individual Mark.
One can also add a number of scenes (more are available online).

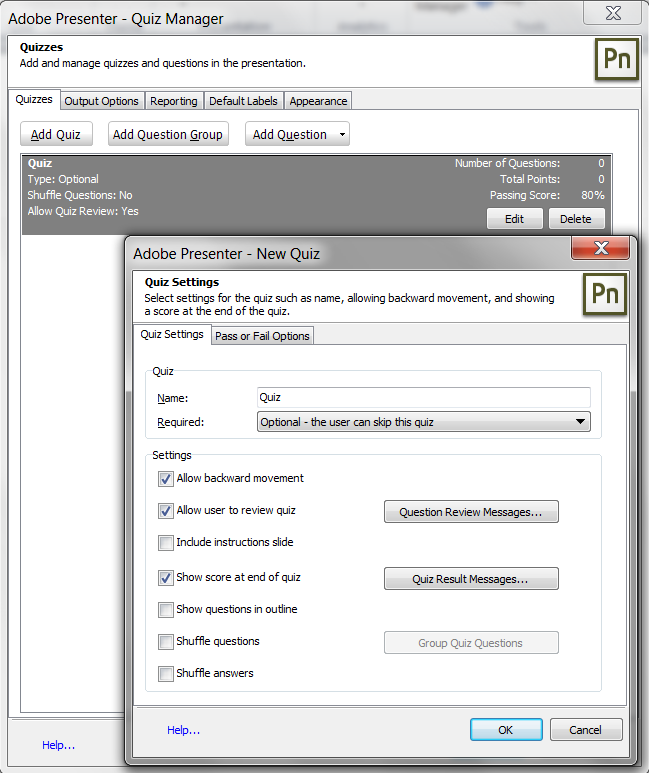
There are many other features (such as the ability to add a quiz). There is also a learning dashboard one can set up (when you publish to a Connect server). I tend to use Adobe Captivate for many of these aspects (I plan to have a separate coverage of that tool in the future). An example of creating a new quiz is shown below. Once you have set the quiz parameters, you can add the usual types of questions.
Once the instructional materials have been developed, one can distribute them. Choices include saving locally, publishing to a Connect server, or publishing as a PDF file. In the past, I typically used the PDF option. However, with certain browsers (ahem, Firefox) thinking they have a better default reader than Adobe (and it isn’t), I have found this option is not viable for all students. I now publish most to a Connect server (and provide links in my Moodle Learning Management System).
Now you know a little more about another of the tools I use periodically in my courses. I am curious if you find this information helpful. As always, I look forward to your comments.