Now that we have some understanding of some of the capabilities of Node.js, it is time to investigate its true strength – as a web server. Recall that many reseller accounts will not allow Node.js to act as a server as it is viewed as a long running task (and most of these accounts prohibit such activity). That being said, it is still highly useful in the localhost environment. In this weblog post, I will walk through some of the fundamentals in the use of Node.js in a local environment.
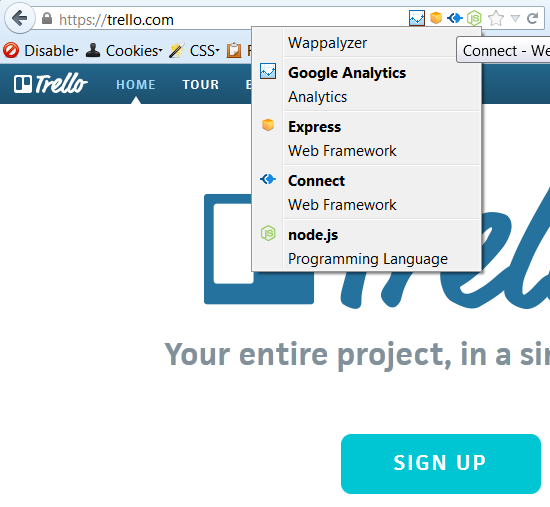
For those who have more control in their hosting server, one can do some amazing things with Node.js. Trello, GoMockingbird and WordSquared were all developed using Node.js. There are many other sites as well. You may note in the screen capture below, I use the tool Wappalyzer to identify the type of server. This is a plugin for Firefox and Chrome.
Obviously, the first step (after installing Node.js on your computer is to create a folder structure to hold your files. I keep these within the NodeJS folder for ease of locating. You create the necessary JavaScript and HTML files, create a package.json file to include necessary dependencies and then run Node.js at the command line (I typically use node-dev instead of node in terminal or at the command line because I am often developing things and node-dev is a bit more forgiving). The biggest advantage is you can use one language (JavaScript) for prototyping your entire application (both client and server code).
Simple Server – At it’s simplest form, you can use Node.js to serve up a static web page. Consider the following block of code and the resulting output. I created a file called server.js and required the http functionality (comes with Node.js, no need for an add-on). I then used the createServer method to write out a basic HTML page and listen at port 3000. There is a note added to the console log to let me know that the server is running. Any page or folder requested is echoed back in the resulting web page. Ok, not much, but it is a start. Note there are very few lines of code required for this initial option.
First the code:

Note that the majority of the code relies on the createServer method within the http object. We first send the appropriate header informaiton and follow it with some basic HTML. We also write the results to the console log. The results are shown below.
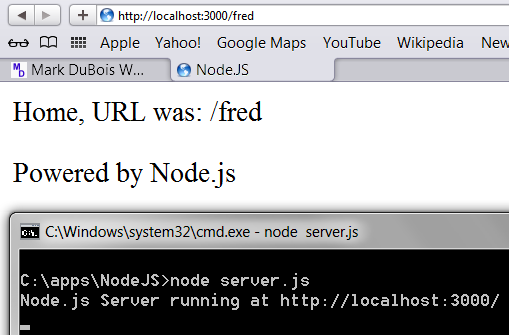
As you can see, I have a browser open in the background. I navigated to a non-existent spot – fred at localhost, port 3000. The result is displayed in the HTML. In the foreground, you see what was required to activate the node server (along with the console log message included). Ctrl-C would stop the server. Se we now have a basic web server which relies on Node.js. Wouldn’t it be nice if we could do a bit more?
Connect add-on – we can include the connect add-on to provide us with common web server functions (such as specifying the proper file type for HTML, images and so forth). Given that our code will be come more complex, we probably want to use a package.json file so that we can install necessary modules once in a folder and then start node.js.
Let’s examine the package.json file first.
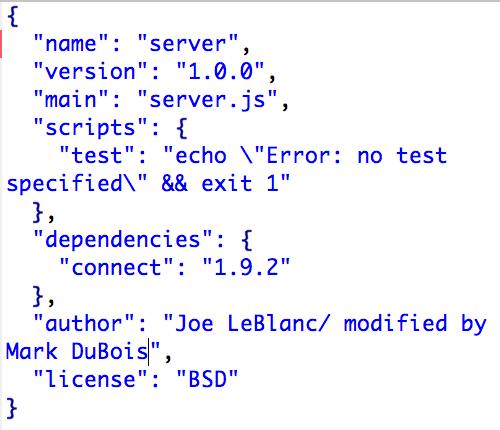
The above example was modified a bit from the sample provided in the lynda.com course by Joseph LaBlanc on Node.js fundamentals. We point to the server.js file as the main script and reference the 1.9.2 version of connect as a dependency. We would then run npm install to pull in the connect add-in. You can see the list of files in the screen capture below (after having run the install).
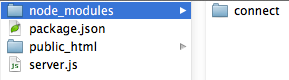
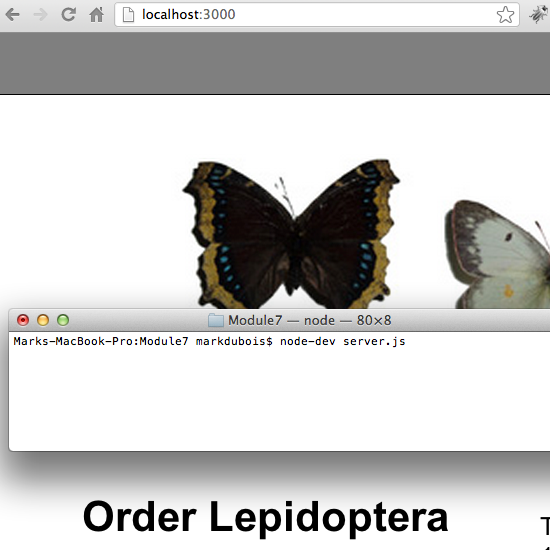
Note that I created a folder called public_html to reflect the typical folder structure on many student websites. I populated that folder with an example of a website on central Illinois butterflies that I have used for other demonstration purposes. Let’s next examine the server.js file.
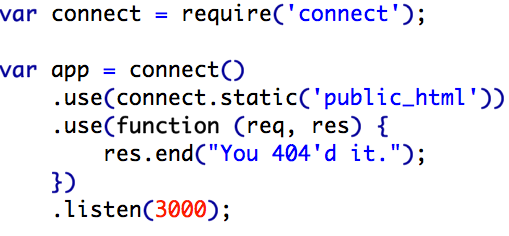
As you can see, we first need the connect add-on to handle the majority of the core web server functions. We then reference the public_html folder for the necessary content to serve to the browser. Normal request and response happens unless there is a request for a non-existent resource. In that case, we display an error message. As in previous examples, we listen on port 3000 for any requests from the browser. The result is shown below. Note that I have included a screen capture starting up the Node.js server along with the resulting web page displayed in the background. We now have a local server running and can test our code as needed. Yes, we can do a lot more with Node.js, but you should now have a solid understanding of some of the basics and should be able to proceed further on your own.
For those wishing a copy of the files I am using in this discussion, I provide a zip archive that you can download and run locally to verify you have Node.js working as a local server. I note that Node.js seems to be growing in popularity. For example, it is now included in standard installations of Titanium Studio (Appcelerator).
I hope you found this introduction to Node.js helpful. There are a number of excellent places to learn a lot more about Node.js. A great starting point would be the lynda.com course by Joseph LaBlanc on Node.js fundamentals. I look forward to your comments about Node.js and hope I have inspired you to further investigate this tool.