As we conclude the fall, 2013 semester, I thought it was appropriate to focus several weblog posts on some “fundamentals” that students in various classes have been exposed to. As a start, I thought it appropriate to focus on Markdown syntax. At the start of the year, I also covered markdown (as part of my post on node.js) and I wanted to return to these fundamentals as we close out the year. I suspect many students/ readers have encountered this syntax without realizing it.
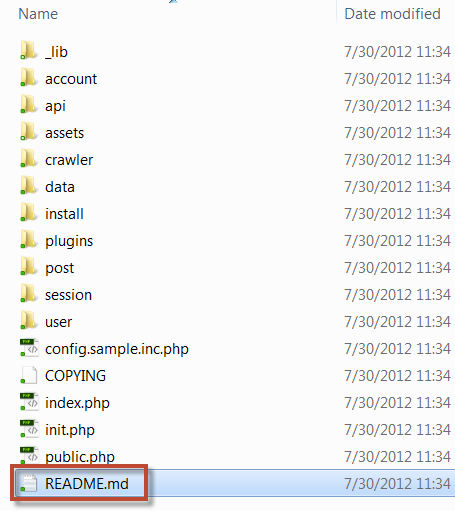
For example, one may install a web application on a server and encounter a readme file with an extension of .md (yep, that is Markdown and is a very popular format for readme files). In the screen capture below, I have opened the contents of the old ThinkUp application (useful for various Twitter statistics) which runs on a server. Note the prominent readme.md file in the screen capture.
The purpose behind this is to provide for text to HTML conversion as needed. Obviously, the .MD file can be opened with a simple text editor (such as Notepad++) and viewed. It can also be processed into HTML (or XHTML) for display in a web browser. There is a Perl based tool which one can download and run on a web server (including a localhost server) to convert Markdown code into HTML. The syntax is relatively easy to learn. For example, to include a paragraph of text, simply have a block of text and separate the paragraphs with blank lines. Markdown is based on email syntax. Although there are some variants, here are some of the common approaches I employ.
To mark a line of text as a header element, use an octothorpe (#). Use one for a <h1> element, 2 for <h2> element and so forth. Thus #Header 1 would translate to <h1>Header 1</h1> and ###Header would translate to <h3>Header</h3>. Note that you do not have to close the markdown (I know some people do). Just place each new item on a separate line. You can also include a fair amount of actual HTML (if desired). To make an unordered list, simply use an asterisk in front of each item in the list. For ordered lists, just number the items (obviously one item per line in both cases). To include a link to a web page, use square brackets followed by the link (in parentheses) and an optional description (in quotes). For example [Google](http://google.com “Google search engine.”) would translate to <p><a href=”http://google.com” title=”Google search engine.”>Google</a></p> Note there is no space between the link name and the link itself. Obviously there is a lot more to this, but I just wanted to cover the basics. Again, the goal is to make a text file which is human readable but which can also be easily converted into a web page (if needed for documentation or other purposes).
For those who would like to learn more about Markdown, I encourage you to visit the Daring Fireball site of John Gruber to learn more. If you want to see how your Markdown code would translate as HTML, he provides an online engine to perform this conversion (called Dingus).
I just wanted to cover the fundamentals. I know we covered this syntax in a few classes this semester, but I wanted to make certain everyone who reads these posts has some familiarity with the fundamentals. I am curious if readers found this helpful. As always, I look forward to your comments.