|
Listen to this post
 |
I recently posted about the new VR (Virtual Reality) features in Adobe Captivate 2019. This post is a continuation of the new features in the latest release. I will be giving a webinar on some of these features on Nov. 14 and thought it would be helpful to provide this additional documentation (along with example files). Please note that you will need Captivate 2019 to open any of the zip archives I provide. Of course, you can always just view the results/ output of these files in a web browser. I will review one new feature (interactive videos with overlay slides) and one enhancement (fluid boxes). Let’s get started…
Fluid boxes
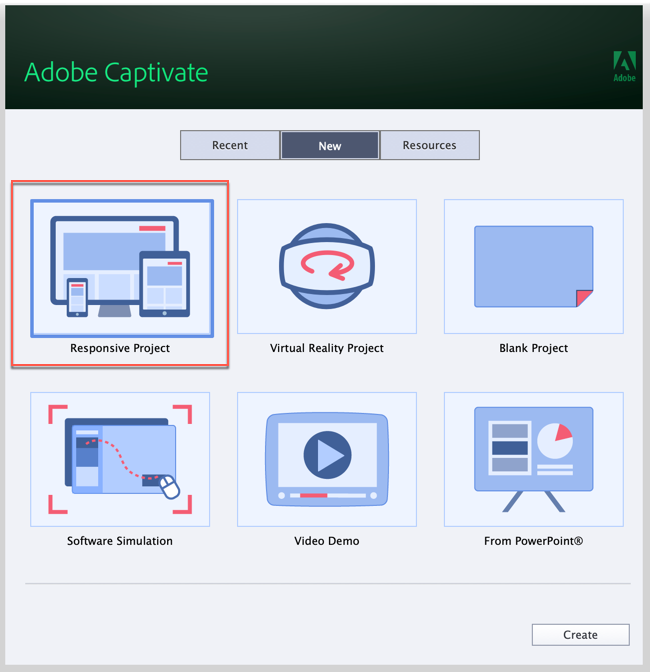
First, let’s examine fluid boxes. These have been enhanced in the latest version of Captivate. Any objects placed inside a fluid box are automatically aligned. There are a number of enhancements to fluid boxes and I will cover some of these in the webinar. Once that has concluded, I plan to post a video of the webinar at the bottom of this article as well. To take advantage of fluid boxes, one must start with a responsive project in Captivate. If you choose other options, you will not see options like Layout Preview.
I provide a simple example of a responsive project (many thanks to Bill McKay for the photos of various insects). For those who do not have the latest version of Captivate, the second slide contains a video screen capture demonstrating the layout preview option.
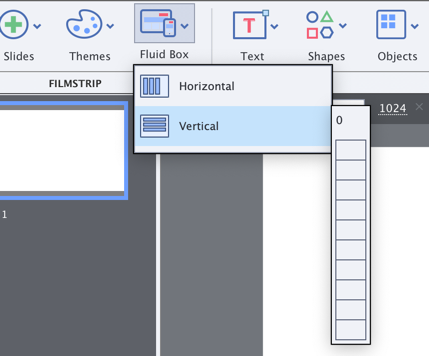
To add fluid boxes to a responsive project, you add a new slide and then select the Fluid Box icon. Boxes can either be horizontal or vertical in orientation (and they can be nested). This screen capture demonstrates the addition of vertical fluid boxes. You simply choose the number to add. Personally, I tend to think in terms of rows first, then columns (much like building a spreadsheet). This is why I often start with vertical fluid boxes.
If we examine the properties panel in Captivate with the above example project, we see the following:
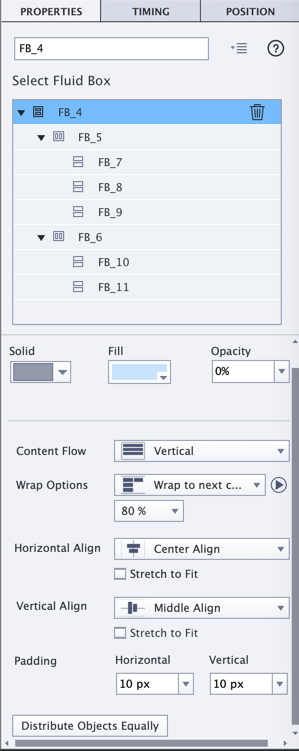
You will note that you can adjust the alignment and much more (such as whether the box should stretch to fit the available space and whether a given item should be hidden at a certain resolution). If you wish to examine the CPTX file, I encourage you to download it. Remember, you will need Captivate 2019 to open it and view the contents. I plan to discuss these in much more detail in the webinar which is why I am moving on to the next improvement – interactive videos.
Interactive videos
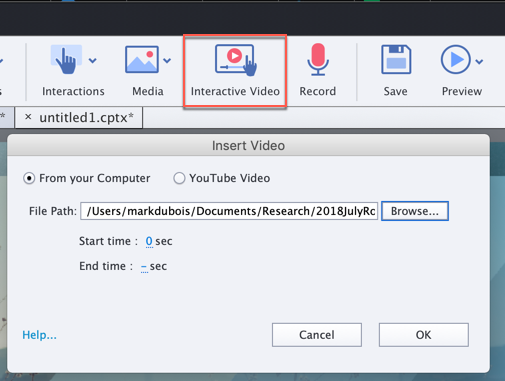
This is a nice addition to Captivate (and is only found in Captivate 2019). One now has the ability to create interactive videos. For example, one can pause a video at some point and have a knowledge check slide appear. If answered correctly, the video proceeds. If answered incorrectly, one is directed to a bookmark in the video to review the material again. First, let’s examine an example I created. I actually built a small video using Adobe Spark (a free tool) and then imported the mp4 file into Captivate for this demo. As the video plays, you will be asked a couple of questions (near the end). These overlay slides were added using Captivate 2019. Let’s see how this was done.
To begin, we create a new project in Captivate, apply a theme and select the initial slide. After modifying the initial slide to be a quick introduction, I added a new slide and then chose to add an interactive video from the menu. Within the pop-up dialog menu, you can choose to add a YouTube video (or one from your computer). You can also specify the start and end times for the video (if you do not wish to include the video in its entirety).
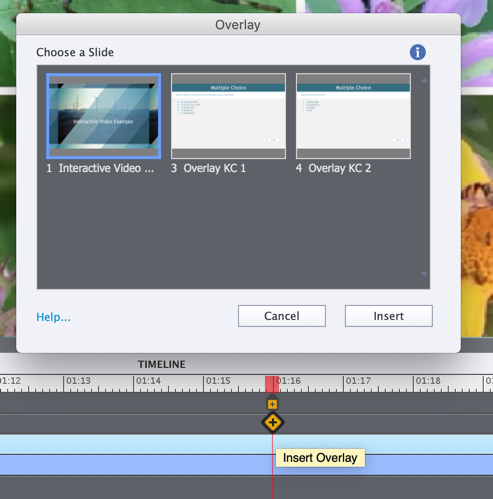
Next, one can create question slides (or knowledge check slides). In this case, I chose to add a couple of knowledge check slides with multiple choice questions. Once these have been created, you scrub the play head on the video to the precise position where you wish to insert the slide as an overlay. You click the insert overlay box and choose the slide to insert. I recommend naming the slides so you know which to select (in this case, I just had knowledge check 1 and 2 so I didn’t take that step).
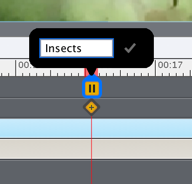
In my case, I also wanted to add the ability to return to the video at a certain spot in the event that the knowledge check question was answered incorrectly. To accomplish this, one needs to add a bookmark (and name it) in the video timeline (see below).
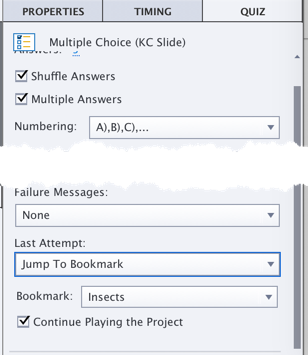
Once you have created the bookmark(s), you need to choose the knowledge check slide and adjust the failure setting to jump to a bookmark (shown in the properties panel screen capture below). Note that I selected the Jump to Bookmark (and chose the named bookmark “Insects”) as part of the failure process.
One can repeat the for all the remaining knowledge check slides. If you want to work with the original Captivate file I used to create the demo, you can download it as a zip archive. Note that you will need Captivate 2019 in order to open the file and work with it.
To me, the ability to include questions as part of a video is a feature which has long been overdue in Captivate. I am glad to see this addition.
I hope you found this short overview helpful. As mentioned above, I plan to include a link to the webinar once it has been recorded. As always, I look forward to your comments.