|
Listen to this post
 |
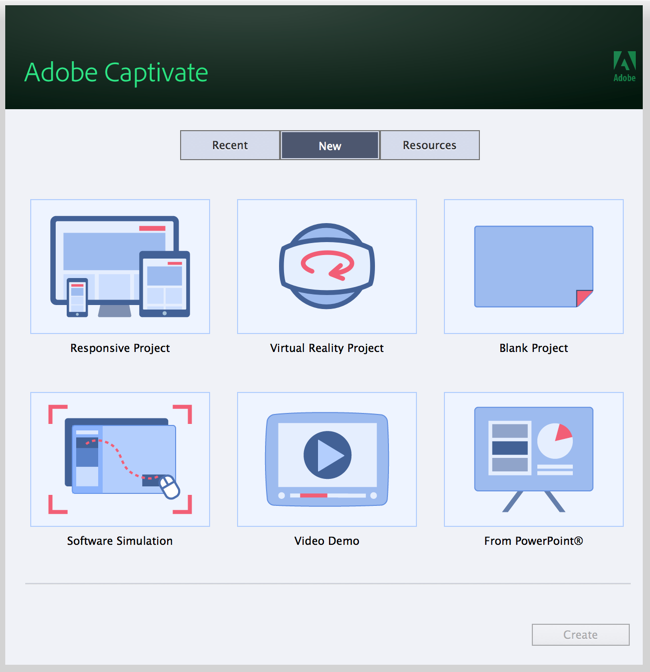
Adobe recently released their 2019 version of Captivate. After examining many of the enhancements, I thought it might be useful to focus on the virtual reality features which have been added. When you first open Captivate 2019, you are presented with the following screen. You will note that one item is no longer included (Captivate Draft) and a new item has been added (Virtual Reality Project).
I created a new Virtual Reality Project to learn more about these capabilities. I can see a lot of uses (especially for many of the natural sciences where it is desirable to be in the field observing). Given that many now have access to 360 cameras (such as the Ricoh Theta in its various models), this should make it easier for many students to experience different environments. Here is the end result of the project (an annotated view of several habitats). Now, I plan to focus on what was required to make this project a reality.
Step 1 – make certain you have 360 degree photos. I have been using my Ricoh Theta for a couple of years now and have a number of photos. I am sure this should go without saying, but if you don’t have starting materials, you need to create some. If you don’t have any, you could use tools like Adobe Dimension to composite some images. Next, make certain you have all the images in the same folder as it is just easier to work from one spot.
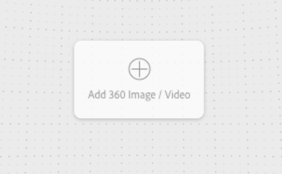
Step 2 – create a new Captivate 2019 Virtual reality project. I tend to first save the project and place it in the same folder as the images (just easier to keep track). You will be prompted to add a 360 image or video on the first slide (screen snippet below). Just click on it and choose your first image.
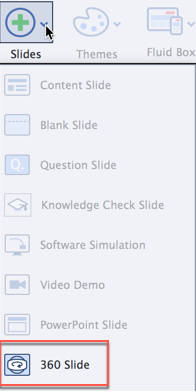
Once I did this, I noted that many of the more traditional options (such as adding a content slide or a blank slide) were not available. If you wish to add more slides, your only choice is to add a new 360 slide (screen snippet below).
I chose to add a number of 360 slides. When you add each, you can control the style properties. You can either st the slide to be guided or exploratory. The former means that you will guide the viewer through various pats of the 360 view as you move from one hotspot to the next on the timeline. Exploratory means just that – the viewer can explore as they wish when viewing the content. This is the option I chose for all the slides.
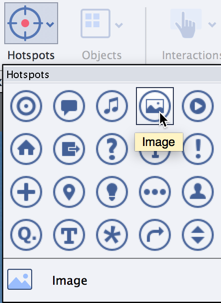
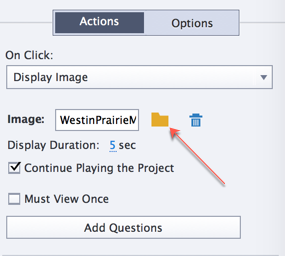
Step 3 – you can also add hotspots on the image as well as a text label. There are a number of hotspot options. I chose to use both images and text in the example. I also added a hotspot to allow for more rapid navigation (from one slide to the next). Here are the hotspot choices. I selected the image hotspot in this screen capture.
When you add the image hotspot, you next choose the image from the properties panel. Just click on the folder to navigate to the location of the desired image. In this case, I chose to include a map image to show the approximate location of the specific habitat.
You can also add text hotspots. When these are selected by the viewer, they will see some text. Note that there is a limitation to the amount of text you can include on any description. Here is what I entered in the property panel for one of the text items.
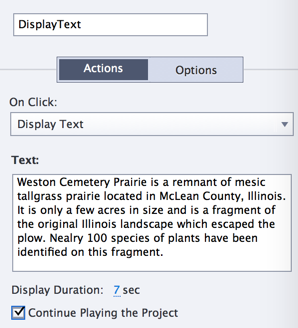
In both of these examples, you note that one can also affect the duration of the display (text or image) and whether the project should continue playing while the information is being displayed.
Step 4 – add audio narration (if desired). In the provided example, I included a bit of narration on each of the images. I chose not to close caption the audio as this is just a prototype. If I were deploying this as an actual learning module, I would definitely caption all the audio.
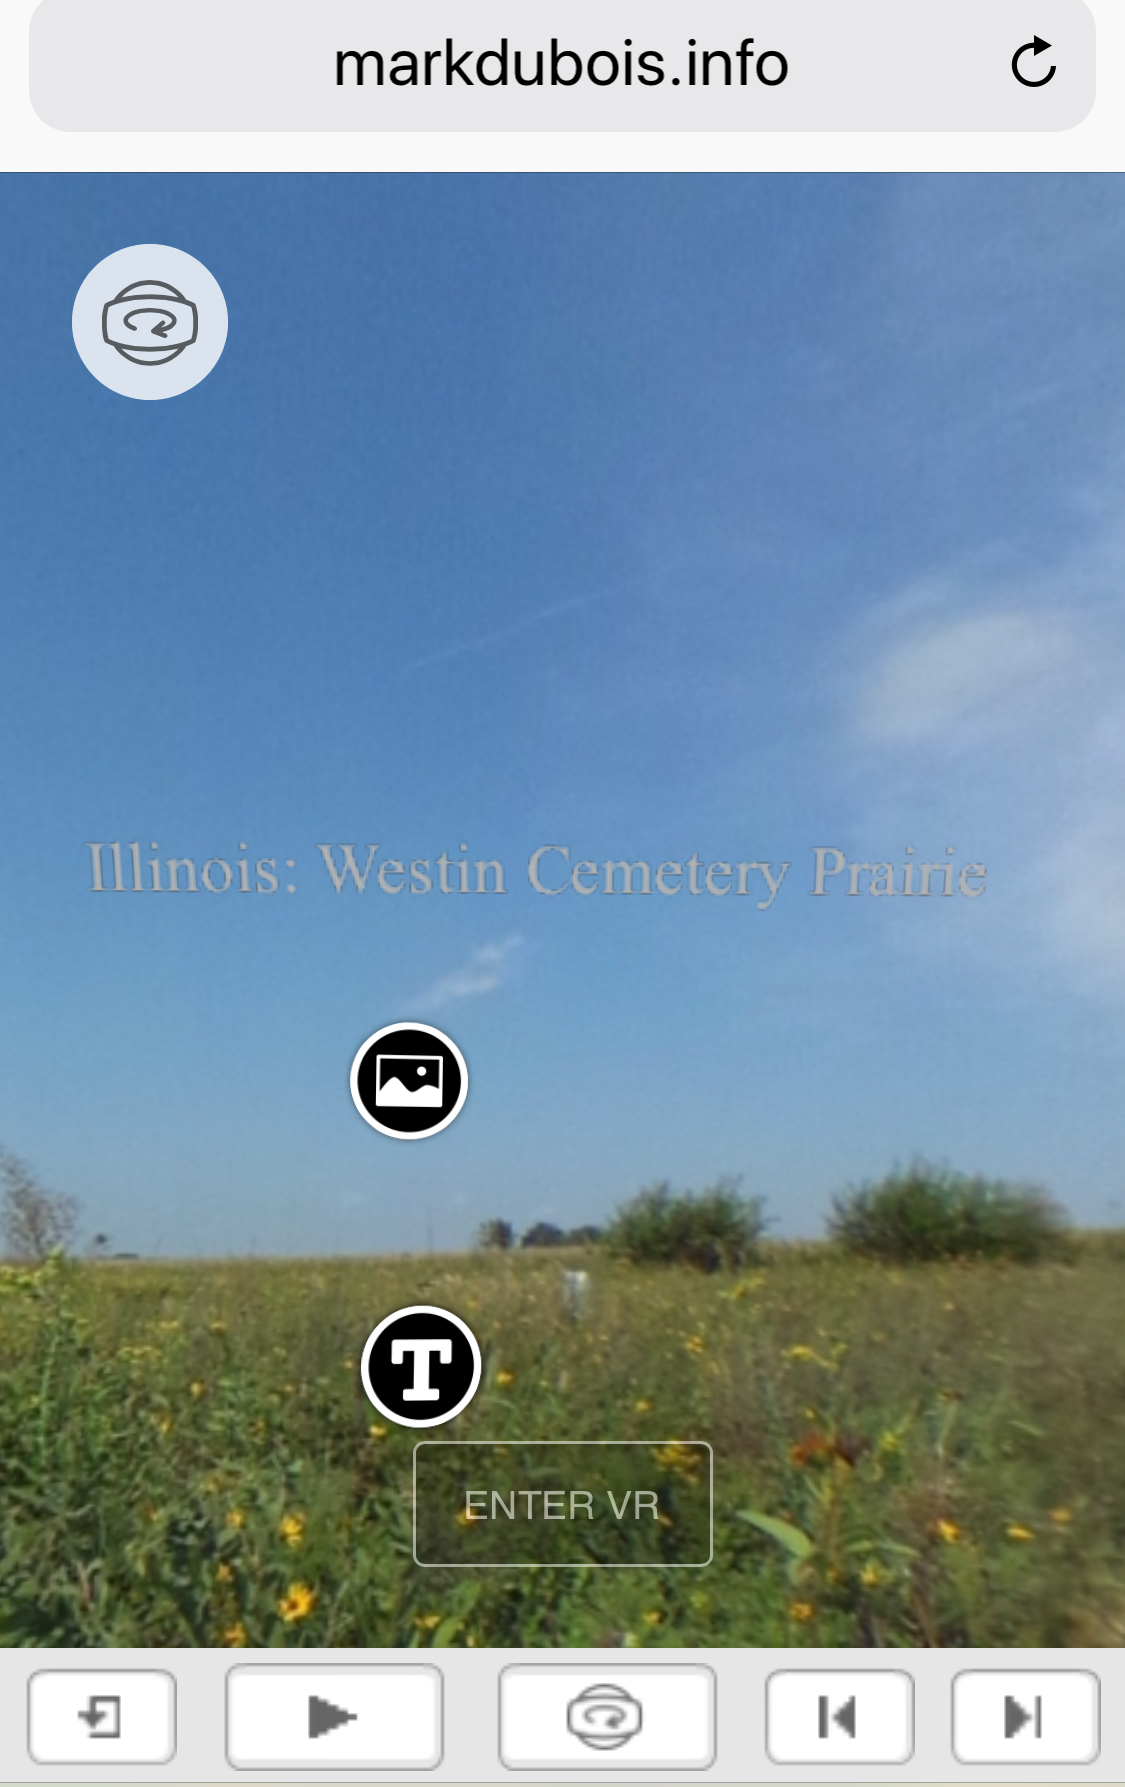
Step 5 – publish and host the content. As with any Captivate project, you need to publish it and make it available to others. I posted my example on a web server. Depending on the VR equipment being used, you may want to place the content in another location. Remember that some devices (like the Samsung Gear VR) have their own browser. Others may use Chrome as the browser. You can also just view the module in the browser on your desktop and move around using the mouse. If you do have VR capabilities (such as Google Cardboard), you may see something like the following when you view the URL in your browser.
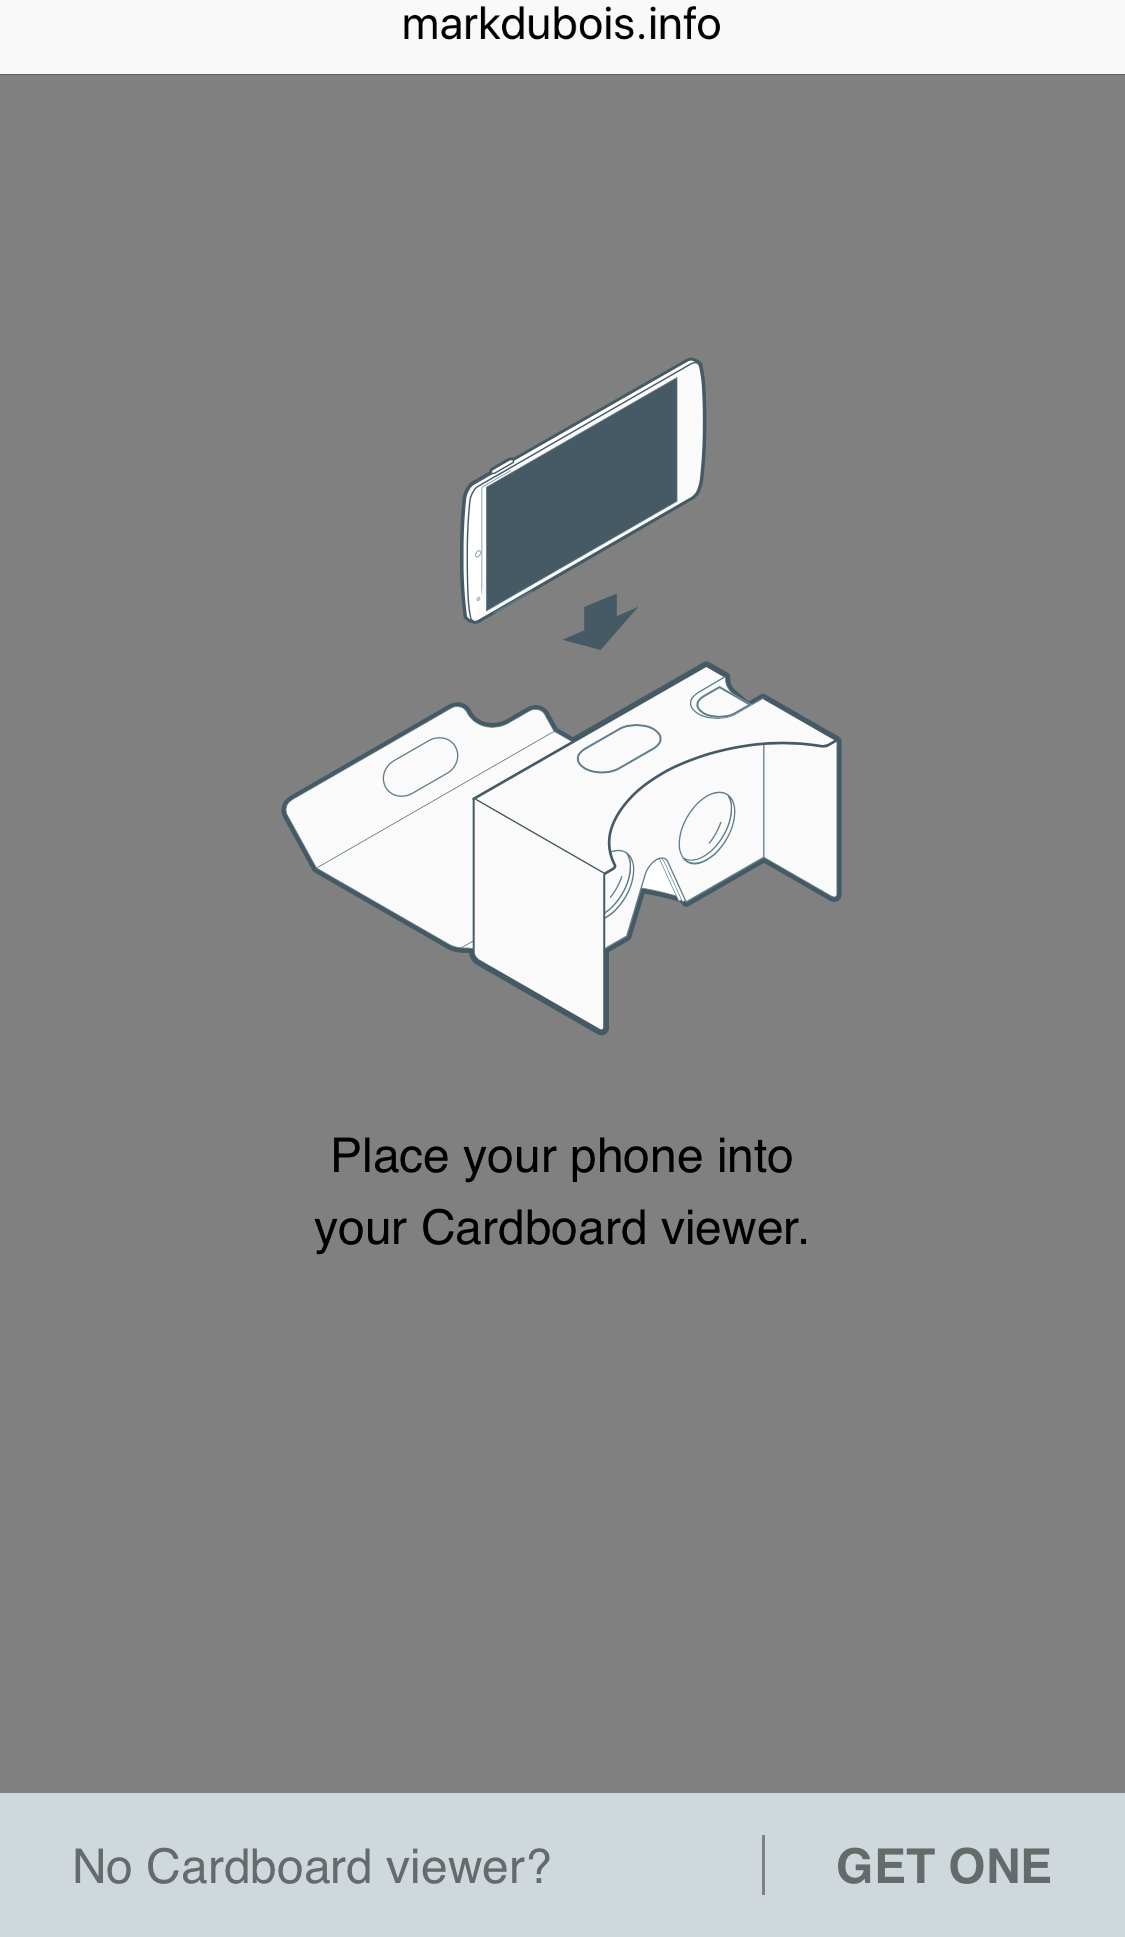
If you choose the Enter VR option, you will be prompted to activate accordingly. The example below is one possible solution.
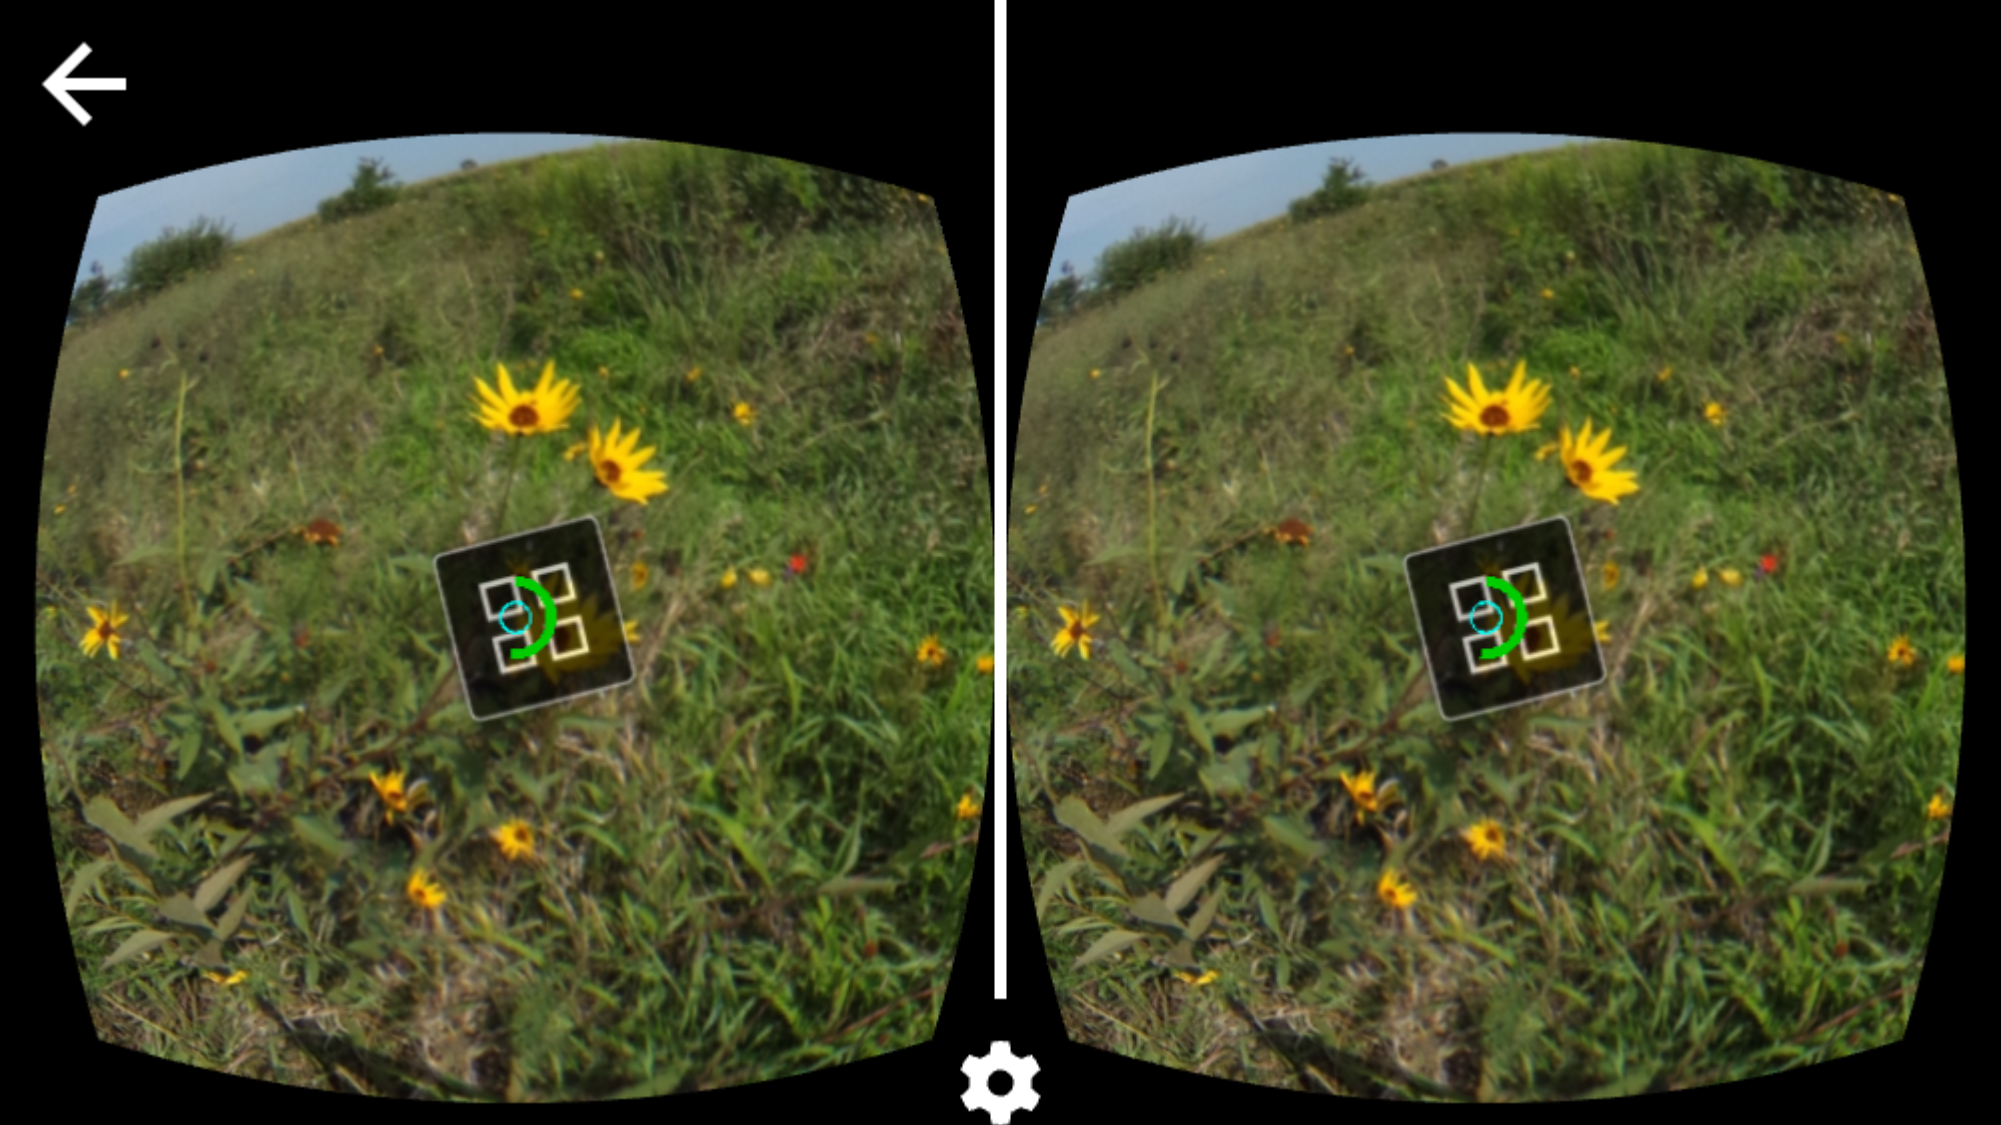
Once you insert your phone in Cardboard, you would see an image like the following. As you move around, the view changes with your orientation.
Personally, I believe the addition of 360 images and videos opens a wealth of new capabilities for those teaching in various disciplines. For example, my degrees are in entomology and I can see a number of uses (such as virtual field trips or examining specific insects in detail). I am curious how you think this may help with eLearning. As always, I look forward to your comments. If you would like to examine the cptx file, just use my contact form to let me know. The file is rather large (over 20 MB).