Given that I teach several classes dealing with security (and we even install SSL certificates on an IIS server in a couple of those), I thought it might be helpful for readers/ students to learn a little about what is required when you are using a Linux server.
First, a bit about SSL technology for those who may not be that aware. It is based on public key encryption. This means that there is a plainly visible public key (which you can see in your browser) and a private key (hidden deep within the operating system and not available via the web). If you encrypt something with a public key, it can only be decrypted with the private key (and vice versa). These are based on large number pairs and it is presently infeasible to break this sort of encryption. Of course, we want information like our username and password (or credit card information or similar confidential materials) to be sent across networks in an encrypted form only. Otherwise, anyone who is sniffing network traffic would be able to see the details in plain text. This is why it is so important to only enter login credentials or similar if you see the padlock icon next to the site address in your browser. If you don’t see that, always change the http:// protocol to https:// and see if the padlock icon appears. If not, go somewhere else. FYI – Google is now making it very important to have SSL encryption on your site (otherwise the ranking score may drop).
In addition to encrypting information which is sent across a network, SSL also insures that the site is valid. In order to obtain the SSL certificate, you need to prove you are who you say you are. This is done through a CA (Certifying Authority). Essentially, they “vouch” for you after you have proven to their satisfaction that you are legitimate.
Ok, so we get it. We need to install SSL. In this case, I am using a dedicated server. If you are using a reseller account, you may need to contact your hosting provider and have them do this for you. Here are the steps one needs to follow to make this happen.
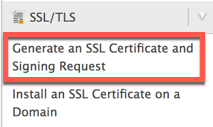
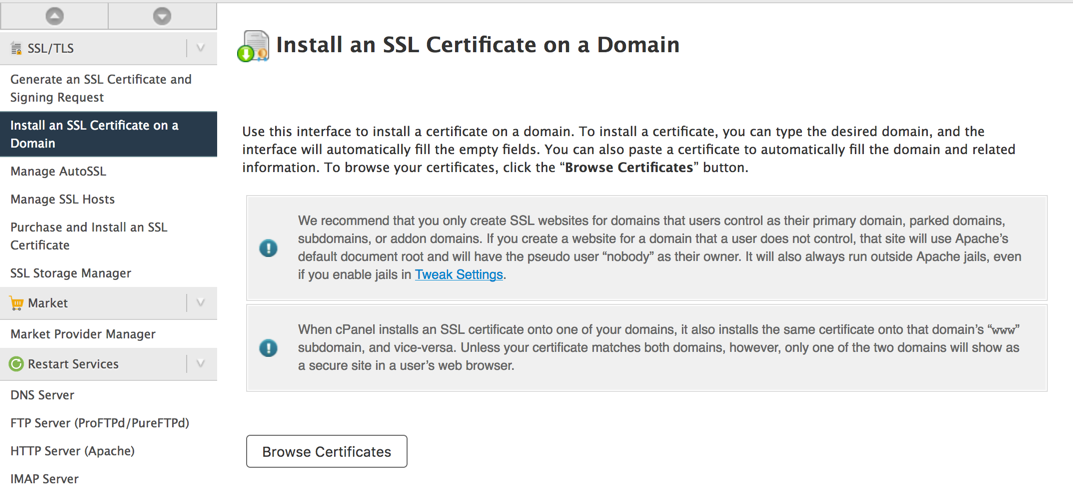
Step 1. You need to access your server environment. In my case, I use WHM (cPanel). You scroll down until you find the SSL/ TLS section on the left. If you don’t see this, you are likely not using a dedicated server.
The CSR (Certificate Signing Request) generates both a public key and a private key. Of course, this is only a self signed certificate at the moment. Yes, it will encrypt, but there is no guarantee you are who you say you are.
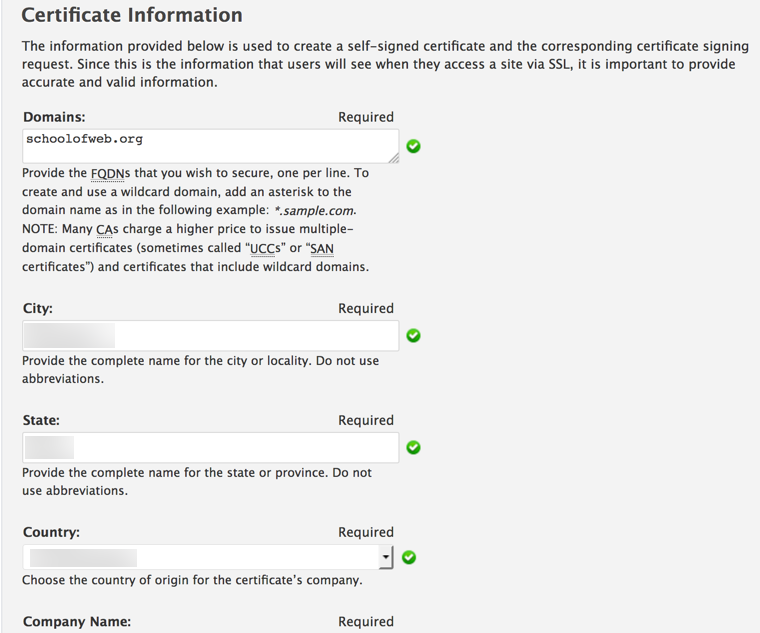
Step 2. As part of the generation process, you need to provide details (such as contact information, company name, address and so forth). You also need to specify the domain you want to use. In this case, it is the SchoolOfWeb.org site where we host training for aspiring Web Professionals.
Step 3. Once all the details have been provided to the server, WHM creates the request and generates the key pair. Obviously, these are blurred out in the screen capture below.
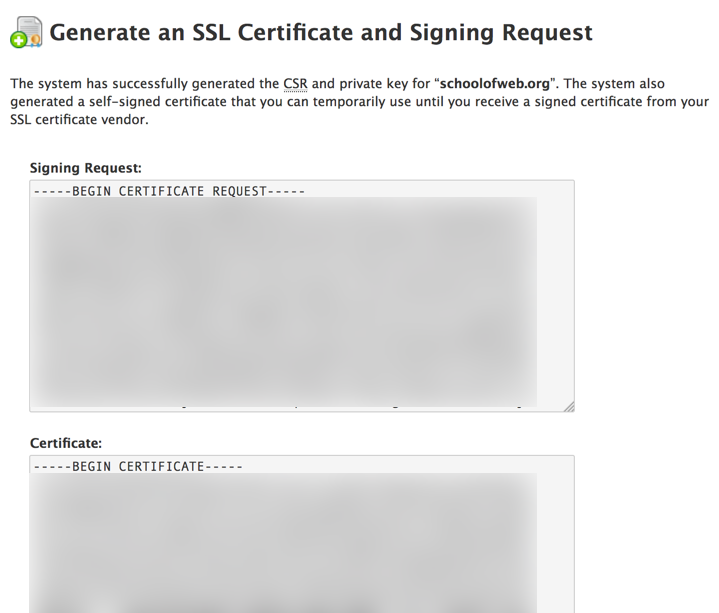
Step 4. As mentioned in the screen capture above, you can use the temporary certificate until you obtain a signed certificate from your vendor. Given that I already have a certificate which was expiring in a few days, there was no need to use this self signed version.
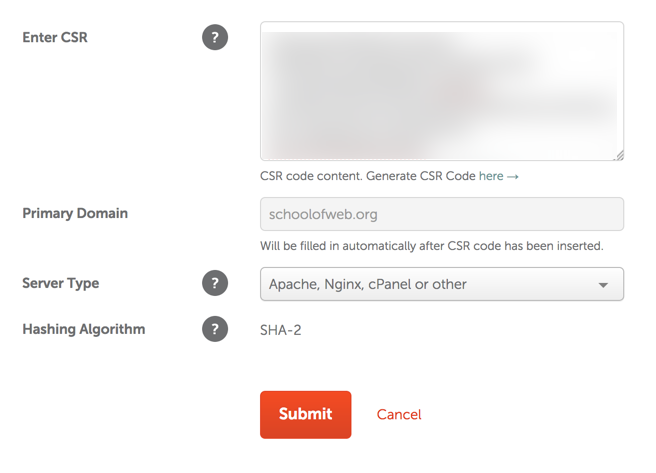
Step 5. You next need to purchase the SSL from an approved vendor. In this case, I used Comodo. You visit the appropriate site, complete the details and purchase the certificate. At this point, it is just a blank item. Note that you have to paste in the CSR (Certificate Signing Request). You will recall this was generated on the server in question. Note that the primary domain is filled in for you (it is obtained from details in the encrypted CSR). You also need to inform the SSL provider the type of operating system you are running (Nginx in this case). Other choices would include Tomcat or IIS.
Step 6. Now that you have paid for the certificate, you need to prove that you actually control the server in question. This step is called DCV (Domain Control Validation). You can do this in one of three ways. I discourage the email approach as this means some information would be sent via insecure email.
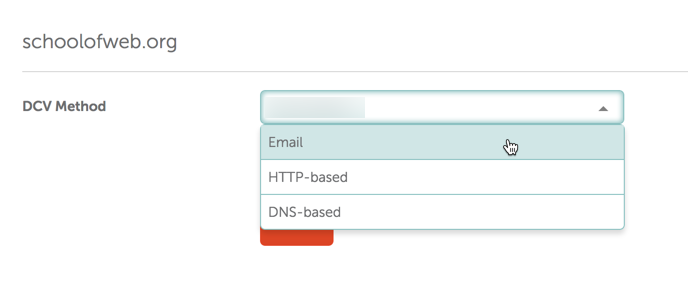
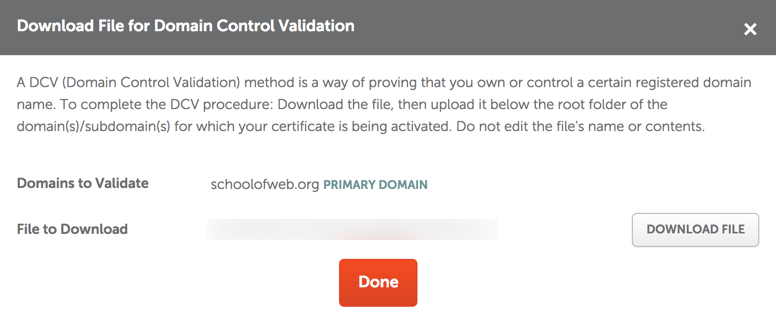
For this example, I used http-based. This means that I am asked to download a text file and place it at the root of the server in question. The validation routine then looks for that file on the server (this would be in the public_html folder). Once found, this confirms you own the domain. As you can see, you click on the button to download the file and then use sFTP to upload the file to the appropriate spot on the server.
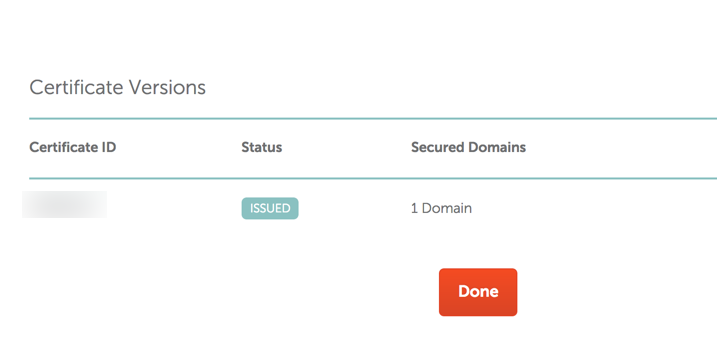
Step 7. Once downloaded, you will see confirmation that the certificate has been issued. There is a specific certificate ID (obviously not shared in the screen capture below).
Step 8. We now return to WHM on our server and install the SSL.
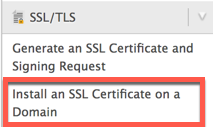
We first see there are several options.
We can browse certificates on the server, we can also upload a certificate (you will recall that one way to install these was to receive the certificate via insecure email). We choose the appropriate option and select the certificate. This is the one which has now been validated by the CA (Certifying Authority). It will still pair with the private key, but has now been confirmed as a valid certificate.
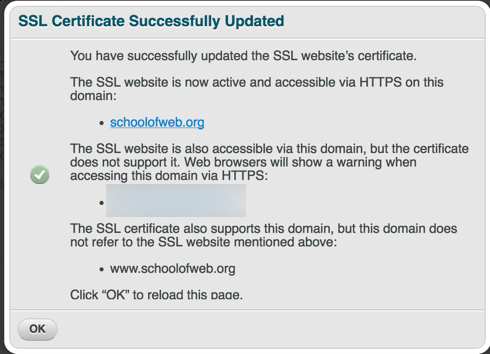
Step 9. We confirm that the SSL certificate has been installed properly. Note that there are some subdomains which the certificate does not support. Obviously, I highlighted those out. You will also note that the www prefix is also included (although most of our www.schoolofweb.org traffic will be redirected to schoolofweb.org by the server automatically).
Step 10. Lastly, we confirm that the new certificate is working fine in various browsers. You can clearly see the Certifying Authority chain as well (showing how this certificate was validated).

That is it. I hope you found this overview helpful. As always, I look forward to your comments.