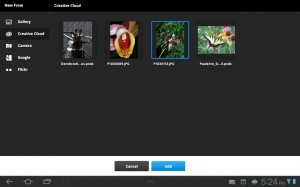
Another Adobe Touch App I have been experimenting with on my Samsung Galaxy Tab is Ideas. This is mostly an app to allow one to sketch/ draw using a tablet. One can either draw using a blank canvas or one can import a photo and add a new drawing layer to trace over parts of the photo. I chose this latter approach for this initial overview. I started with an image of a tropical flower that I photographed in Belize in 2007. If you wish to follow along, I provide the original image. Simply save this image locally, then upload it to the Adobe Creative Cloud and import it into your version of Adobe Ideas. You are free to use this copyrighted image for educational purposes provided I am given credit as the photographer. Your import should look similar to the screen capture shown below.
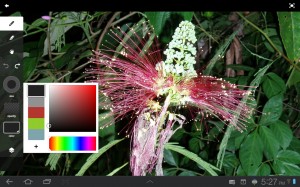
I then changed the drawing color and line size in the app. Hint: I have found having a stylus (no matter how cheap) gives me better control than using my fingers. In the screen capture below, I am changing the color of the drawing line. There is a similar capability to change the line size. If I understand correctly, for those tablets which have pressure sensitive screens, one can actually draw a line which increases in thickness as one applies more pressure to the stylus. In this case, my tablet only provides for a consistent line size regardless of the amount of pressure.
One can then add a drawing layer. Note that there is presently the ability to only add one layer in the Android version of Ideas. One can click on the camera icon to swap images (if needed). You will find that icon on the photo layer once you select that layer. I chose to stick with the single image of the flower. The drawing layer is included in the screen capture below.
One can then begin drawing or sketching over the image. In my case, I chose to trace over parts of the flower only. I also adjusted the size of the lines in various parts of the sketch. One can control the opacity of either layer (by tapping on the layers icon). In this case, the opacity of both layers is 100%.
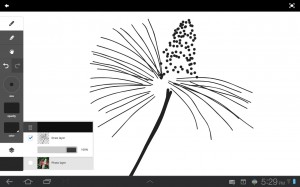
To see the result, I deselected the background image. This leaves the line drawing only visible. That is what is shown in the screen capture below.
Once you have completed the sketch, you can upload it to the Adobe Creative Cloud. One can then download the sketch from the Creative Cloud and directly open it with Adobe Illustrator. Once in Illustrator, these lines are vector shapes which can be manipulated as desired. I provide both the .idea file and the .ai file in the event you wish to compare your results with mine.
As with my earlier posts, I hope this gives you a better understanding of the fundamentals of working with this Adobe Touch App. I look forward to your comments (below).


