I purchased a Ricoh Theta S in late July and provided an overview of the camera capabilities and my initial experiences. Now that I have worked with the camera a few months, I thought it time to share some additional information and tips. Probably the most important tip is that the device can be affected by extreme heat (and likely cold). It can become unresponsive (which means you can’t turn the camera off and can’t access any of the functions). The best way to get around this is to hold the power button for more than 8 seconds. This forces a reset and the camera is then back to its “normal self.” Let’s examine a bit more about the camera, especially the editing of images created using this device.
I have learned that the images are termed equirectangular. Surprisingly, this is a projection first used by map makers during the time of the Romans. It is an attempt to project a 3 dimensional object in 2 dimensions. Although this type of projection introduced all sorts of distortions when working with maps, this old technique has uses with modern technologies (such as the Theta S).
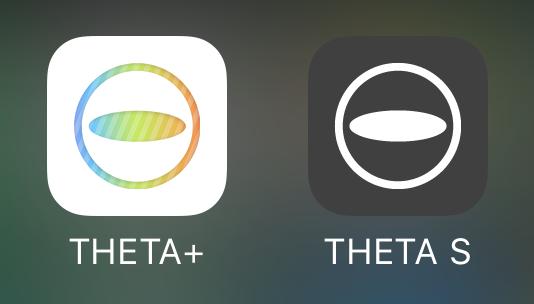
I have also learned there are 2 apps one needs to use when working with these sorts of images. The first is the Theta app (which controls the camera). The second is the Theta+ app (which allows you to edit the images). Both are highlighted in the screen snippet below.
Although one can edit these images in tools like Photoshop, I recommend working with the app first. It tends to have more capabilities and is specifically designed for these images. For example, here is what an image would look like when editing it in Photoshop. Note how the image is distorted.

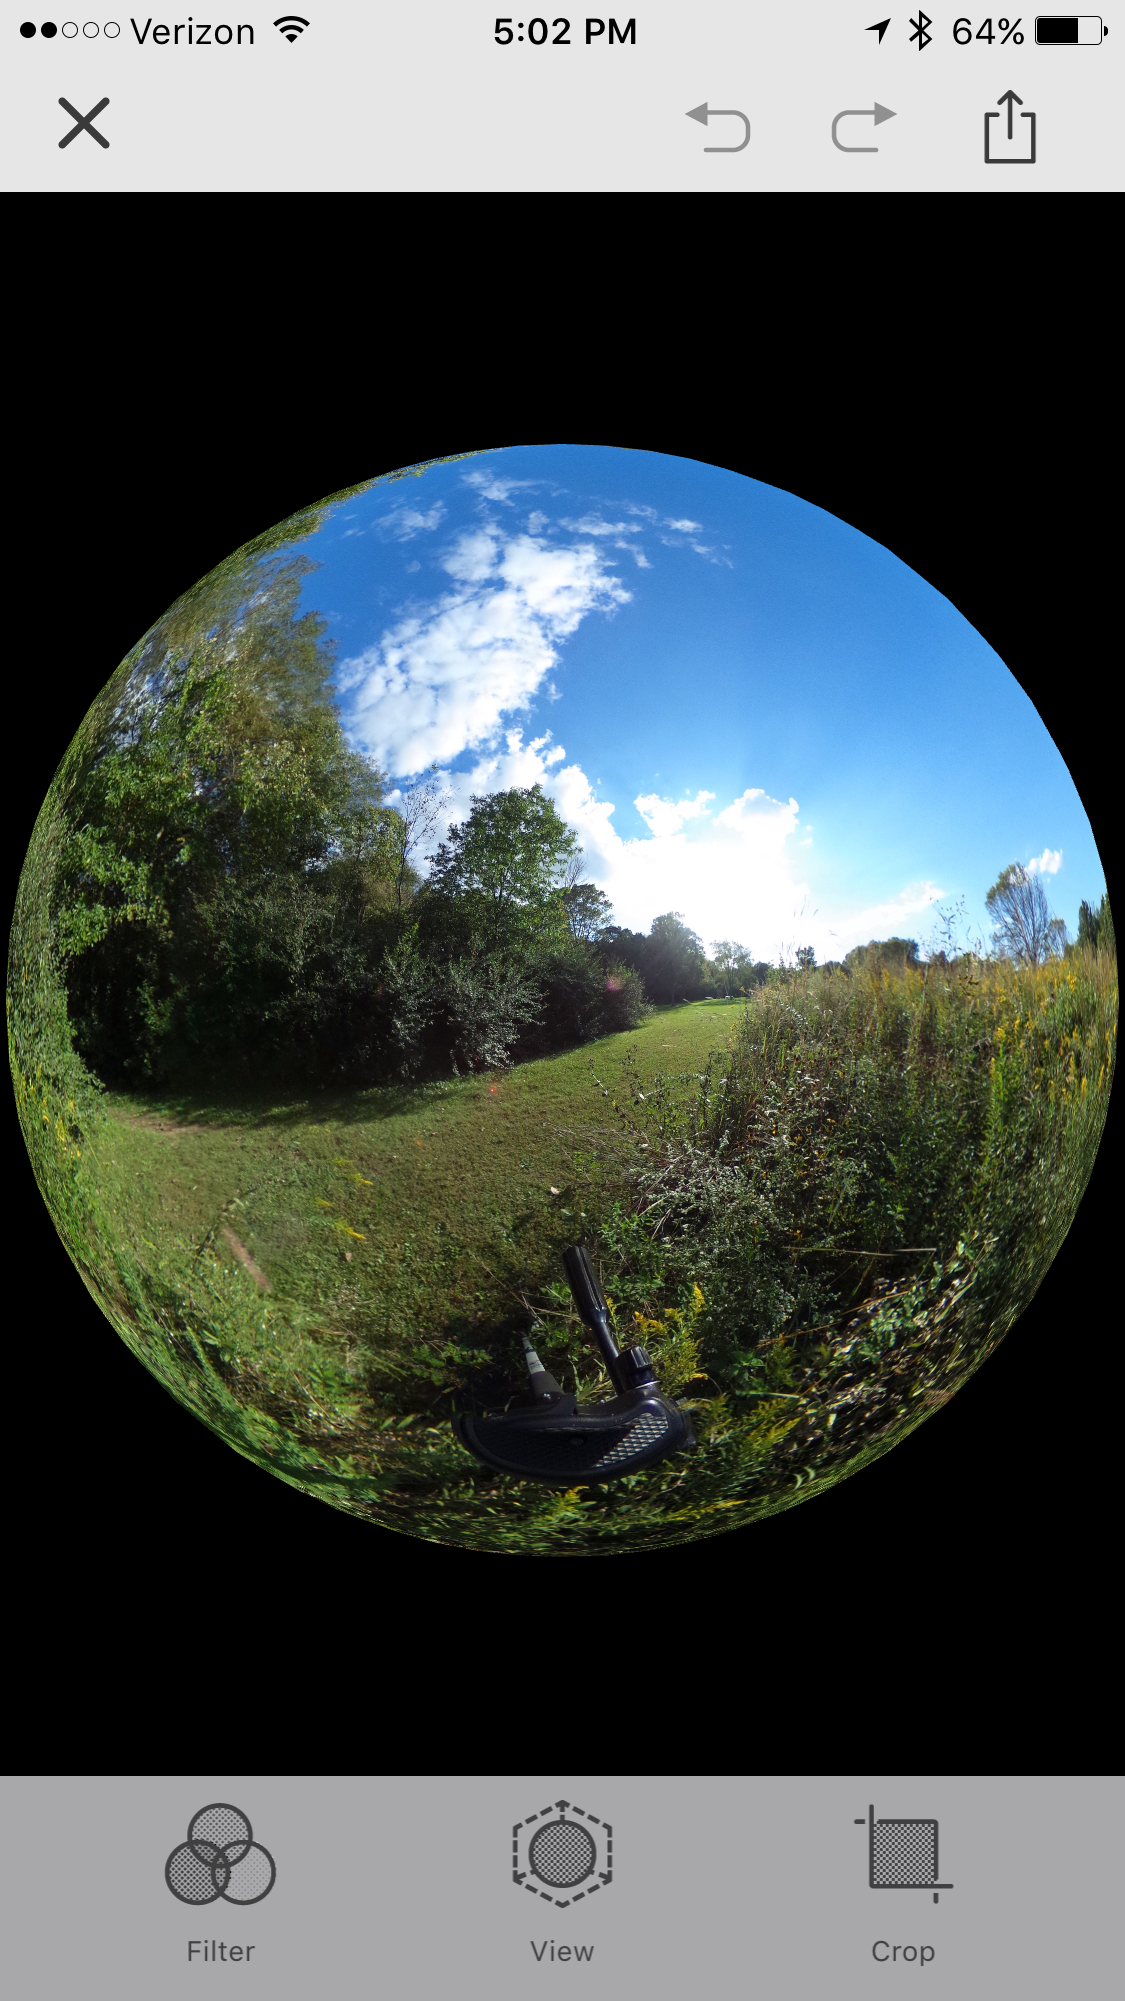
Here is the same image being edited in the Theta+ app on my iPhone. The image appears as a 360 degree image and can be moved around while editing.
Let’s investigate the capabilities of the Theta+ app. When you first launch the app, you are presented with choices (either working with a time lapse or editing an image). Initially, I was unaware that one can create time lapse, but found that option within the camera settings.
I am still experimenting with the time lapse option. When you connect to the camera, you can find this option under the camera settings. I highlighted the three main areas to consider in these settings. [1] You need to activate interval shooting. [2] You need to decide on the image size (smaller images allow for more images to be stored on the camera while shooting). You will see the available number based on the selected image size [3].
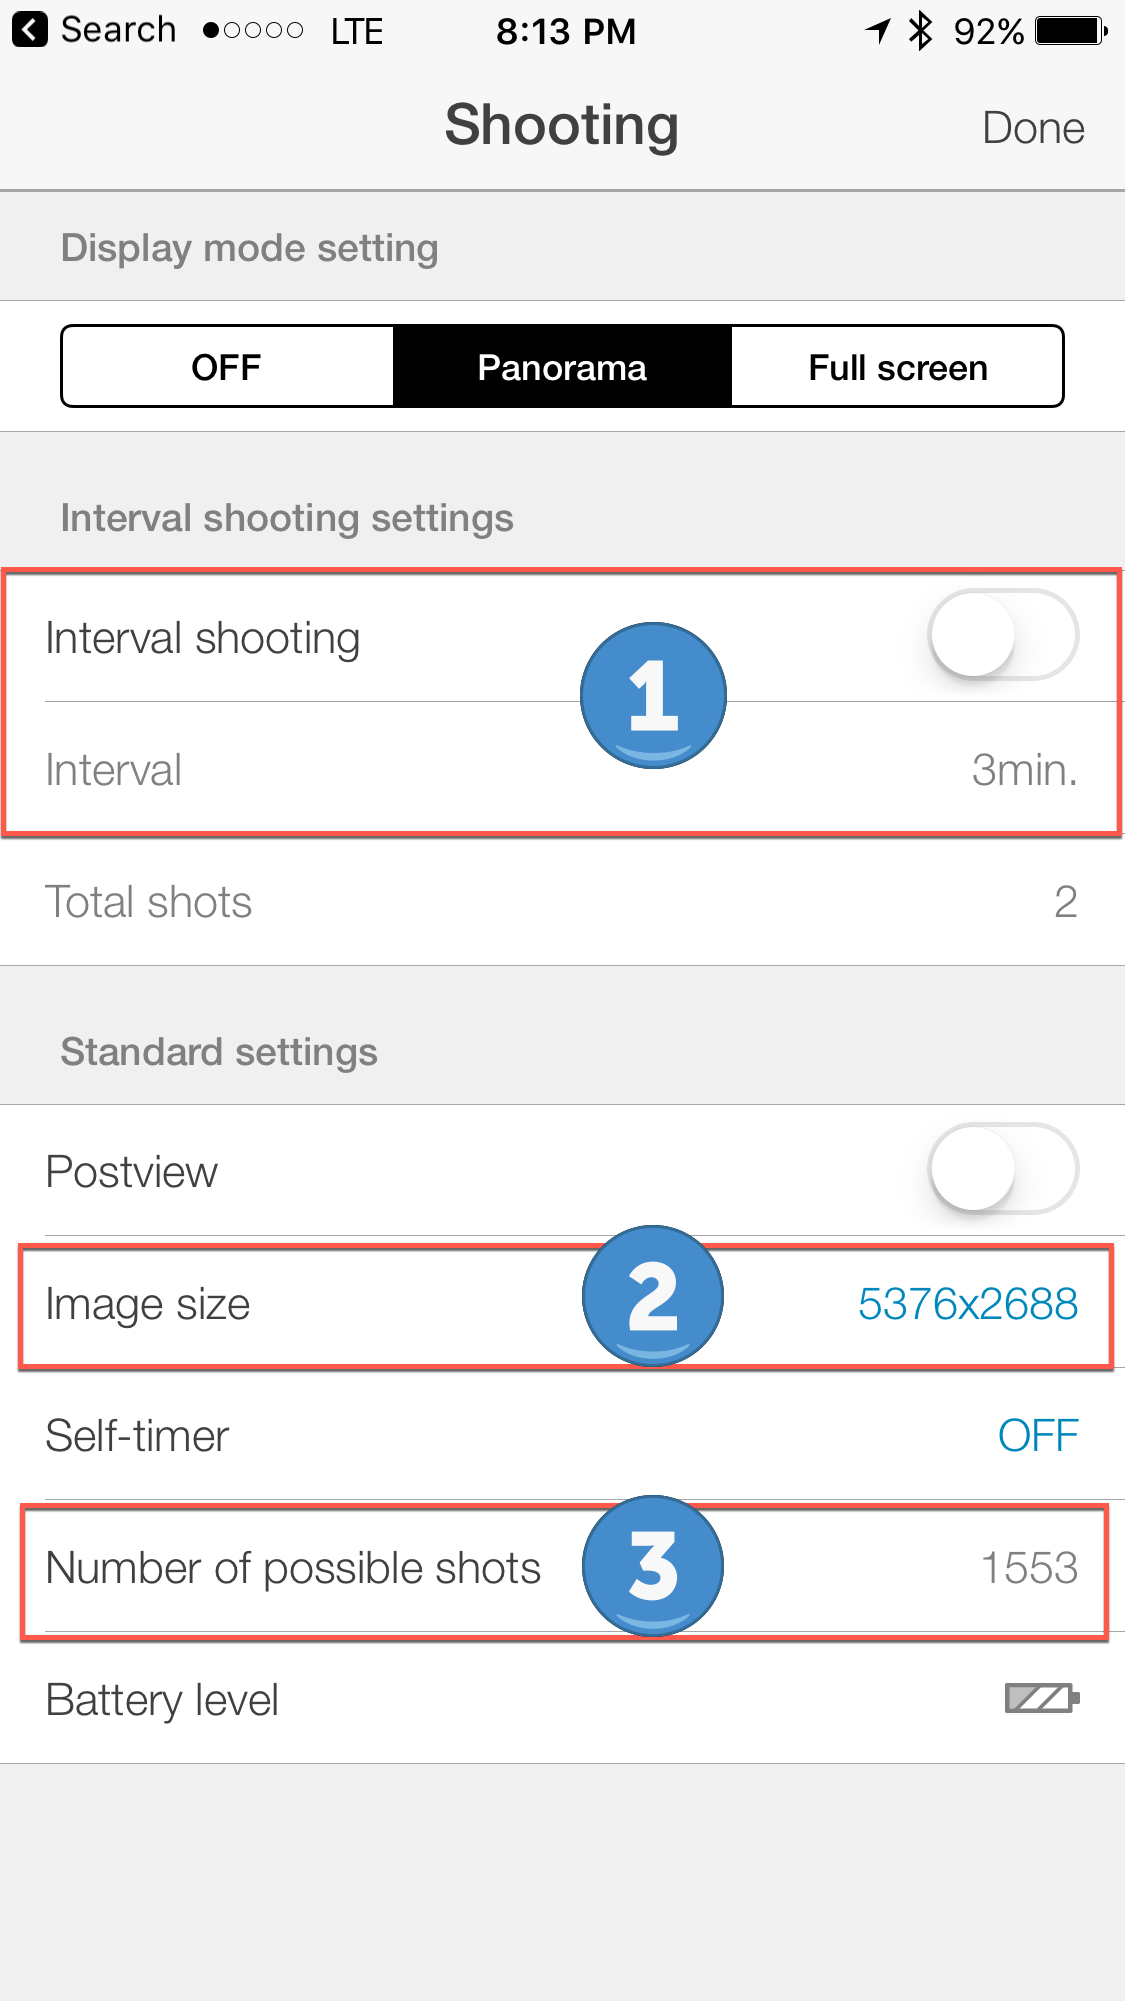
I have also discovered it is a good idea to turn off the sleep after option on the camera. Otherwise, the camera shuts itself down while doing these interval shots.
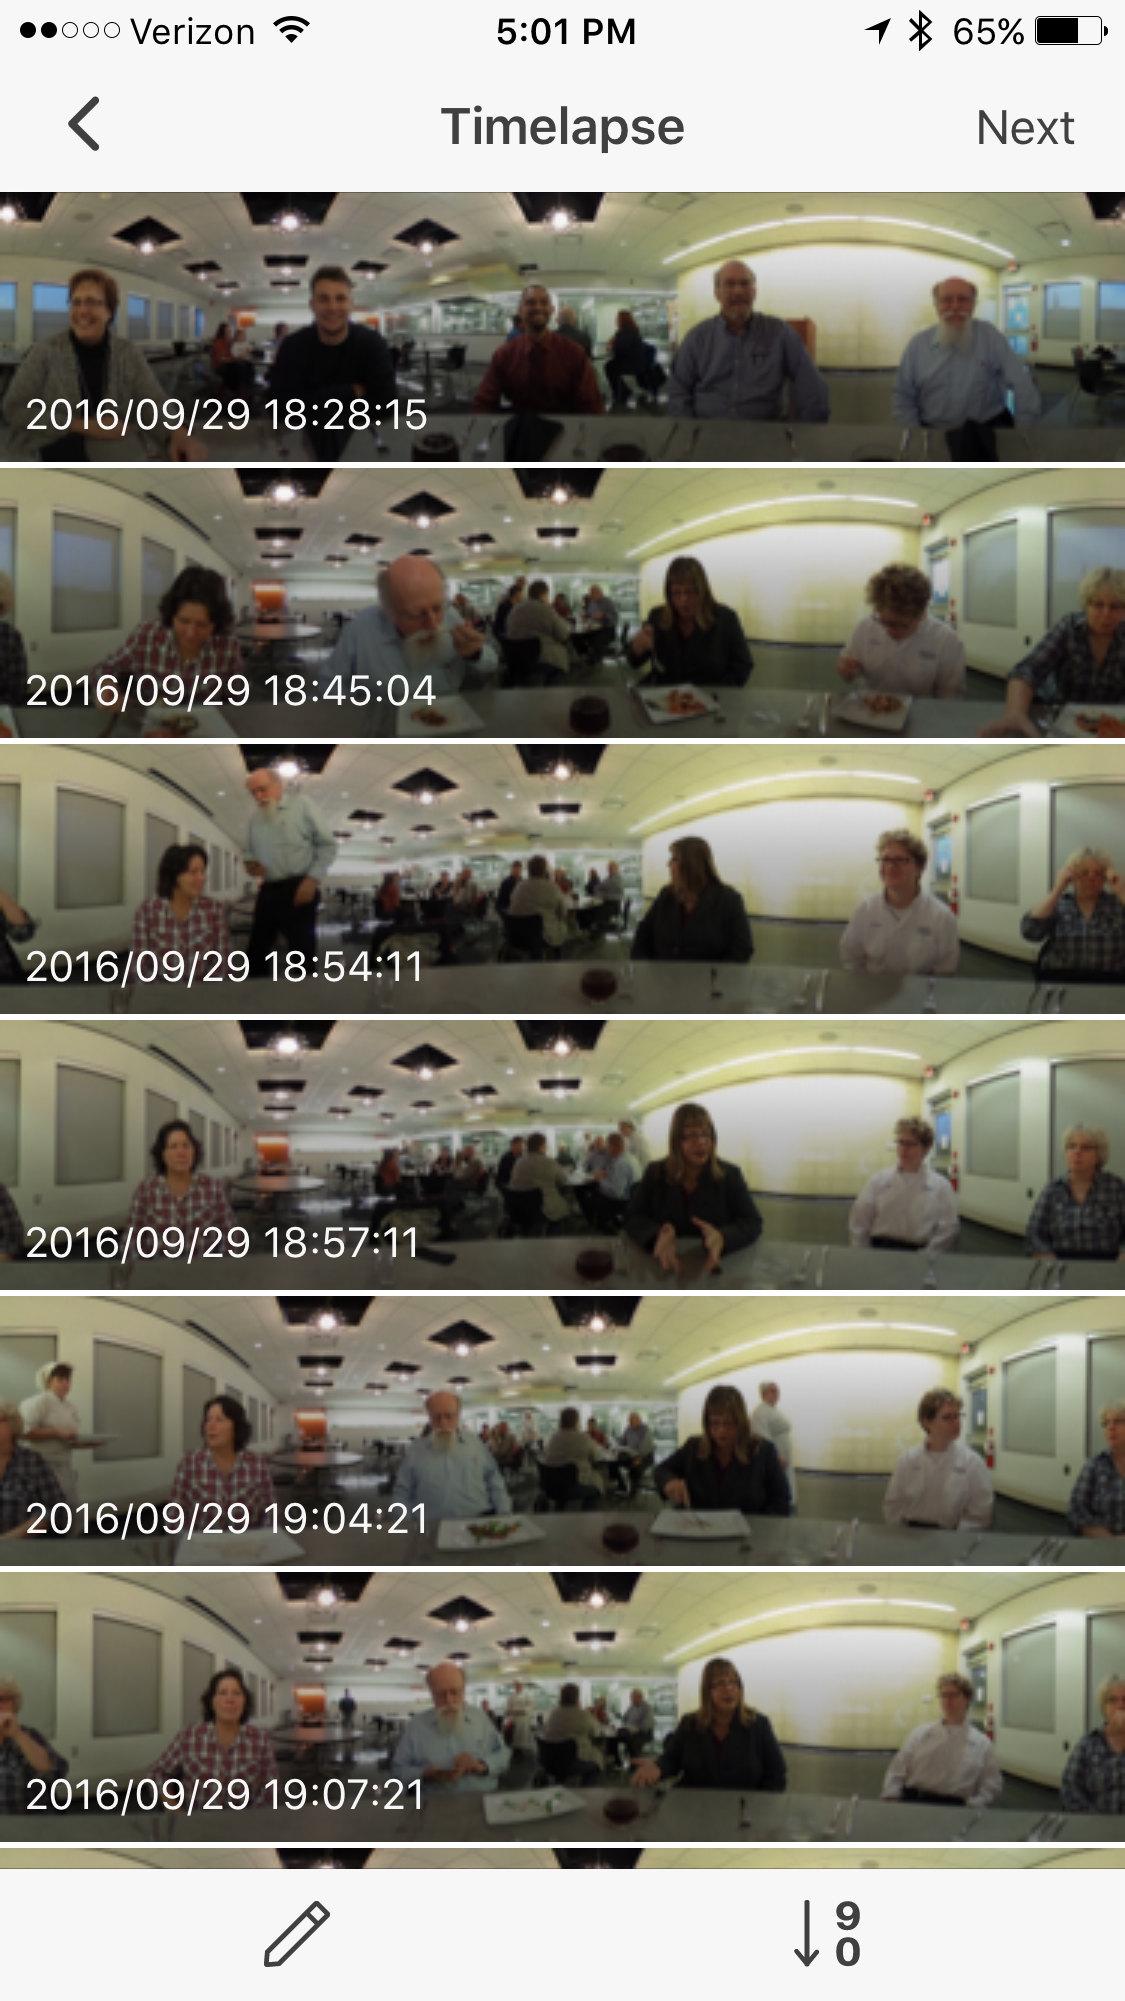
Once you have taken a number of images, you transfer them from the camera and then open them in the Theta+ app (selecting the time lapse option mentioned above). You see that I have chosen 9 images in the series below.
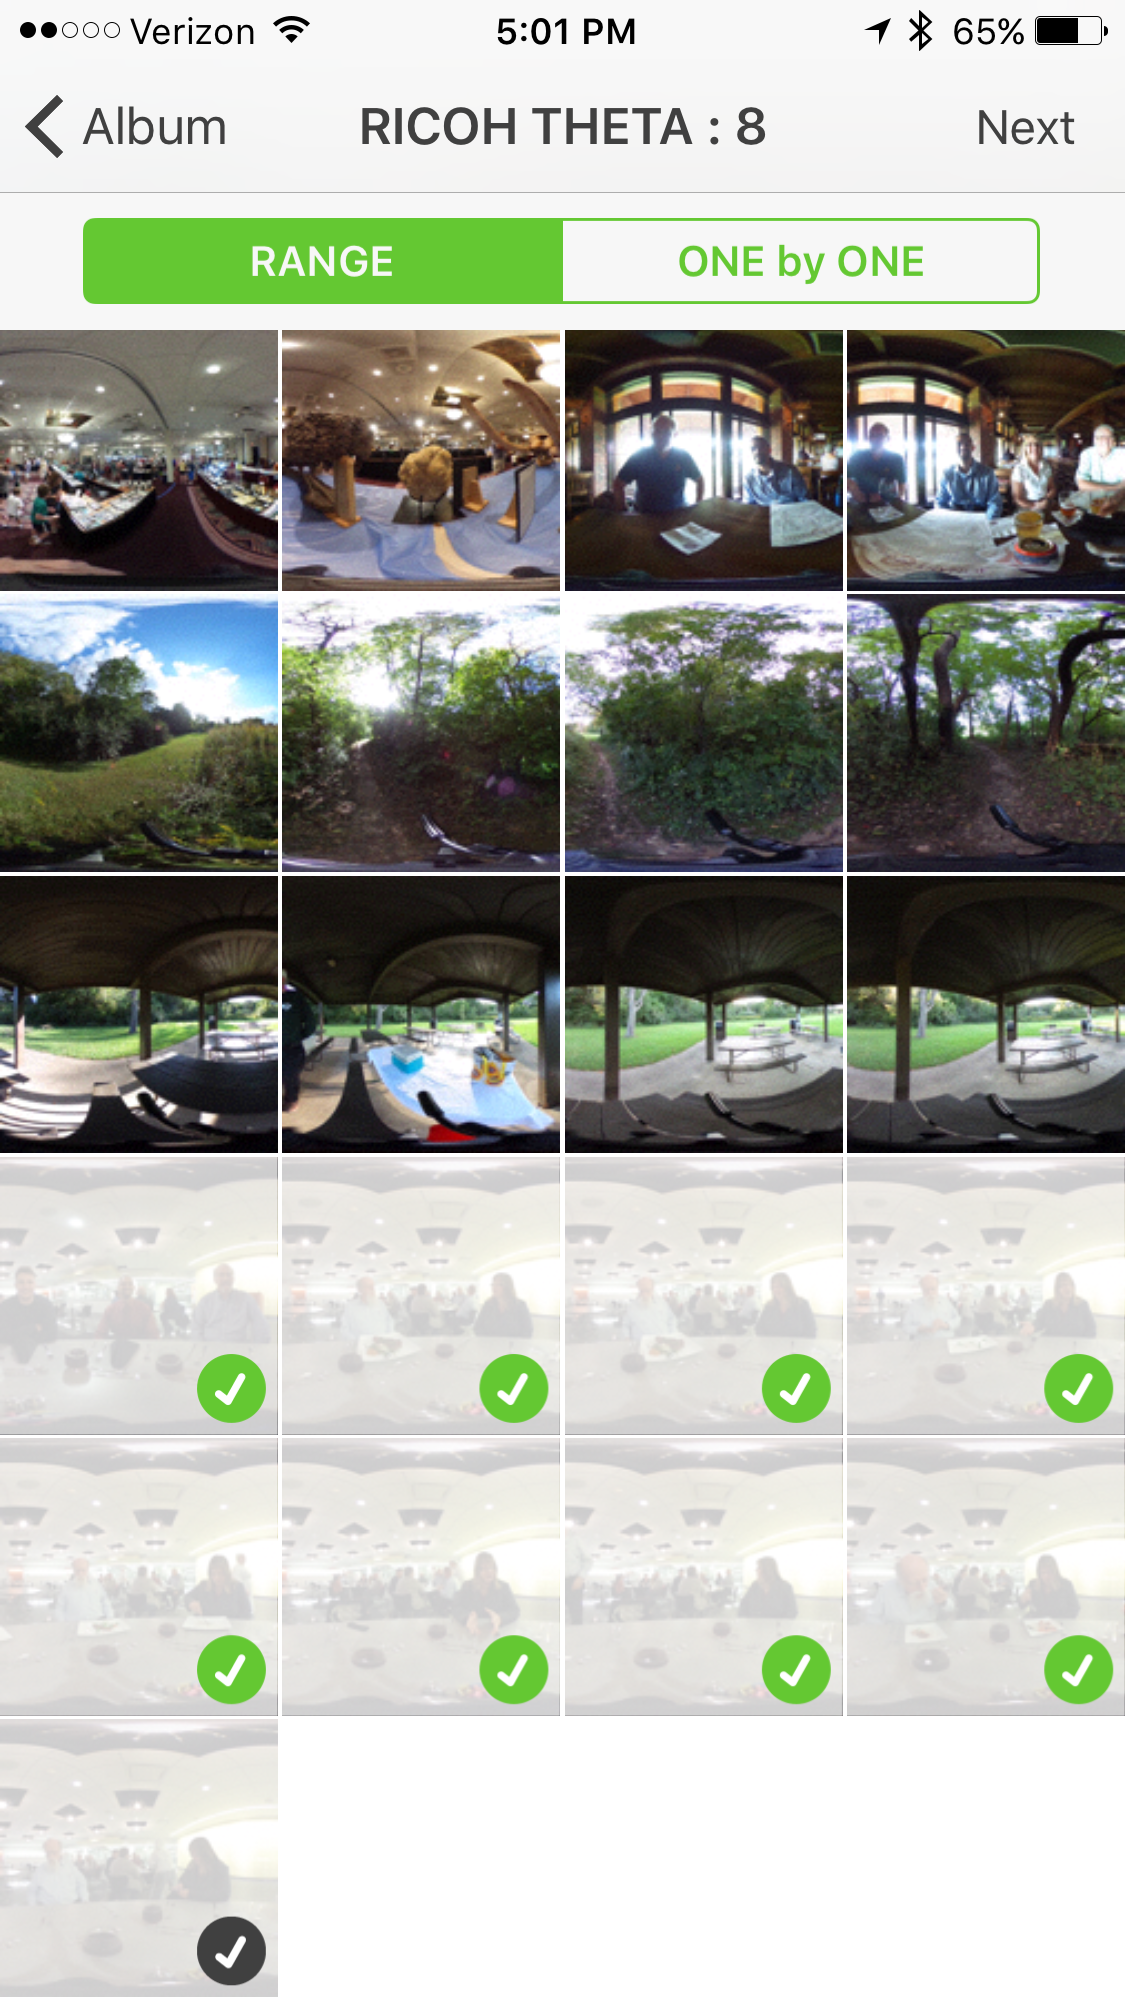
You then see a preview of the images after they are available for editing.
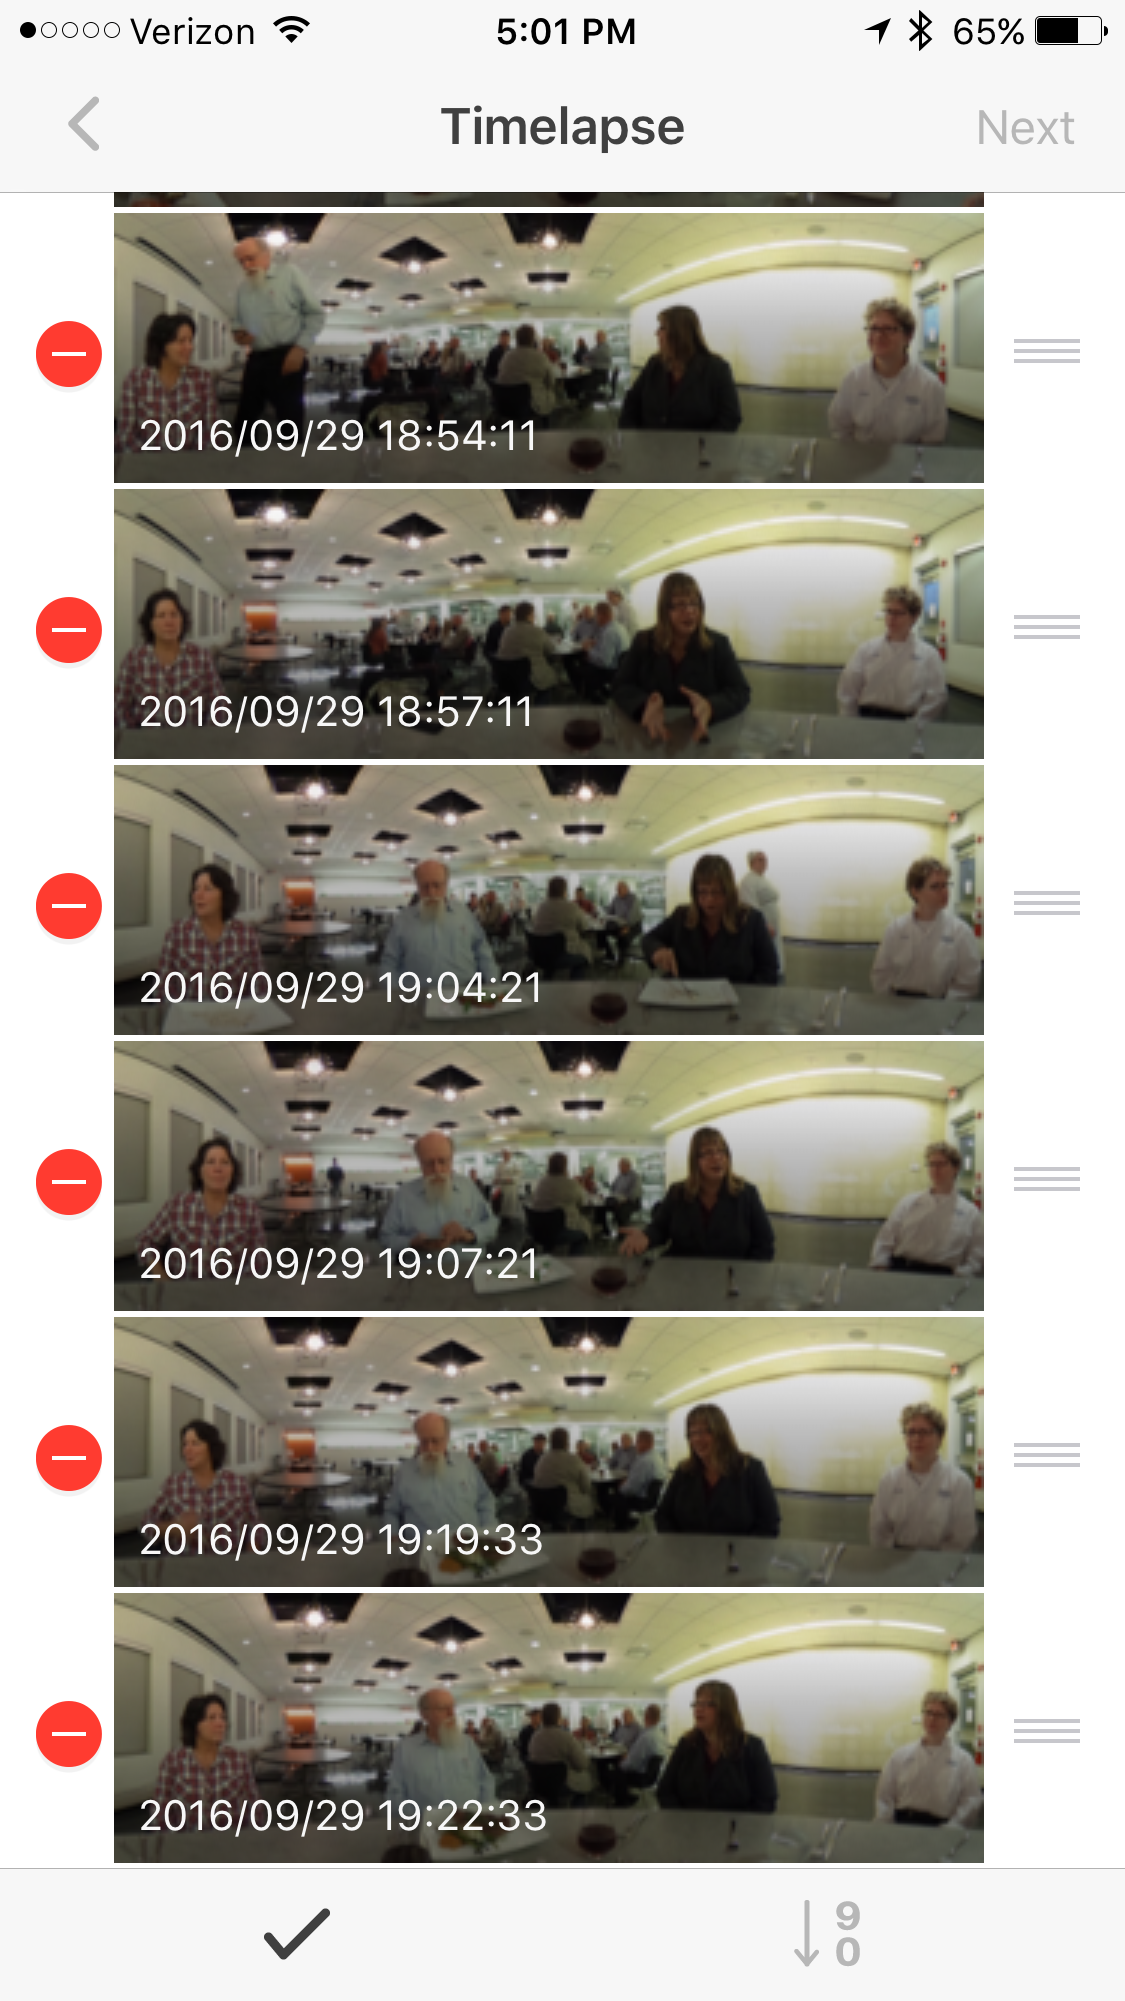
If you choose to edit the images, you can rearrange them (moving each up or down using the grip on the right of each image). You can also delete a specific image (icon on the left of each image).
Once you have the sequence, you select next and can then control the speed of playback.
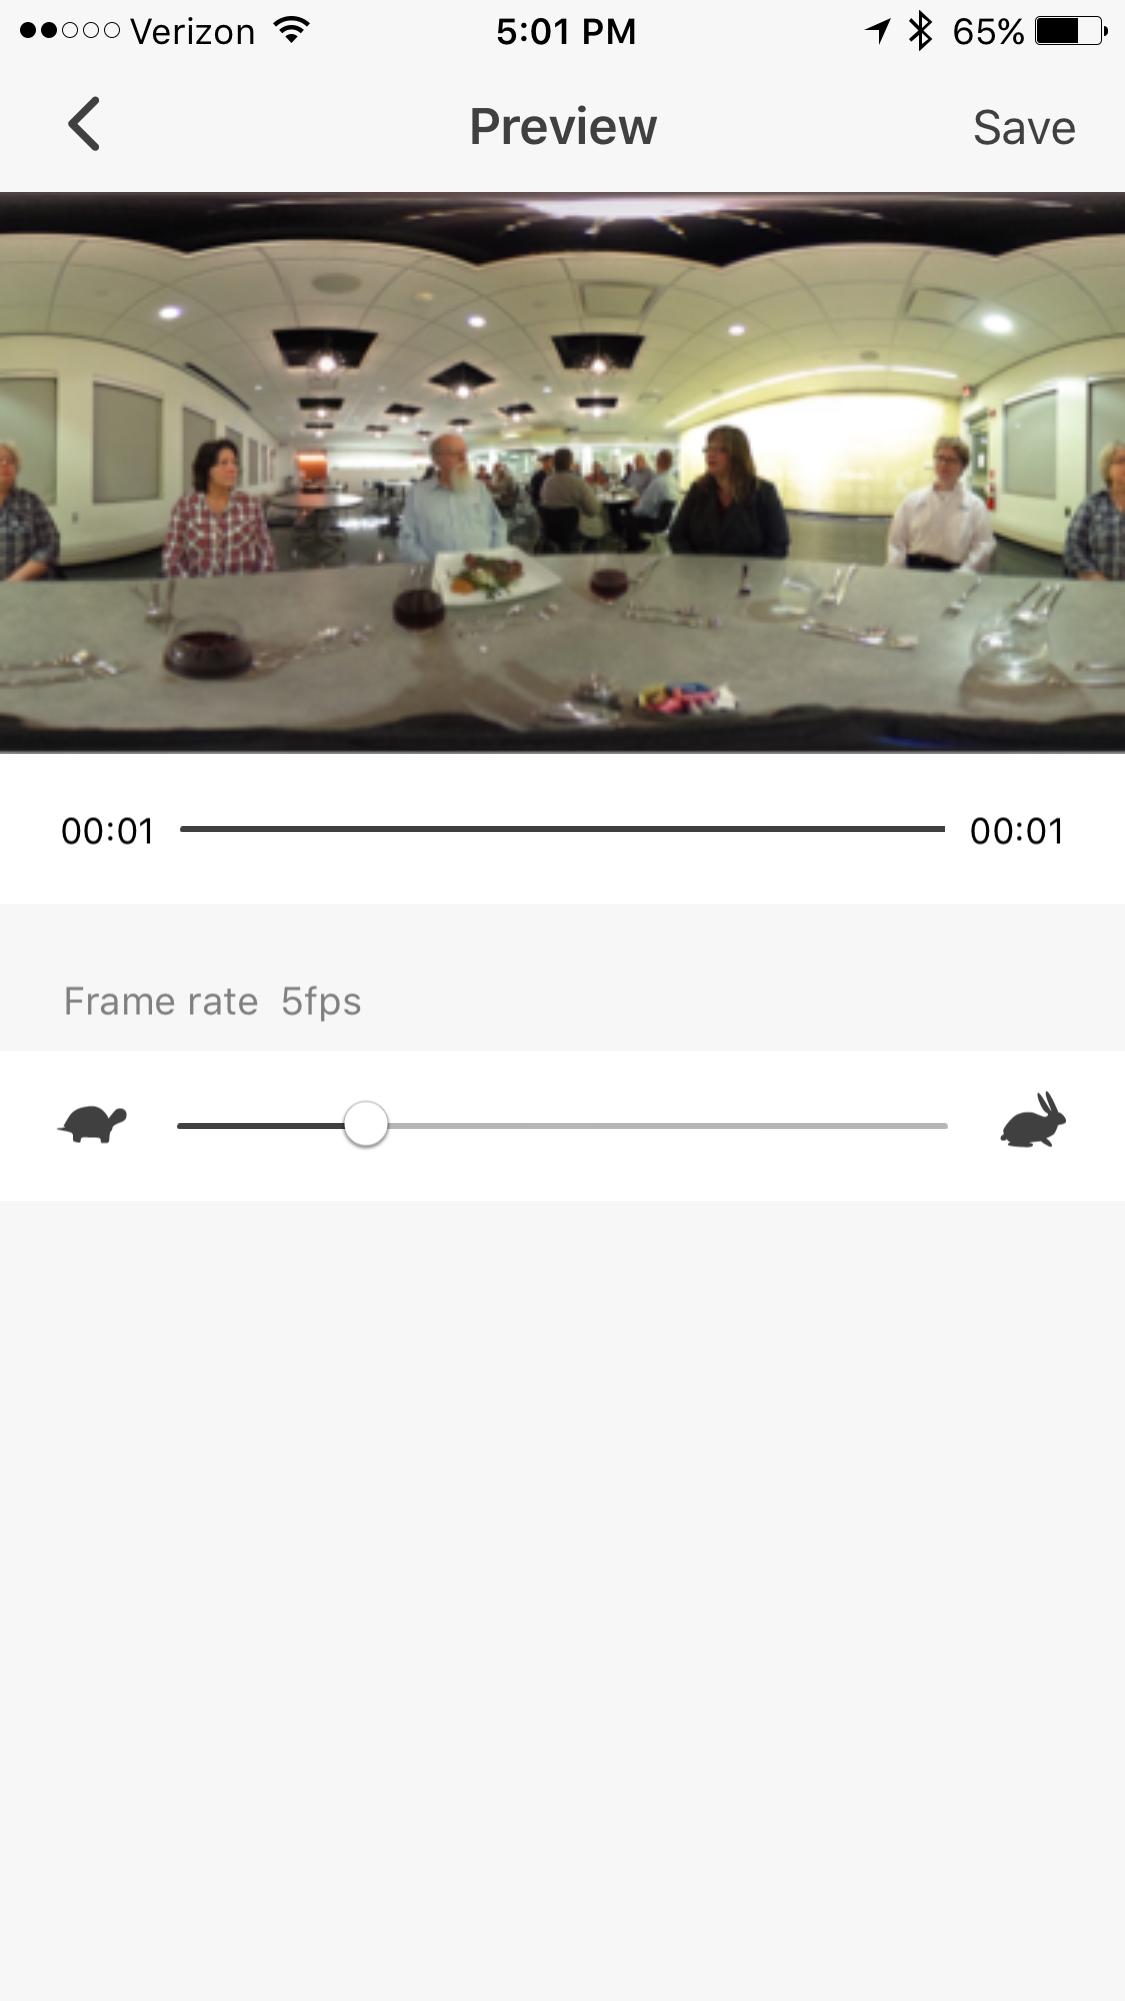
Once you are finished, you can then save your work for subsequent uploading to the Theta360.com site. Here is what the finished result looks like. I have discovered that the image displays on a desktop, but must be viewed in the Theta app on mobile devices.
My first attempt at time lapse. Culinary Arts dinner. Sept. 29, 2016 #theta360 – Spherical Image – RICOH THETA
For now, I view the time lapse approach as a “work in progress.” I have found the other image editing features more useful.
If you choose to edit an image (instead of create a time lapse video), you are presented with two choices.
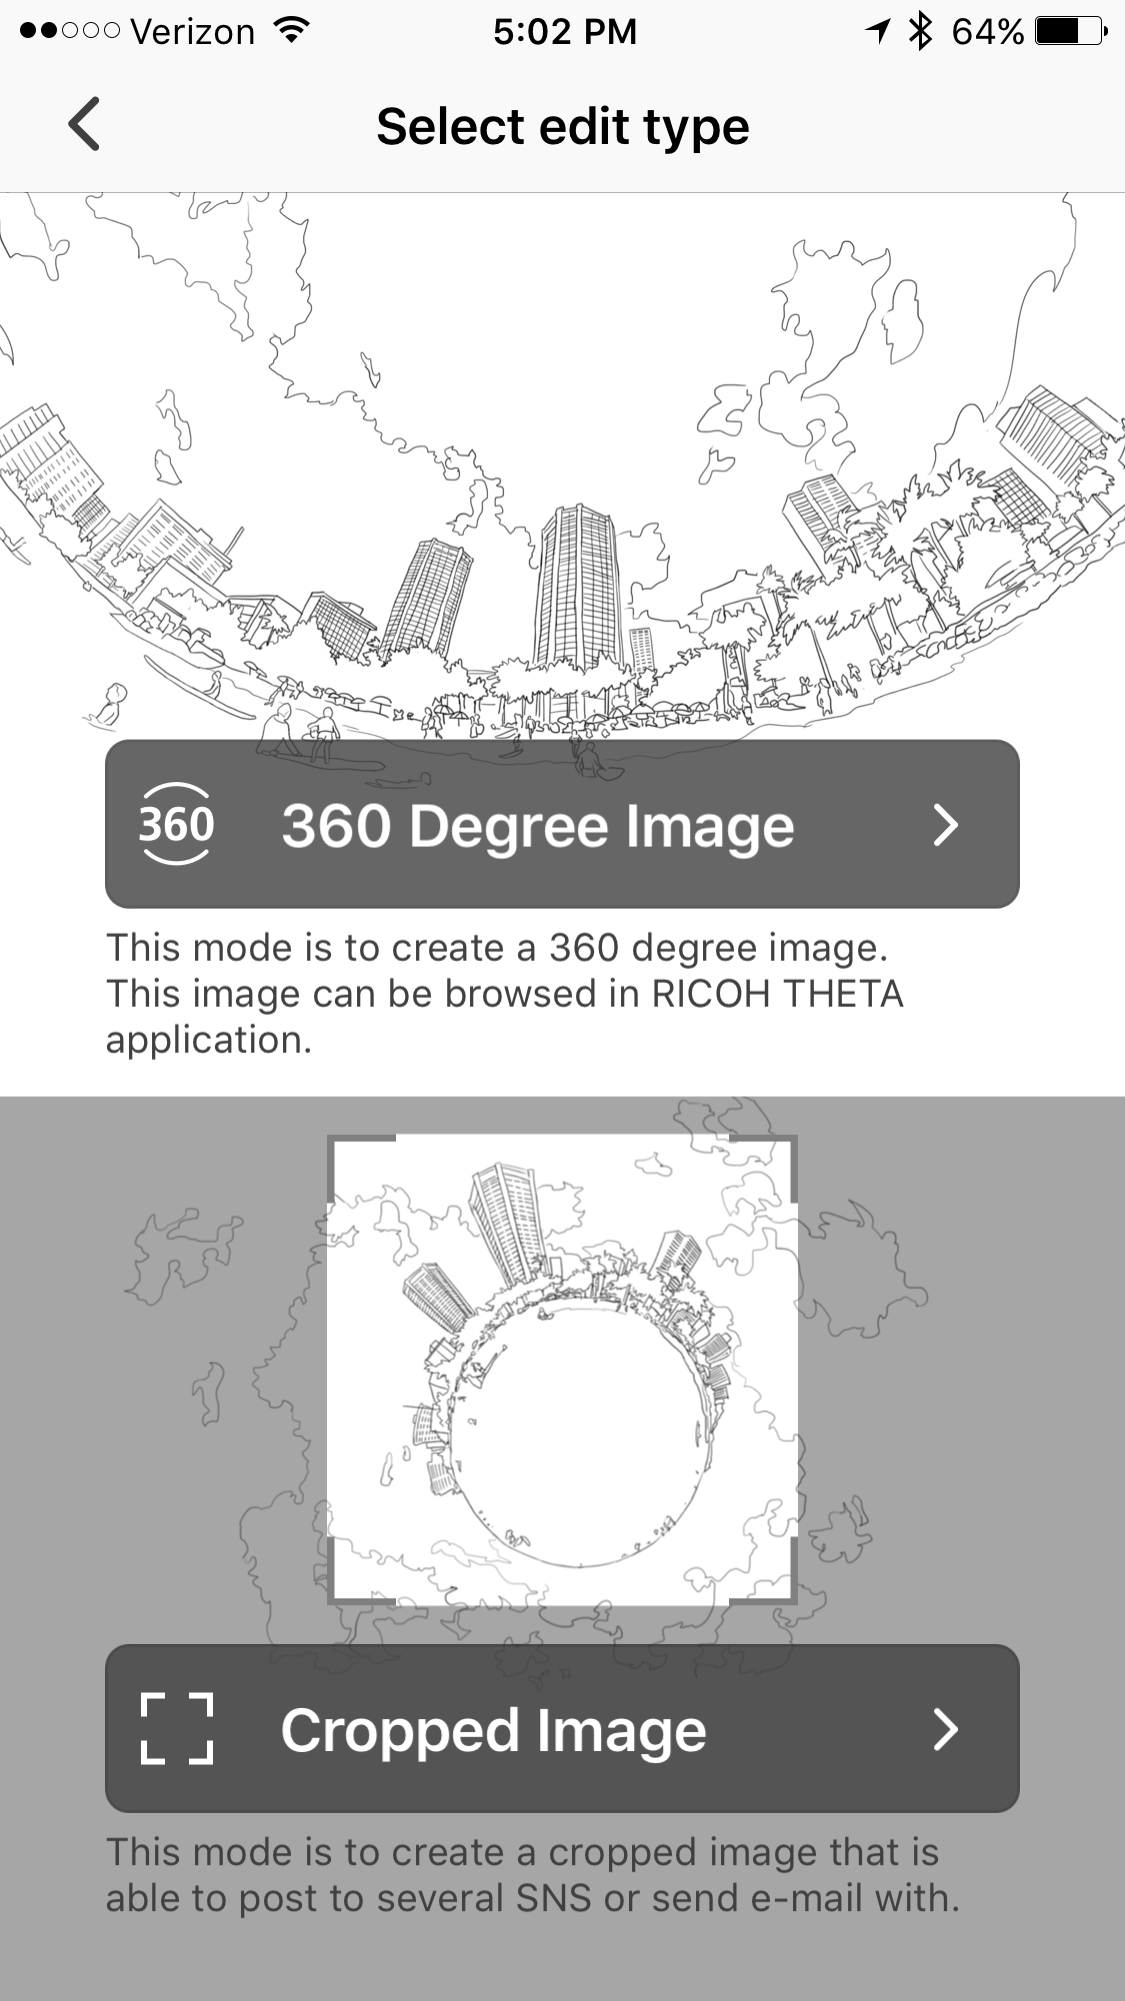
Given that I might want to share images outside of the Theta application, I typically work with the “Cropped Image” approach. When you open the image, you have choices to filter, view, and crop.
If you select “Filter” from the choices above, you can apply a number of filter options. Some are shown below.
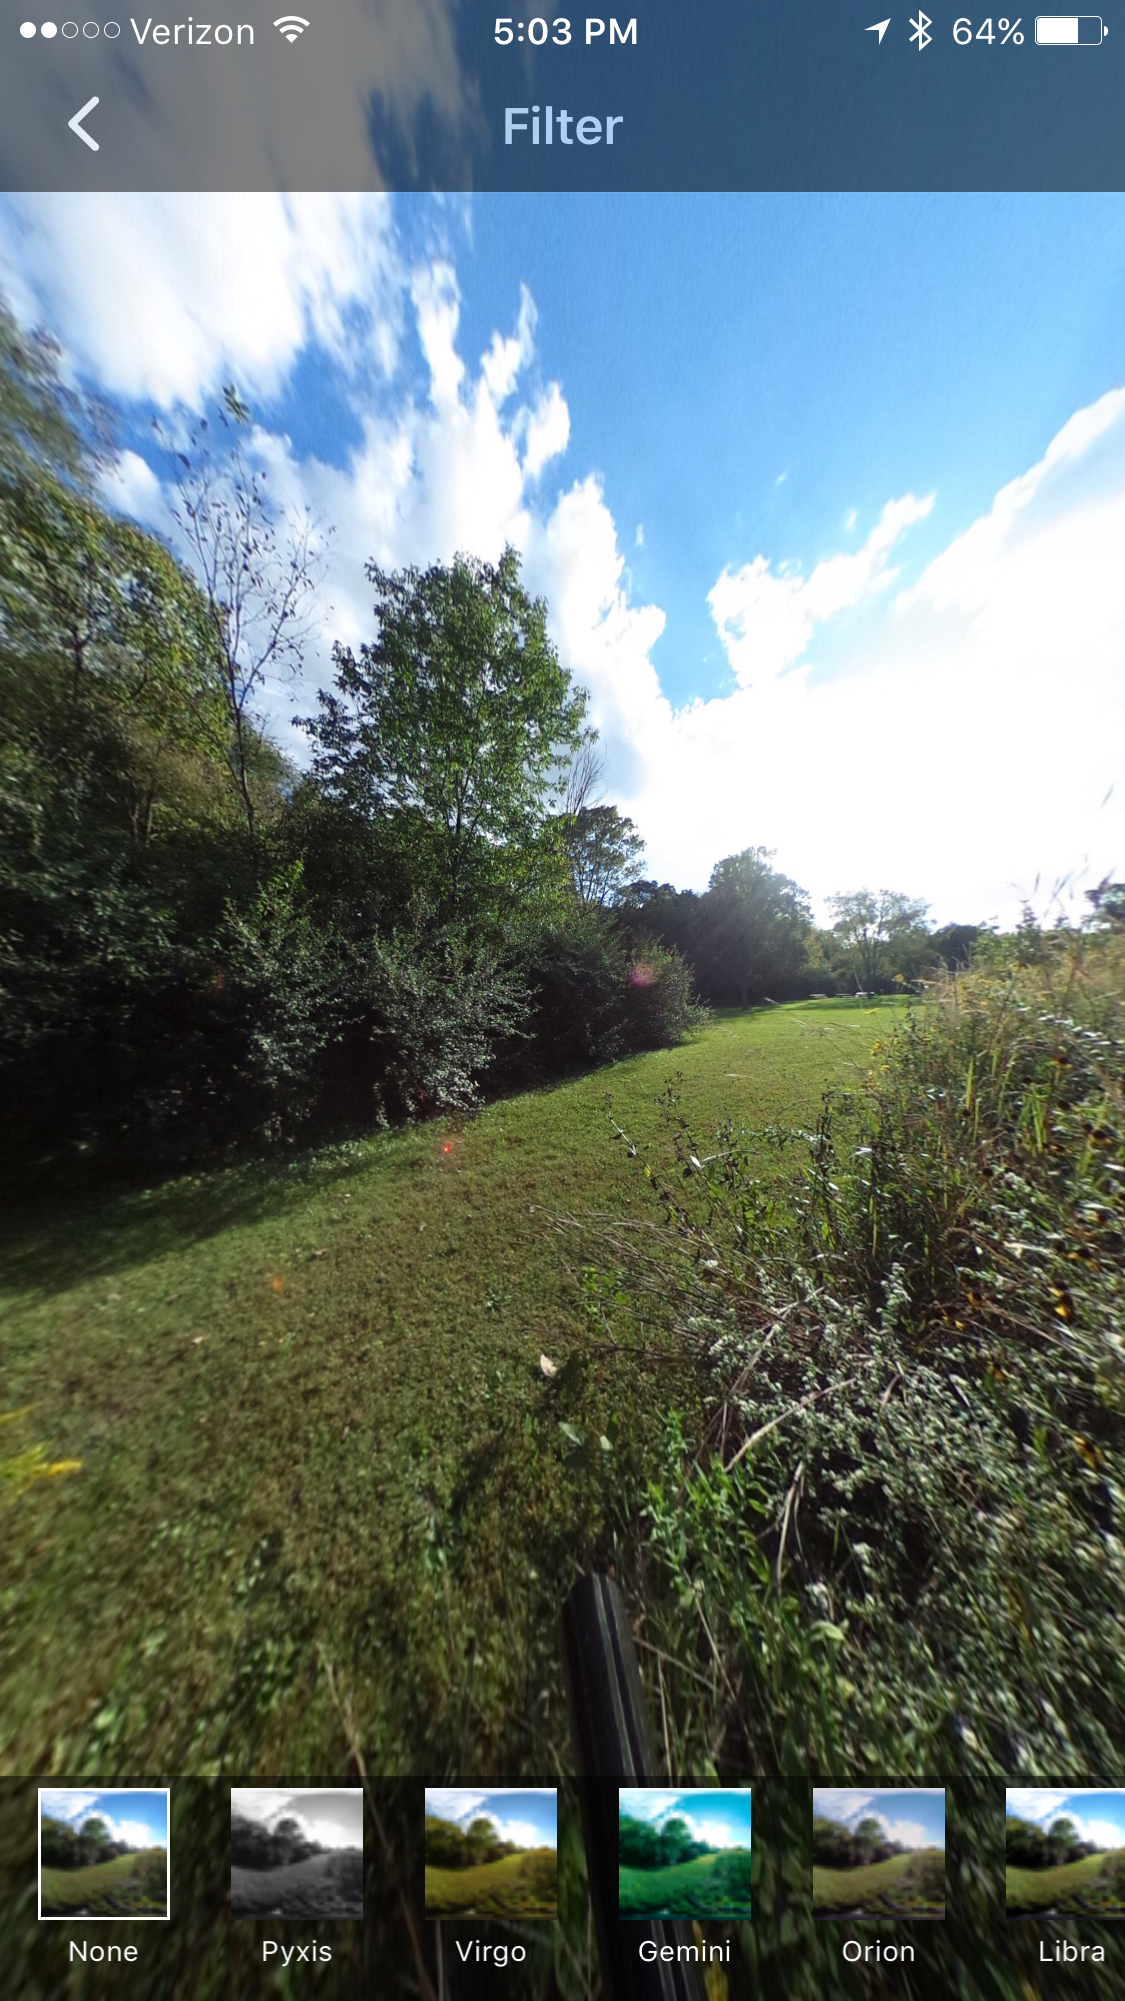
I haven’t experimented much with filters yet. You can also change the view of the image.
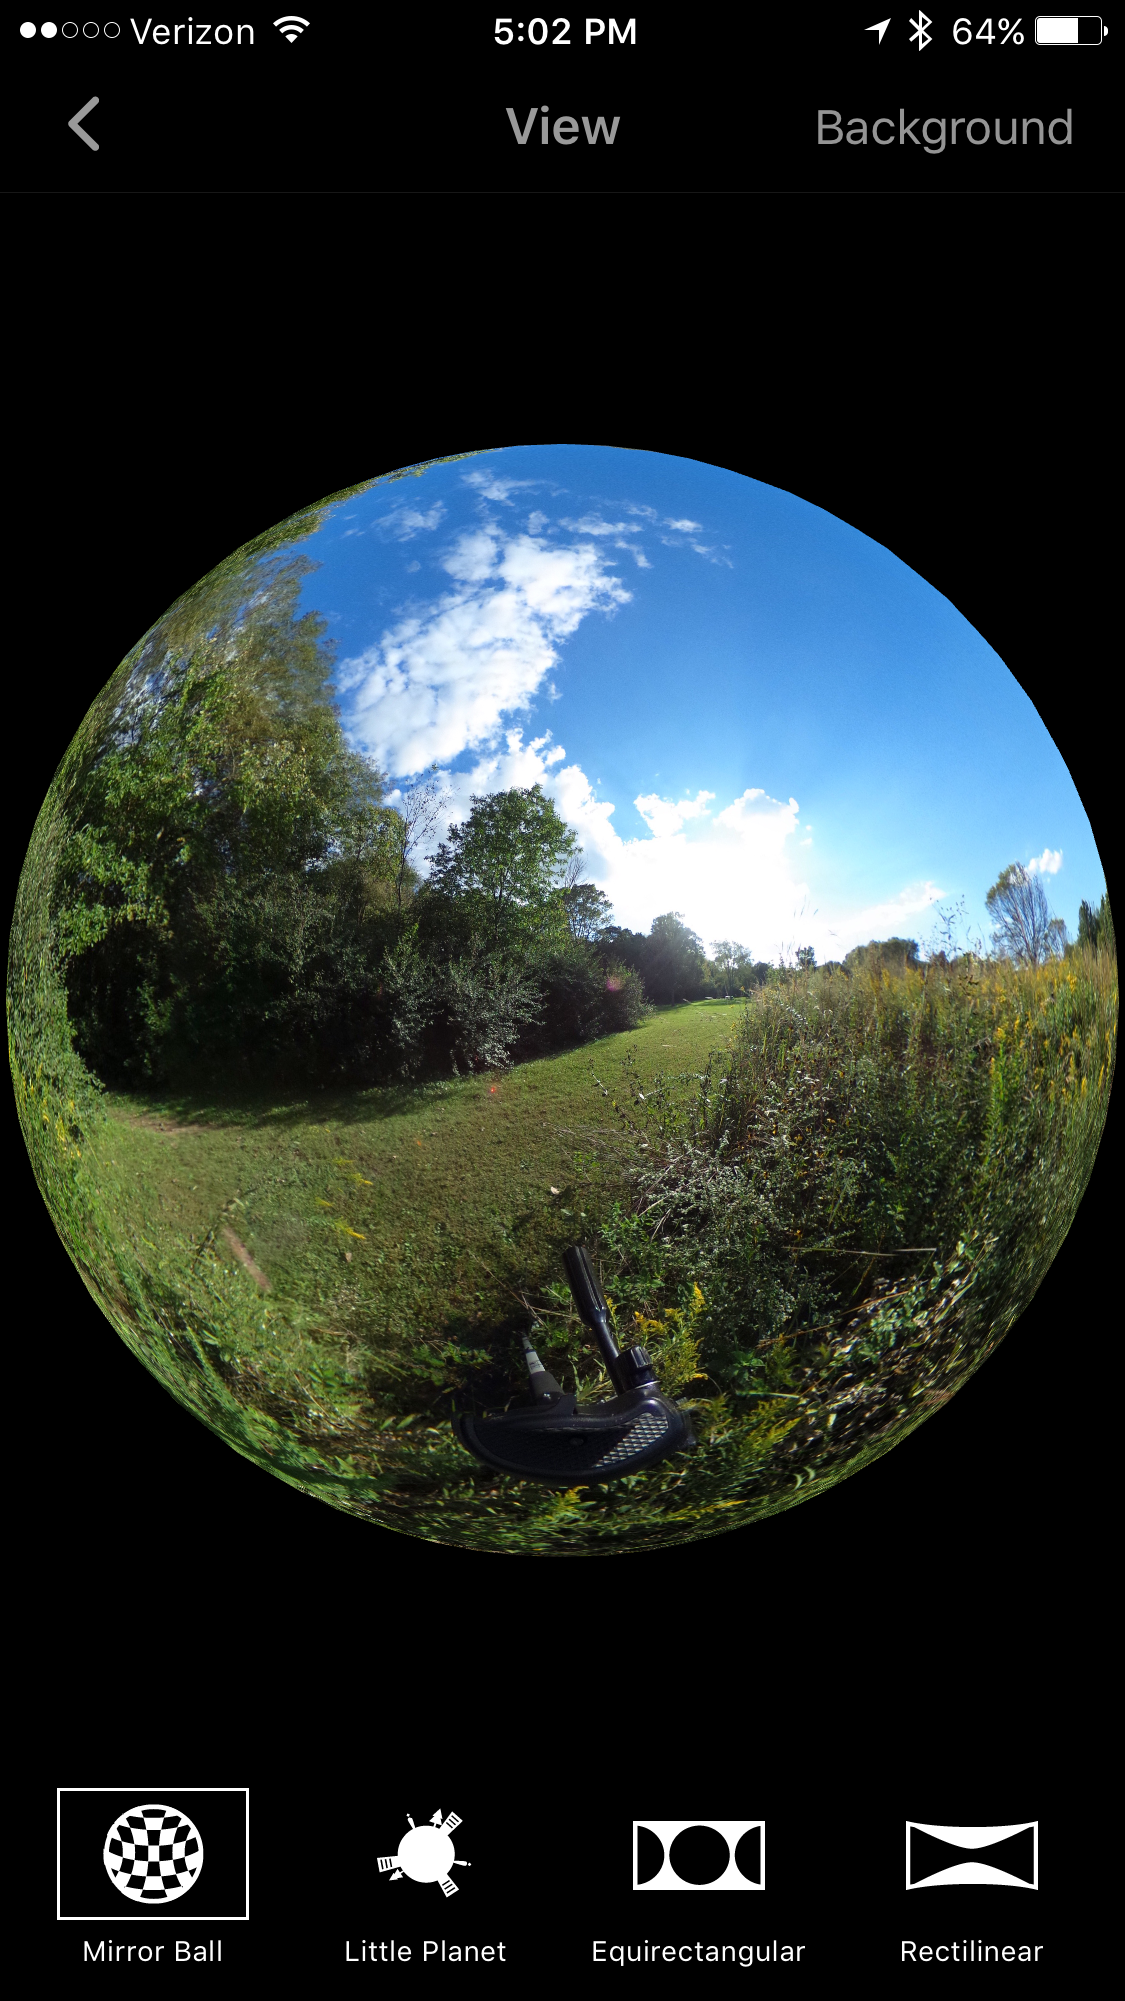
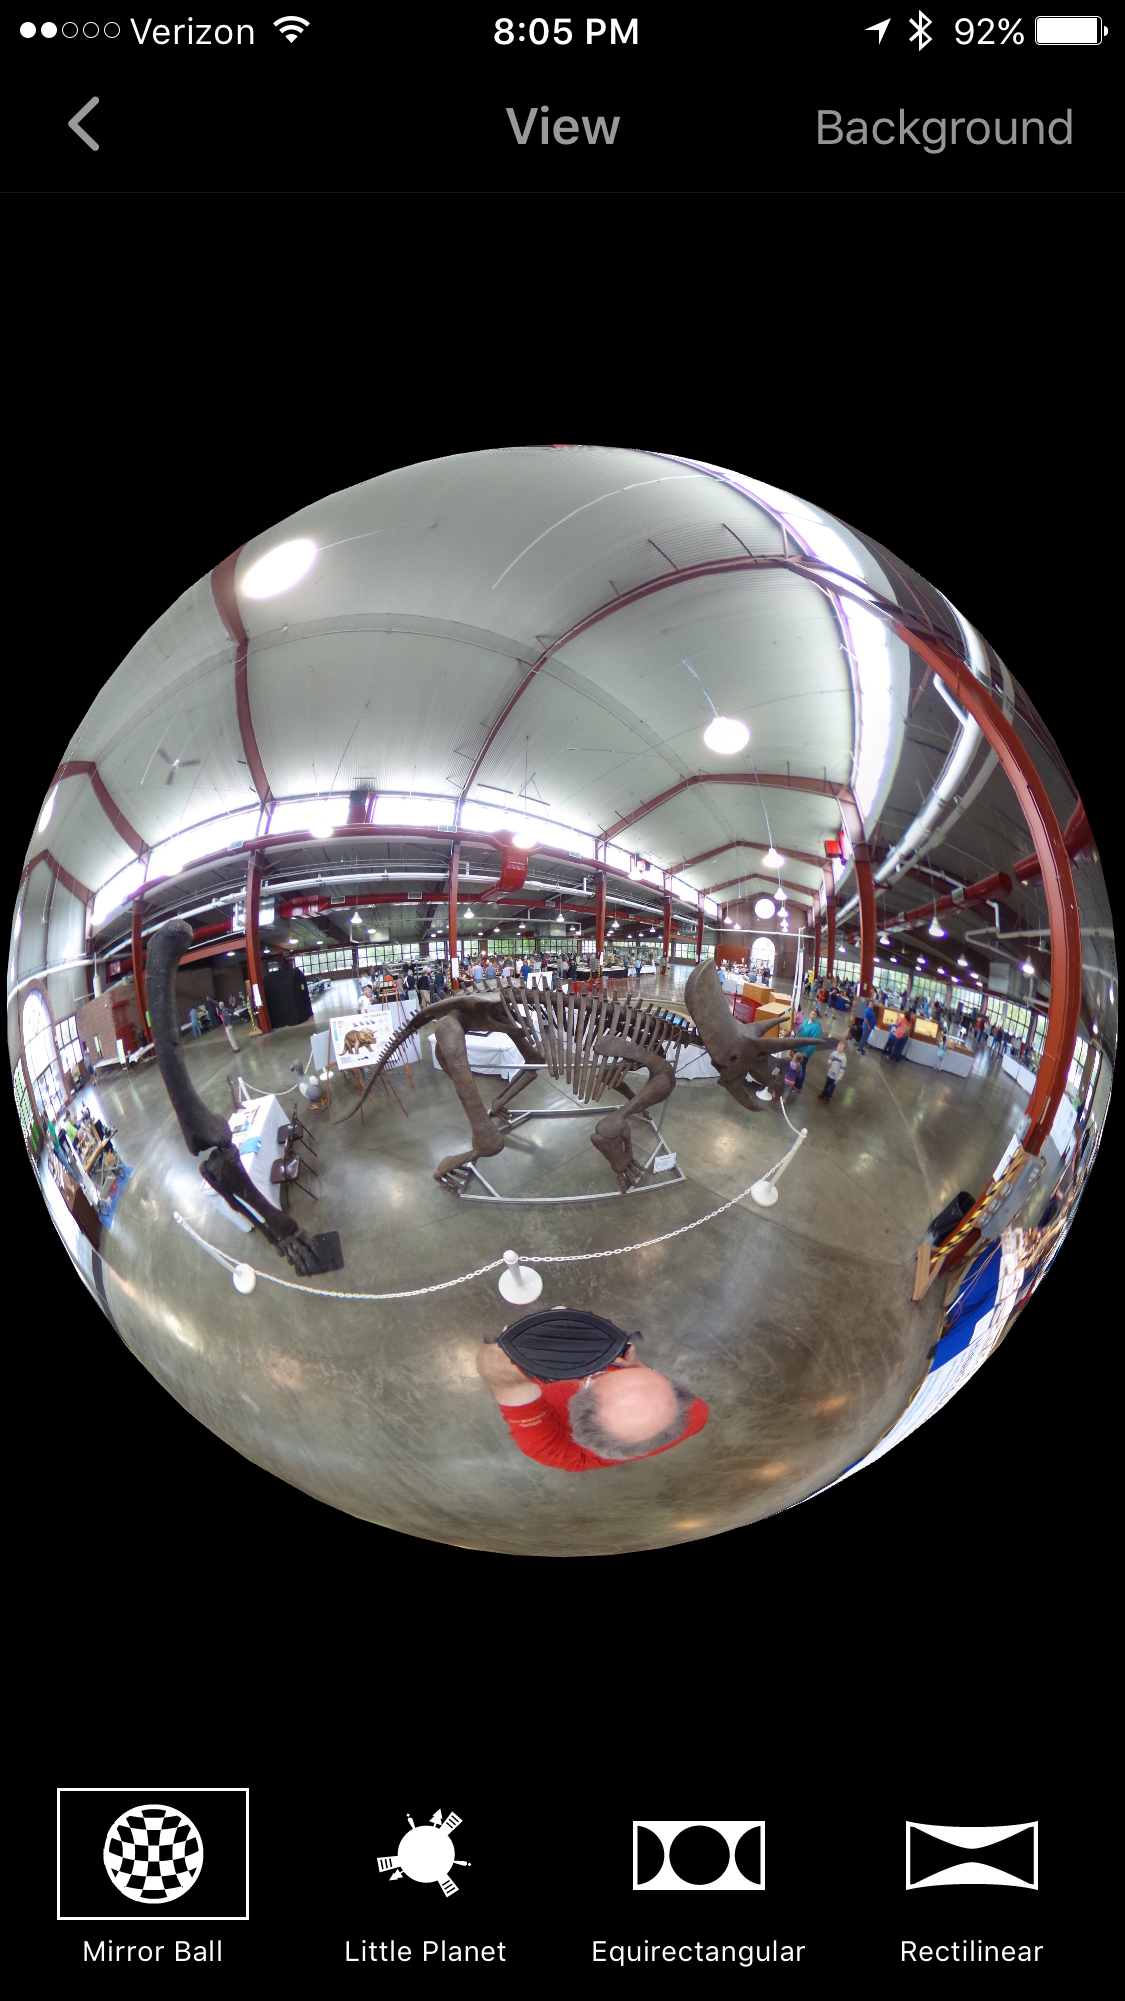
The default view is the mirror ball shown above. However, you can also create “little planets.”
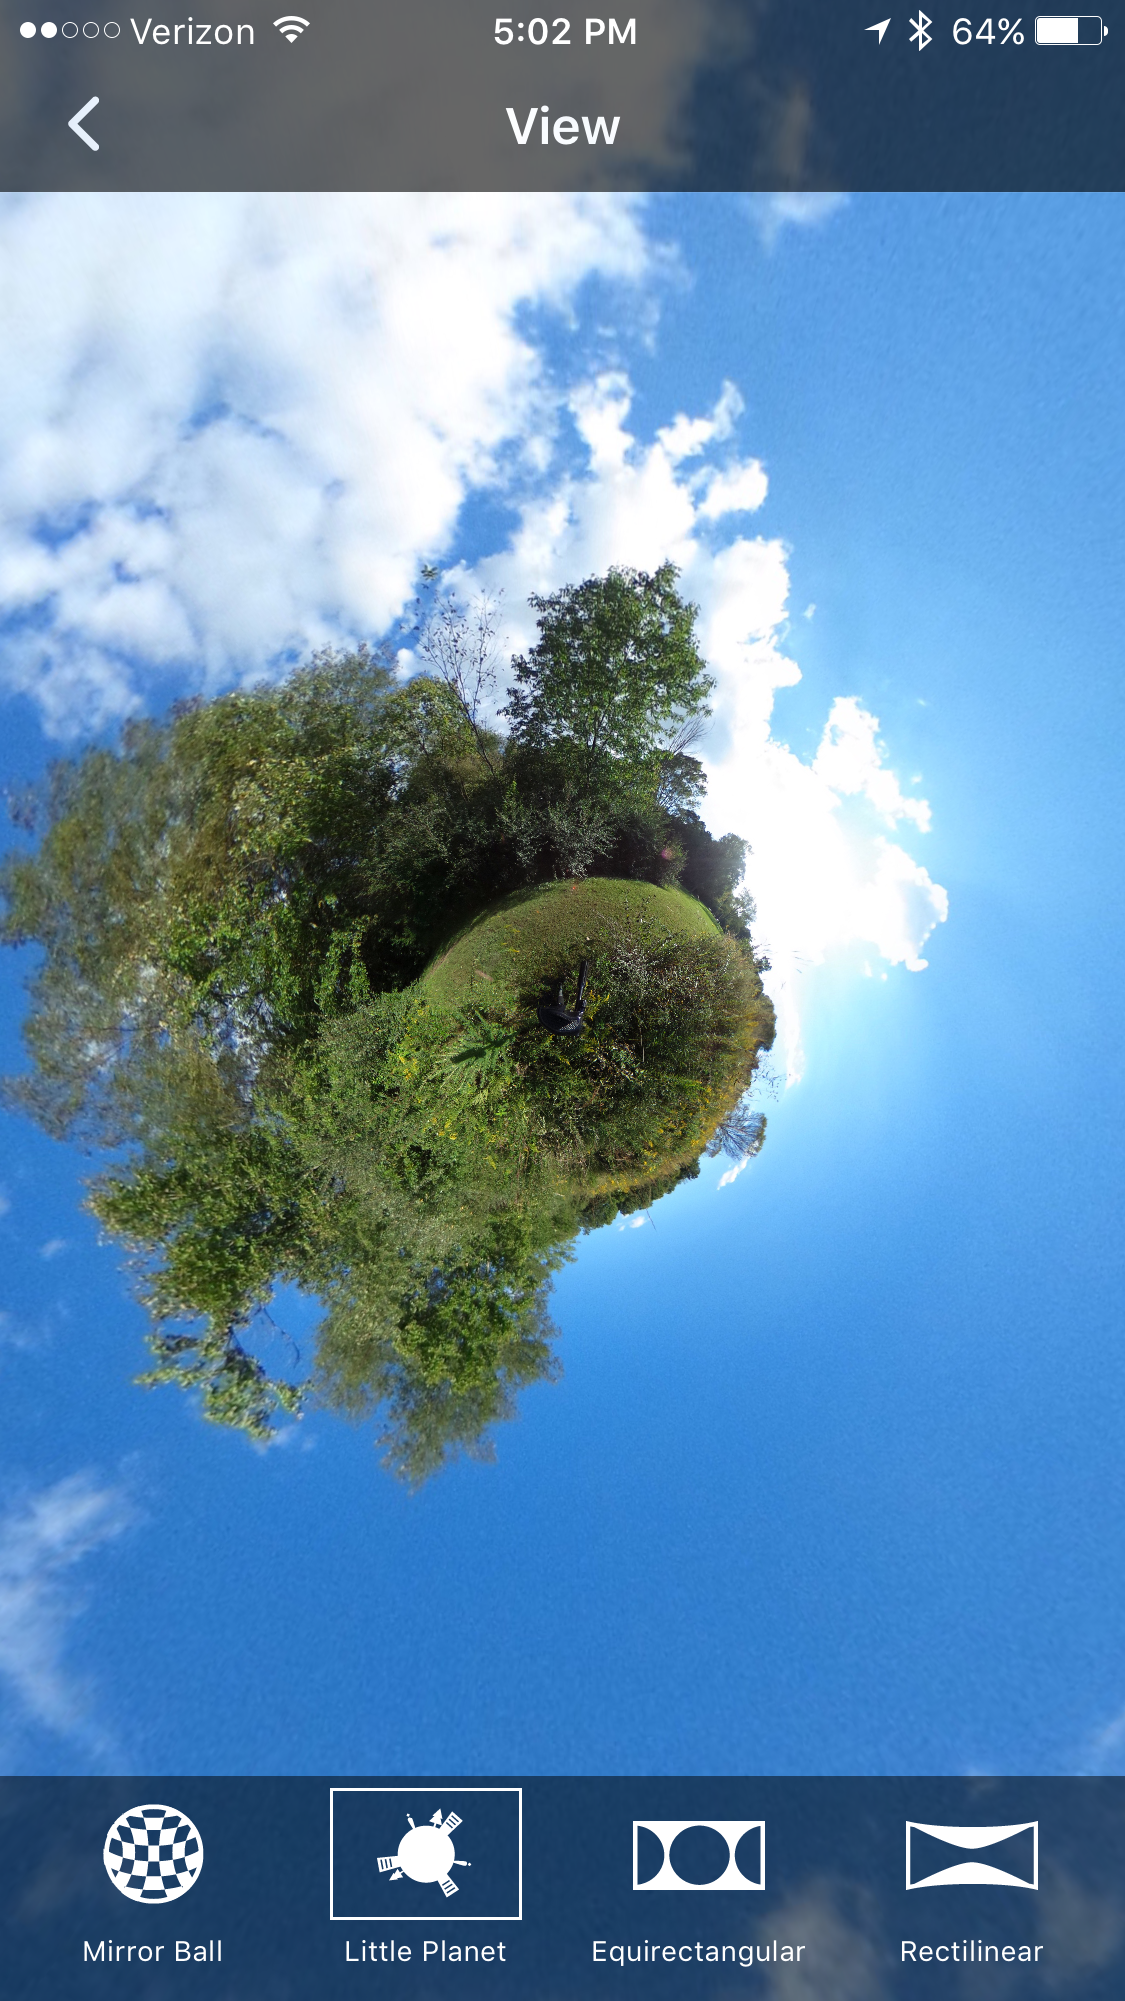
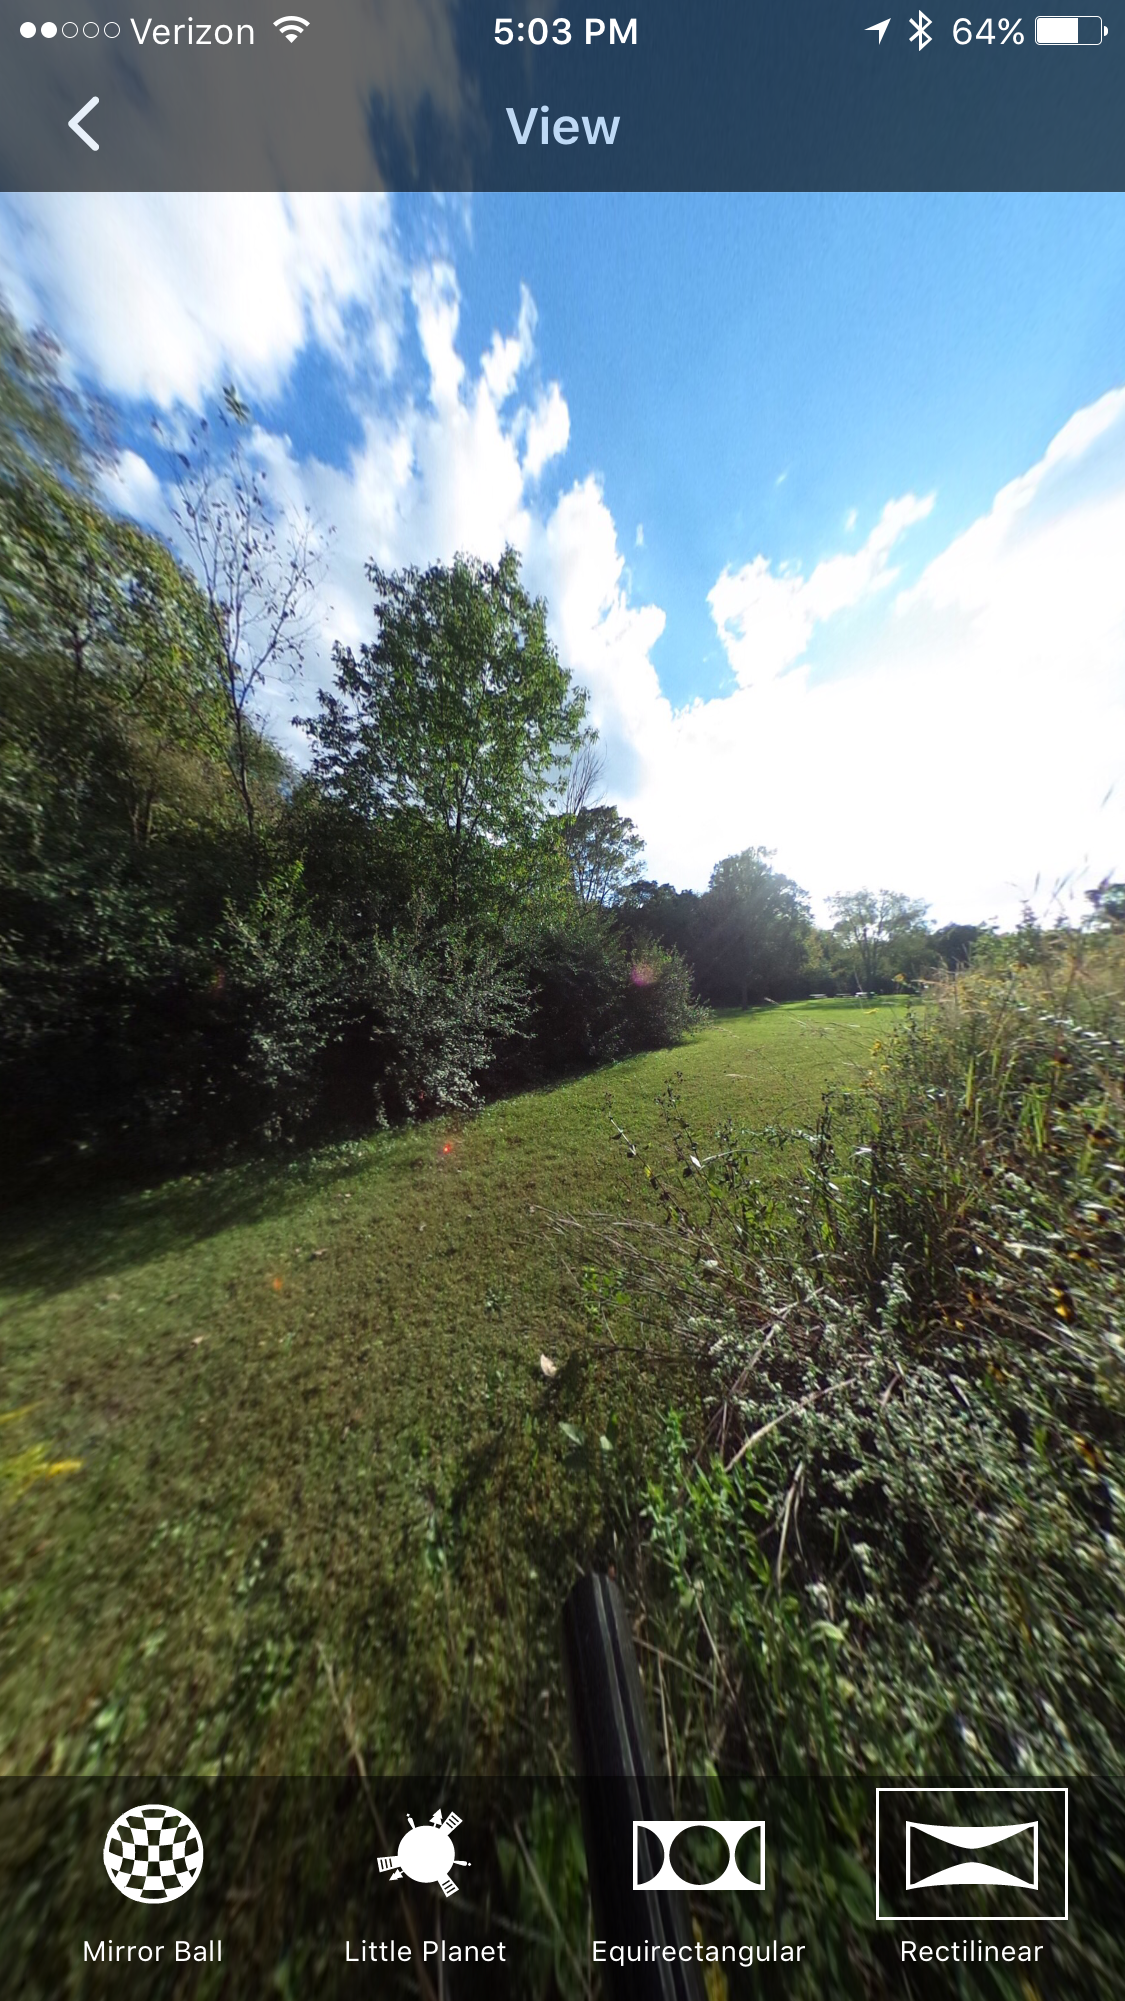
You can also convert the image into a more normal version using the option on the right (Rectilinear).
You can also change the aspect ratio of the image
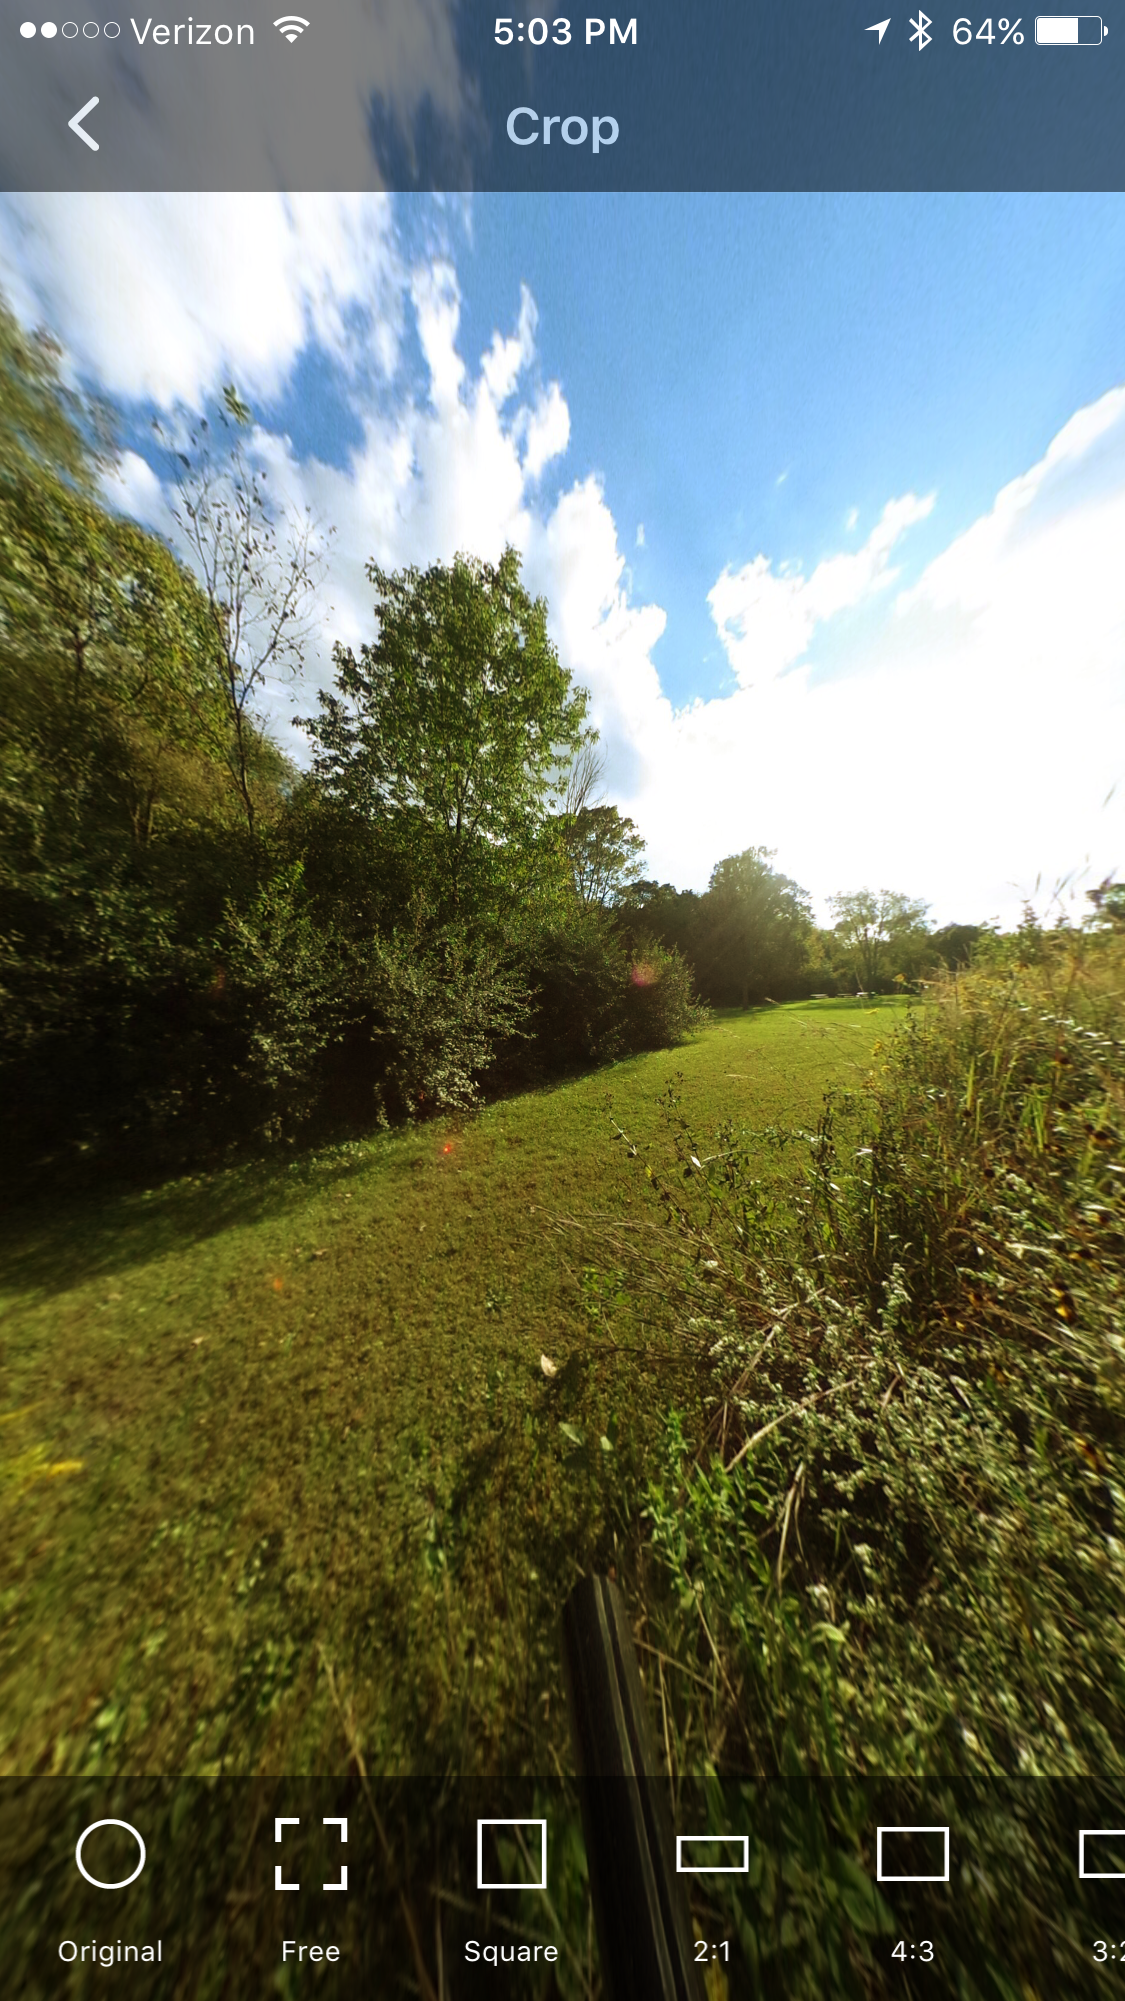
As you see above, there are many options (from 2:1 to 4:3 and more).
These are just some of the capabilities of the Theta S camera and editing the photos with the Theta+ app. I am curious if you have experimented with the camera and this app. I look forward to your comments.