In preparation for our fall, 2016, CMWEB 240 class on developing web pages using the .Net environment, I have been briefly reviewing Visual Studio Code (version 1.3). This is a different product from the traditional Visual Studio and has a significantly UX/UI experience than Visual Studio. You can download a copy here. As far as I can tell, this more experimental version is presently free. One aspect I particularly like about the tool is that you can run it on a number of operating systems (Windows, of course; also Mac [OS X], Debian, Ubuntu, RedHat, Fedora, and CentOS). Let’s investigate the interface a bit.
After downloading (to a Mac in my case), you extract the zip archive and place the application in the appropriate spot (in my case the Applications folder). The shipping version relies on a number of extensions (for example, if you prefer the Vim editor, there is an extension for that). There is also a significant amount of documentation (which should be helpful for students and those just getting started).
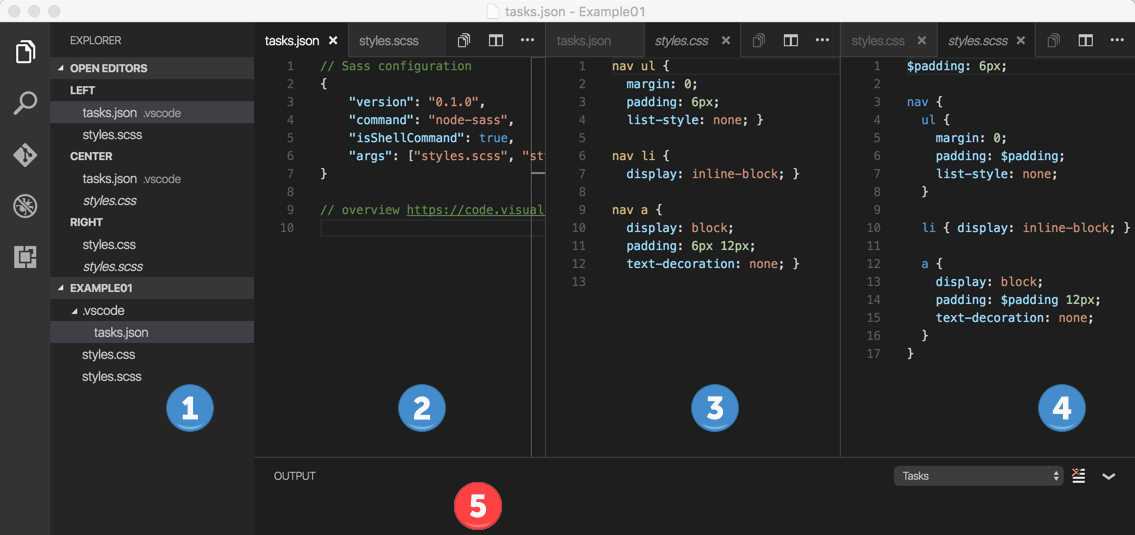
Let’s first examine the editor. Refer to the screen capture below. Panel [1] is the file and folder explorer. One can then have up to three files being edited at the same time. In this case, I have a json file, a SASS file and the resulting CSS file [numbers 2 – 4]. I have found this side by side editing to be very helpful. If I do a build, the output (including errors) appears in the area marked [5] below.
One of the features I like about this editor is that it opens with the same configuration of files as when you closed it. It is quite easy to pick up where you left off.
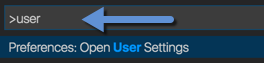
You can also take advantage of the command palette (CMD+Shift+P) to work with preferences. You can start typing (for example, the word user) and the list of choices shortens to 1.
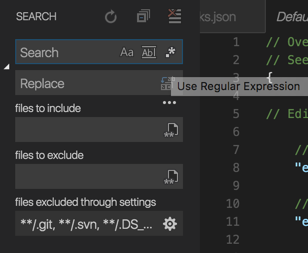
User settings are stored in a .json file (as are most of the preferences). You can also search (CMD+Shift+F) and further configure your search (CMD+Shift+J). You can even use regular expressions in your search (across files and folders).
The status bar also contains a fair amount of useful information.
![]()
In this case, we see the type of encoding and the type of file we are editing (in addition to the location of the cursor).
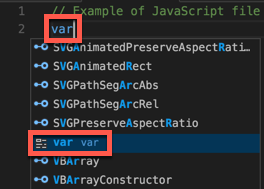
By default, there are smart editing for both JavaScript and TypeScript languages. Many other languages are supported by extensions. Here is a simple example of the smart editing capabilities. In this case, I have just created a JS file and typed the keyword var on line 2. I immediately see a number of choices.
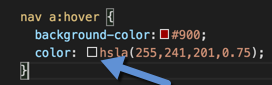
One can also see swatches of the chosen color (if one uses hex values). It would appear that neither hsla nor rgba are fully supported (out of the box). Here is an example of the colors chosen:
There is support for multiple cursors (Opt+Click). For example, you can edit multiple HTML <span> element details at once. In this case, I added the CSS class button to all 4 elements at once. I do like the ability to work with multiple cursors. Since you control where you click, the multiple cursors do not need to be adjacent to each other.

Yes, there are many more features. I simply wanted to introduce this tool to readers. If you are working with the .Net framework, I encourage you to try this editor out.