I recently posted an article on web developer trends for 2016 at WebProfessionals.org. One of the technologies I believe will grow in importance in 2016 is Docker containers. For aspiring web developers (particularly those in our CMWEB program), I thought it might be helpful to further explain the concept. I will start with an overview of the basics of working with this technology. If there is sufficient interest, I will continue to delve further in subsequent posts here.
So, what are Docker containers and why are they important? Readers may be familiar with virtual machines (where one operating system can run virtually within another). Docker containers extend that concept further. Essentially, everything you need to run your application is contained. This includes the operating system kernel, your code, your data (and data stores). Everything. The main difference from a virtual machine is that the latter contains the entire operating system (even if it is GB in size). Each virtual machine may be very large and take time to load. Containers share the operating system kernel with other containers, but run as isolated processes. Essentially, they will run “on any computer, on any infrastructure and in any cloud.” Quote from: https://www.docker.com/what-docker To me, the biggest advantage is that you don’t need to worry as much about infrastructure and can focus on application development. Also, they load very quickly (where virtual machines can take a very long time to load). Let’s learn a bit more about this technology.
Docker provides a fair amount of documentation to help you get started. I took the path of installing on my Mac, but you can install on Linux or Windows. First, you install the Docker toolbox. This installs necessary binaries (and makes them available to all users). You also install a custom terminal environment and a GUI version (this is presently in beta).

Oracle VirtualBox is also installed as part of the installation process.
I recommend experimenting with the terminal (command shell) environment until you are comfortable and have a solid understanding of how to work with Docker. You can download, create, run containers. These appear as images. There is an initial instance (whale-say) that you can experiment with. In the screen capture below, I have just issued the command:
docker run docker/whalesay cowsay Mark
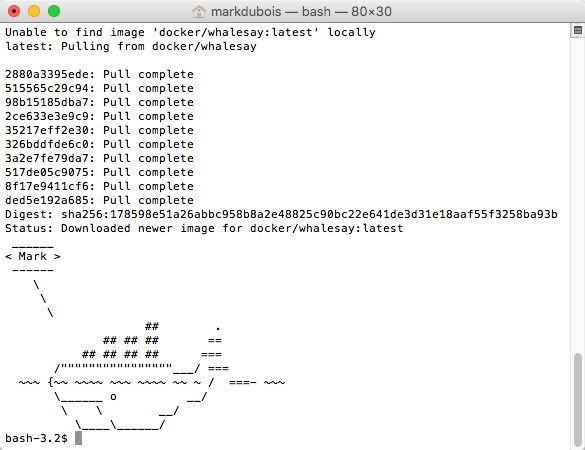
Since I did not have a local container called whalesay, the container was downloaded from the Docker hub repository. Yes, you can save your own containers in that repository (and make them public if you wish). The cowsay method is exposed and one can pass any string of text to the container. In the above case, I asked the Whale to say Mark. Clever, huh?
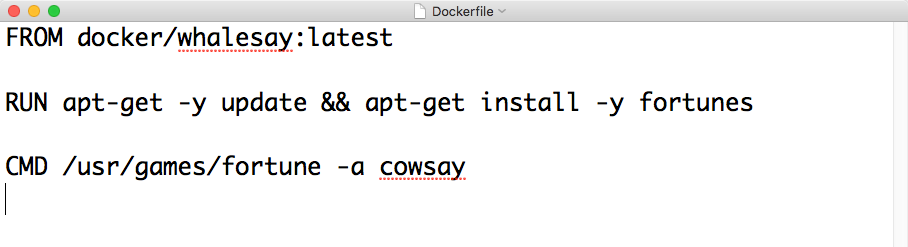
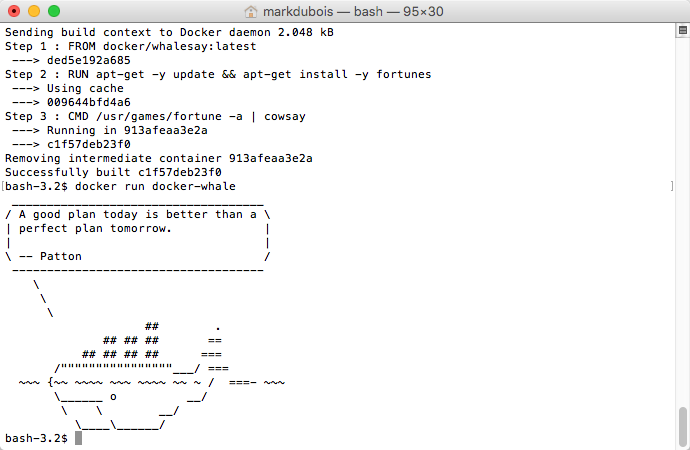
You can also create/edit files to reside inside the container to execute commands (when the container loads, for example). In the screen capture below, I launch an initial container and then install additional software within it. In this case, I obtain the latest version of the whalesay container and then add the fortunes application within (and then run it).
The results of these commands are shown below.
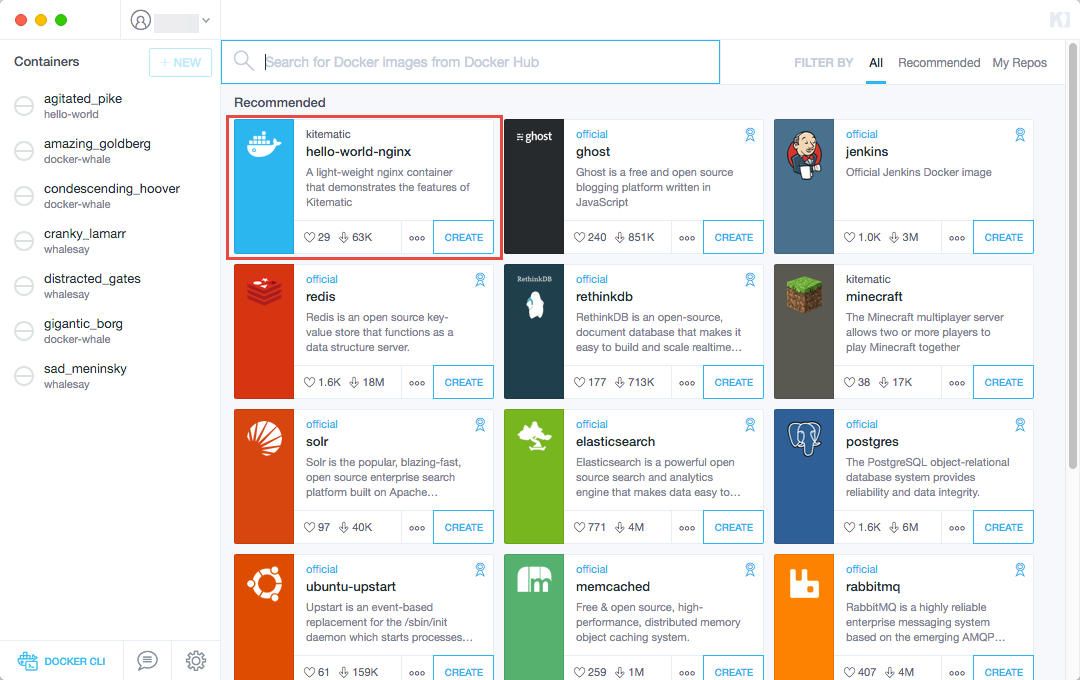
So far, so good. But what about web sites? For our purposes, I will now switch to the Kitematic GUI. When you open that, you are presented with a host of containers which you can download and experiment with. To get started, I chose the Nginx server environment in the upper left.
As with other containers, you download this and run it locally. Once started, you can access it via a specific IP address and port (you can configure these in the settings). The default comes with a very “bare bones” bit of HTML (not even HTML5 compliant). The interface allows you to modify the contents of the files and to visit the page(s) in a browser. Let’s examine the interface (below) in a bit more detail.
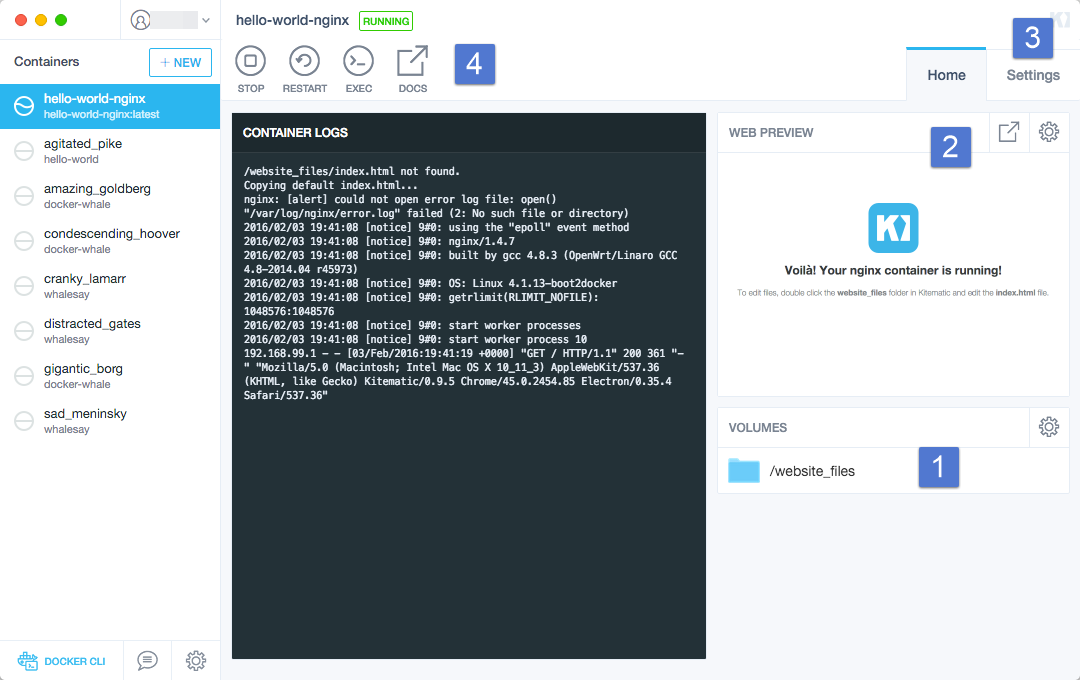
The data volumes are accessible [1] above. You can also change the location (if you have a more complex application on your local computer). You can preview the page in a browser [2]. You can adjust the default port and IP address [3]. You can also stop, restart and manipulate the container/ server itself [4].
Obviously, the first thing I did was to modify the HTML code. Yes, I also added a file in the folder.
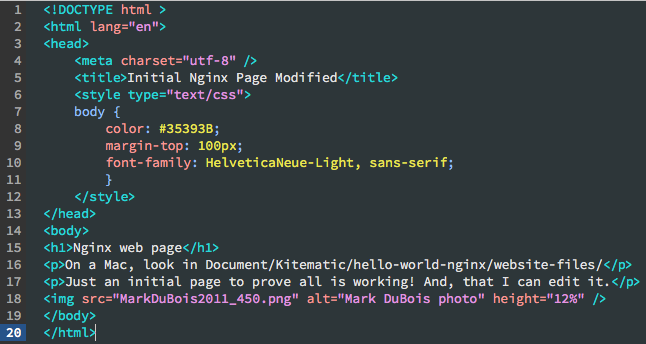
Once modified, I can then view the site locally.
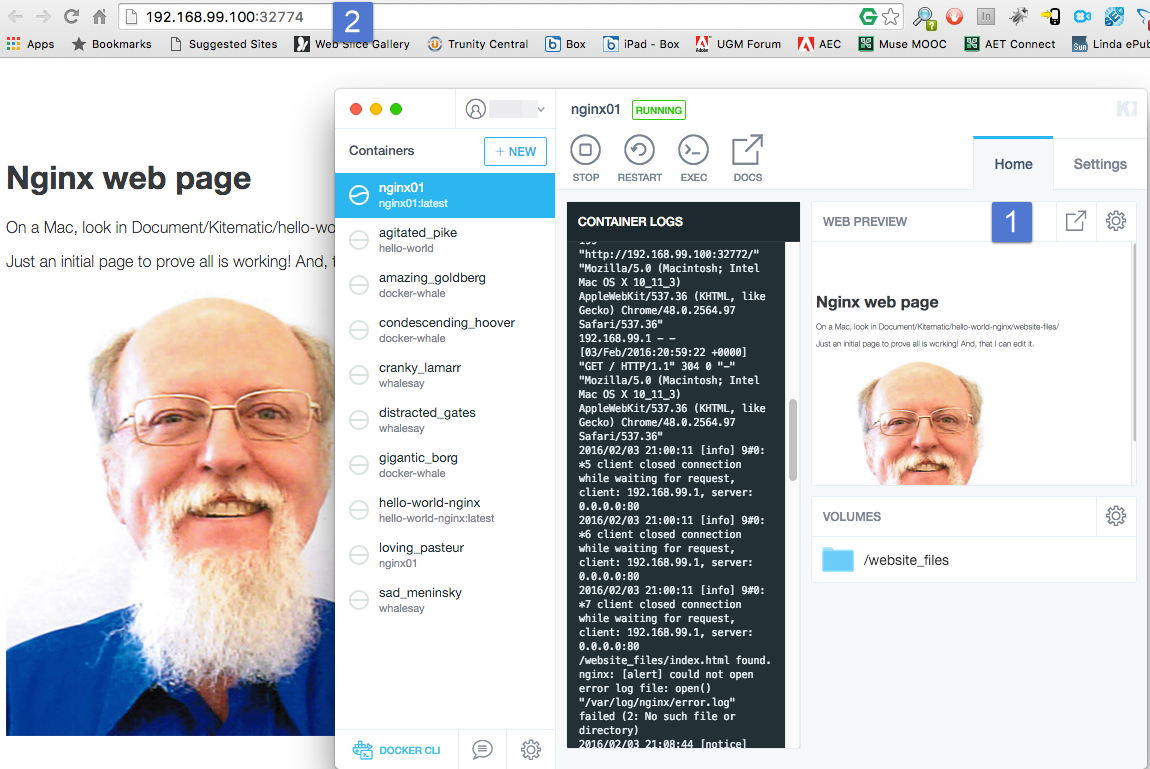
In the screen capture above, I have opened a browser window [1]. You see the default IP address and port assigned by Kitematic [2]. Obviously, one can make a lot of changes in these environments. This is just the start of what is possible.
So, did you find this discussion helpful? Do you plan to further investigate Docker containers? What additional items would you like to know about this technology? I look forward to your comments.
Very nice write up. I have 4 sites running in docker containers on Digital Ocean (Personal site, Ghost blog, and 2 client WordPress sites). I used dockerfiles while experimenting, and then orchestrated bringing everything “up” with Compose. Possible topic for Web Professionals meeting…