At our monthly Central Illinois Web Professionals and Adobe User Group meetings, I have been holding a series of discussions on the fundamentals of working with PHP. I started with the basics of server side scripting, PHP variables, syntax and related topics. Larry Ball then provided a session on debugging PHP. I followed that with a review of how to use PHP to connect to a database using PDO (PHP Data Objects). At the last meeting, I covered the fundamentals of the MVC (Model View Controller) architecture. At our Nov. 12 meeting I plan to cover CakePHP (which relies on the MVC architecture). I thought it would be appropriate to also include my thoughts in this weblog post (for those who may have missed something I said or wish to refer to this at a later time). To get started with CakePHP, we need to download the framework and install it. The current version is 2.4.2.I tried a couple of different approaches.I wanted this working on both Windows and Mac computers.
Mac – I downloaded the software and placed it in a CakePHP directory which was accessible to Mamp. In my case, applications\MAMP\htdocs\CakePHP. I then opened a browser, pointed to the URL – http://localhost:8888/CakePHP and discovered the following errors.
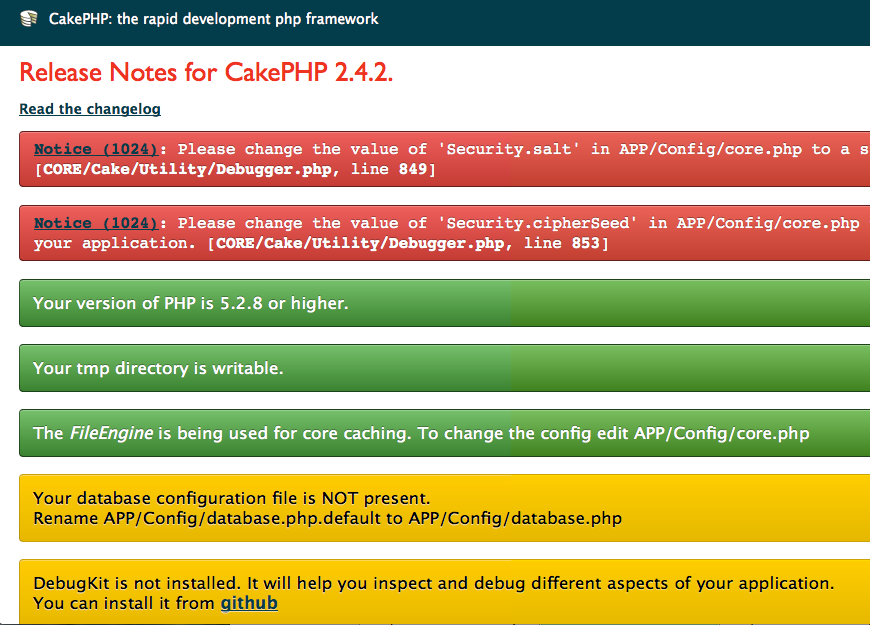
Red is never a good sign, is it? I followed the instructions shown above (you may need to click the image to see the full version). That took care of the red errors. I next followed the instructions for the database configuration error and removed that. Lastly, I decided to install the Debug-Kit as recommended (last yellow error above). First, you download this from GitHub (yes you can also do all this with terminal as an alternate approach). Since most of the online tutorials reference the terminal, I thought I would try a different approach. Extract the archive and place it in the applications\MAMP\htdocs\CakePHP\plugins folder as DebugKit. There is a readme Markdown file which explains the steps necessary to activate the plugin.
You first need to modify the file applications\MAMP\htdocs\CakePHP\app\Config\bootstrap.php file to include a pointer to the plugin. the single line below takes care of that. Actually, this was already commented out in the file on line 74 so I just uncommented it.
CakePlugin::load(‘DebugKit’);
The actual screen capture is shown below (I provided the text so it could be copied by readers if necessary).

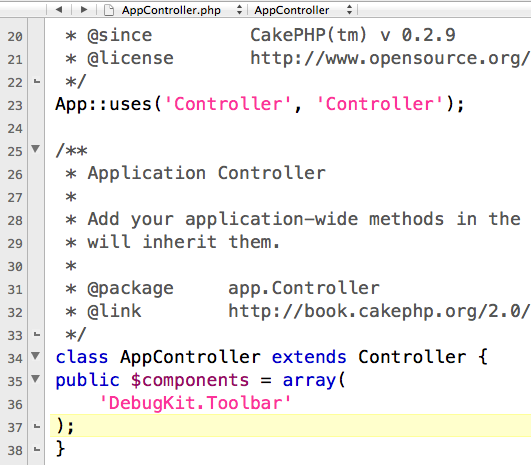
You next need to modify the applications\MAMP\htdocs\CakePHP\app\Controller\AppController.php file to include the DebugKit toolbar. The following lines were needed:
class AppController extends Controller {
public $components = array(
‘DebugKit.Toolbar’
);
};
Again, here is a screen capture as well.
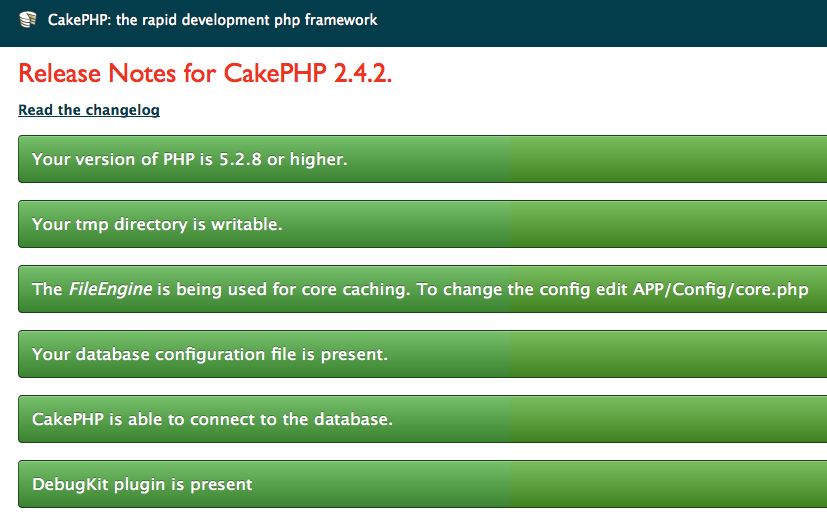
Once I made these changes, I saw the following screen when visiting http://localhost:8888/CakePHP
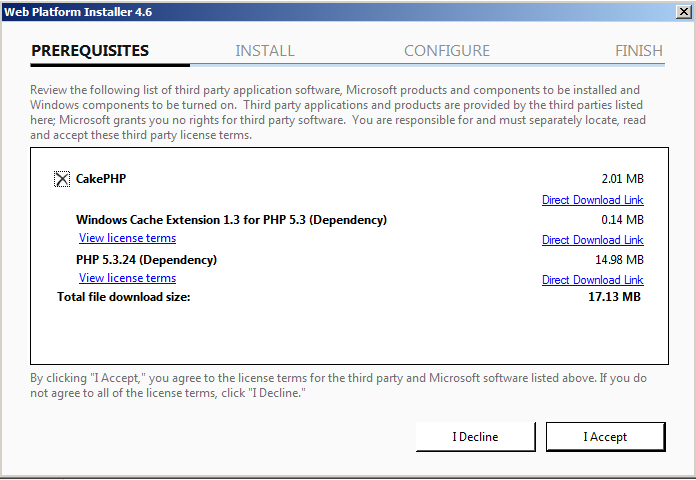
Windows – I relied on Windows Server 2008 R2 and the Web Platform Installer. CakePHP is included (and is the only application framework listed). One opens the Web Platform Installer (this would be a separate download and install for Windows 7 computers).
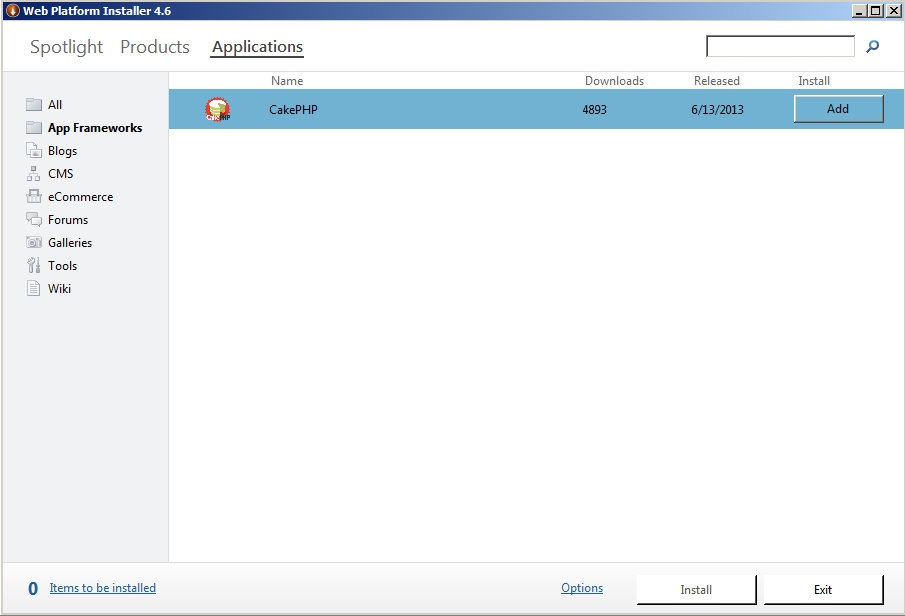
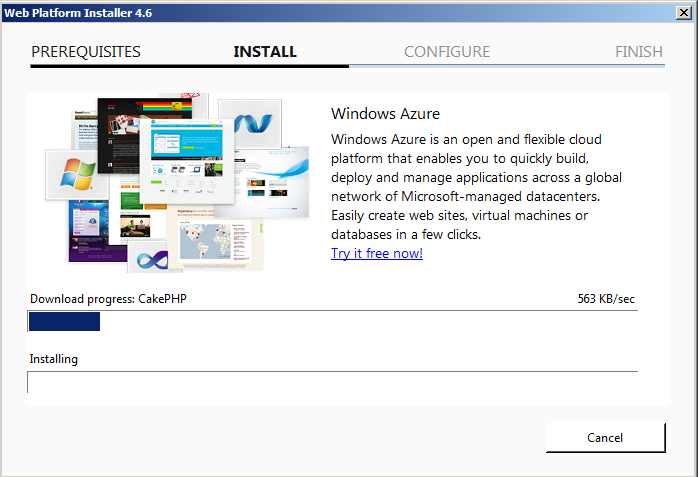
As with most Windows installations, one follows the steps and accepts most of the defaults. I include screen captures here for those not familiar with the installation process using web Platform Installer. Once one had added CakePHP to the application list to install (you can only do one at a time), click the Install button. You will next see the screen below.
You will then see the installation progress bar.
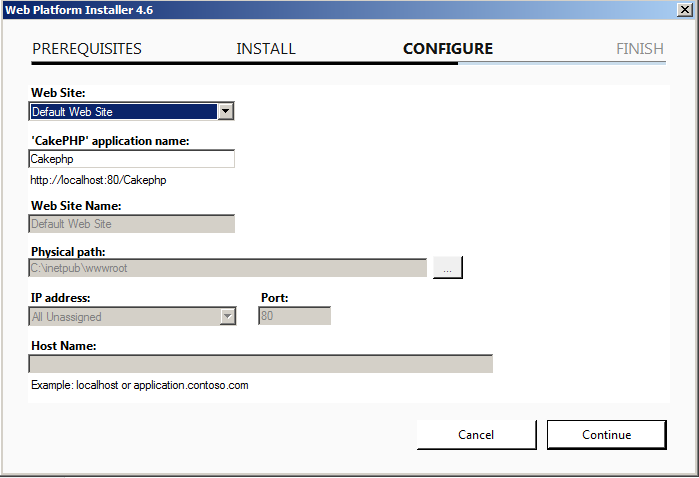
You next need to decide on the folder to install (for a Windows server running IIS in a test environment, this is often a folder in c :\inetpub\wwwroot. [Never use that location on a production web server connected to the Internet. If there is a problem and the site is compromised, it is possible for an attacker to gain access to all the programs, including the operating system, on the computer. I strongly recommend using a networked drive which only contains sites.]
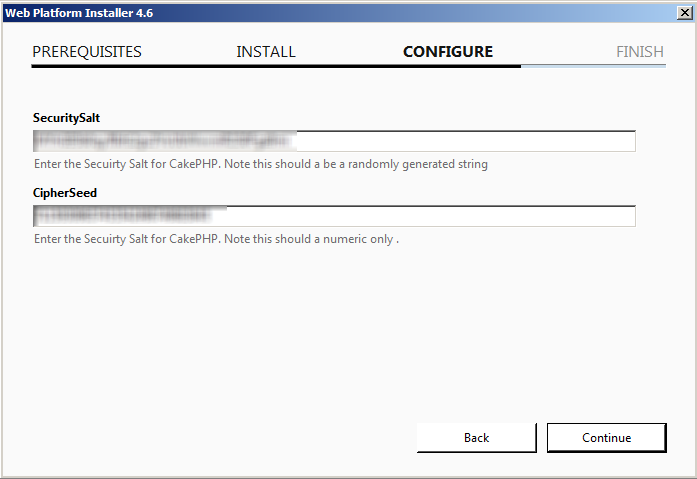
The next step is to select salt and seed values (obviously not shown even though it is only a test machine). On the Mac, I had to manually edit these values in the appropriate files.
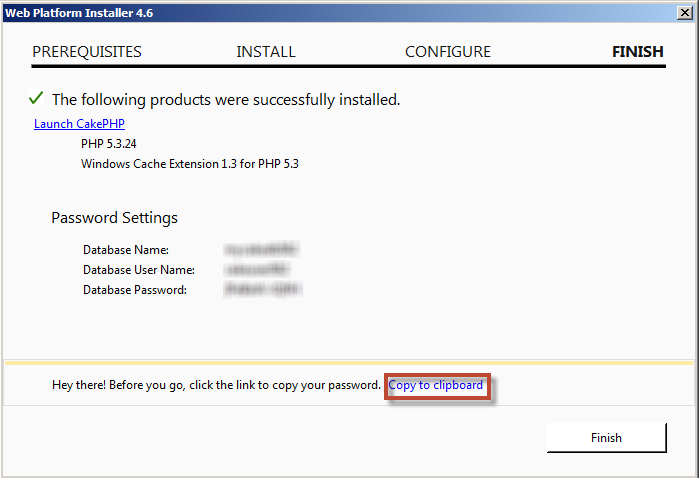
Lastly, one is prompted to connect to the database. In my case, I am using MySQL on IIS (since many students will work with MySQL on their Linux server). You will note that it is a good idea to copy all the access credentials to the clipboard and store them in a secure location (in the event you need to reference them in the future). See the highlighted message below.
Lastly, I had to install and configure DebugKit. I placed this in C:\inetpub\wwwroot\CakePHP\plugins\DebugKit. Once I had completed a similar configuration to that described for the Mac, I accessed the site via my browser.
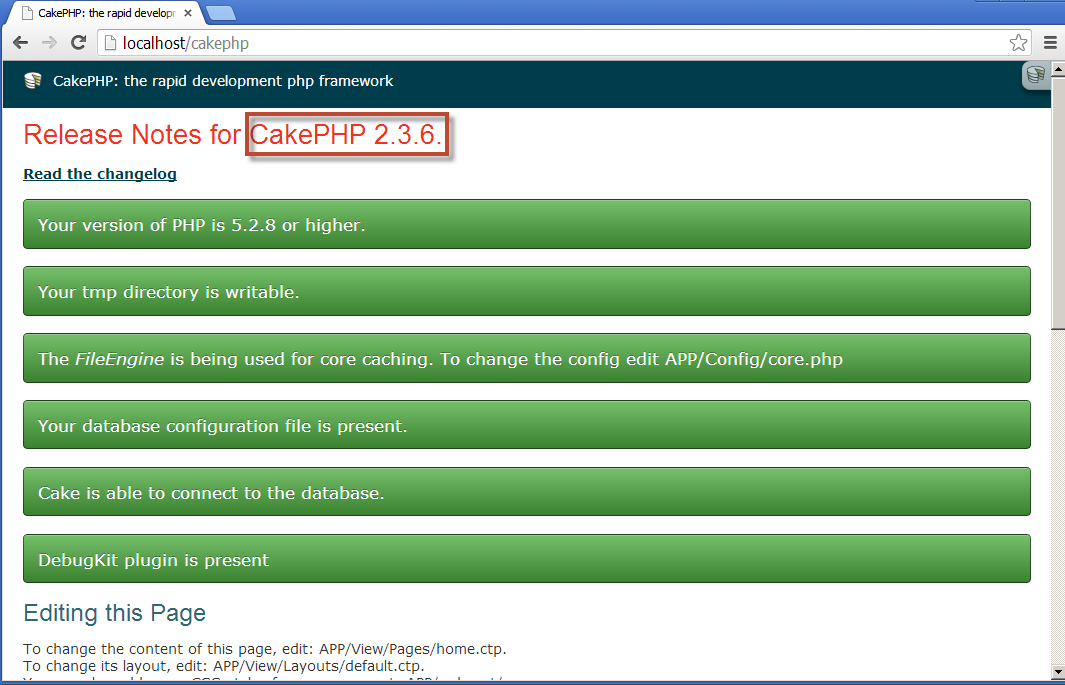
Ok, I now have CakePHP running on both my MacBook and windows 2008 R2 server. One difference is that the Windows version of CakePHP is 2.3.6 and the Mac version is 2.4.2. for initial testing purposes, I am ok with that. In the long run, I will likely upgrade my Windows version to be the same level as the Mac.
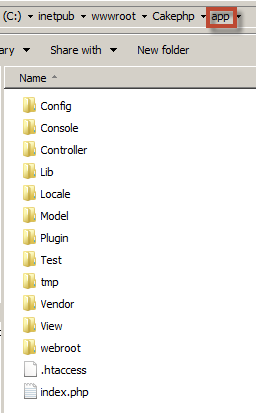
Now that I have working installations of CakePHP, it is time to briefly examine the folder structure. Remember this is following the MVC architecture. The following folders are found in the installation.
- app – this folder contains the custom application code and can be thought of as the public webroot (it will also contain the model, view, and controller).
- lib – this folder contains the core CakePHP links.
- plugins – this folder contains the plugins – DebugKit for starters.
- vendors – this folder is for third party code (like GeShi – generic syntax highlighter).
If we examine the app folder contents, we see the following folder and files initially.
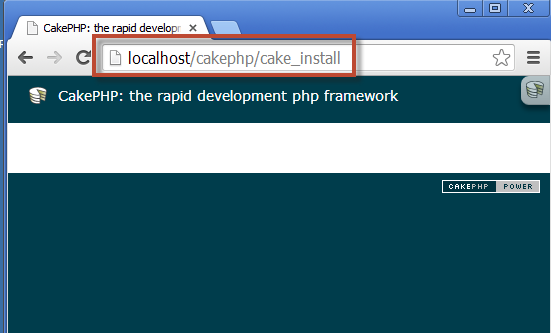
When we visit http://localhost/CakePHP/cake_install (or run cake bake in terminal on a Mac), we will start to work with the actual code. Initially, we may see a screen like the following (indicating the framework is installed and working, but we haven’t written any code yet).
We now have everything installed and working. What to do with this environment will be the subject of another weblog post.
As always, I am interested in your comments (and whether you find this information helpful). I look forward to the feedback.
I would recommend using a vhost setup (with .dev or .local tld) on top of that routing to the document root /webroot/ to avoid assets to be wrongly linked and to be closer to the real “productive” environment.
Then it would just be “http://my-domain.local” instead of “http://localhost/CakePHP/cake_install”.
Mark
Good point. I appreciate your feedback. I plan to cover additional configuration and work in subsequent posts. They should appear in coming weeks.
Best always,
Mark
I am trying to follow your instructions to install on Windows server 2008. The installation fails at the MySQL login screen . The password is not accepted. though it is the right password.MySQL is installed at localhost:3300 , Am i missing something
Please help
Make certain you use the username of root (I have had some students use administrator or similar and the login fails). Otherwise, this should still work. Of course, these days, I would consider working more with Server 2012 (although that environment is more restrictive). Server 2016 is coming soon.
Best always,
Mark