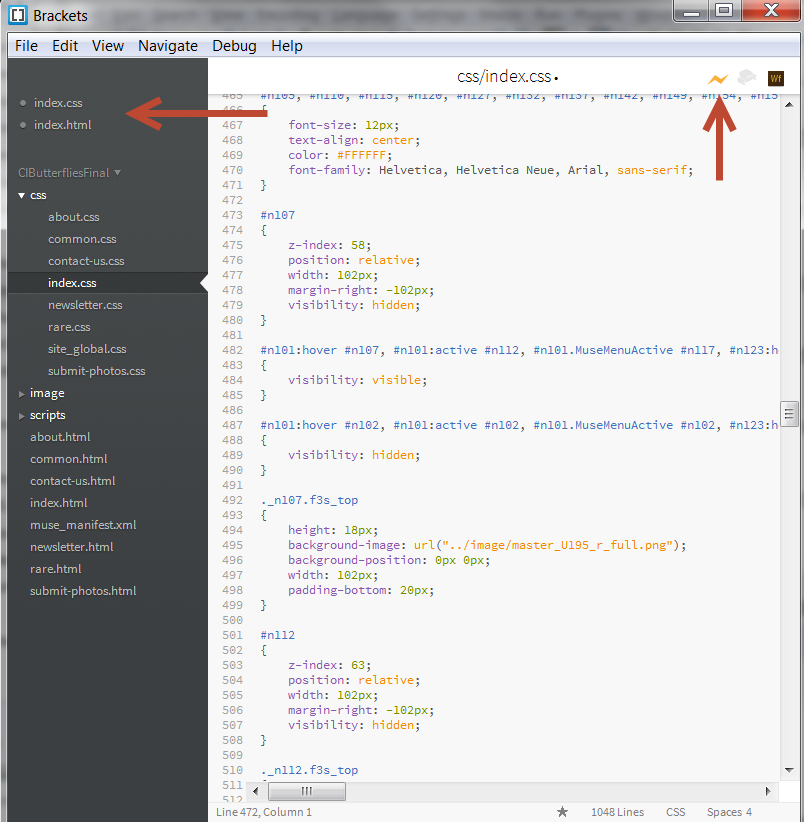
Last July, I examined the Adobe Brackets tool (for editing HTML, CSS, and JavaScript files). That version was Sprint 10. I am now working with Sprint 20 and think it is about time to review the tool again. A lot has changed. Many thanks to Ray Camden for recently providing a webinar on Brackets (which provided the impetus for this overview). You can obtain the Adobe Brackets tool at no charge (it is open source) from download.brackets.io. If you are using Windows, you will be able to download a .msi file to install Brackets; if you are using a Mac, you will see a .dmg file to install in your Applications folder. As I mentioned in my previous post, one very interesting aspect of this tool is that it is written in HTML, CSS, and JavaScript. Therefore, you can create your own extensions and include them in the tool. Being able to modify the editor with just knowledge of HTML, CSS, and JavaScript makes this tool very extensible. I think the most impressive part of this tool is the ability to see a live preview of your changes. This is immediate. You make a change to the CSS and see the effect in the Chrome browser as soon as the change has completed. No more having to save a file > refresh your browser > realize you made a mistake in your CSS > return to the editor > make more changes > save the file again > refresh your browser and repeat (for me many times). Let’s take a closer look at the tool. If you examine the interface (below), you will note that it is rather minimal. The arrow on the left points to the most recent files you have accessed. Underneath is a list of all the files in the project. The arrow on the right points to the Live Preview icon (and some extra extensions). You may need to click on the image to enlarge it.
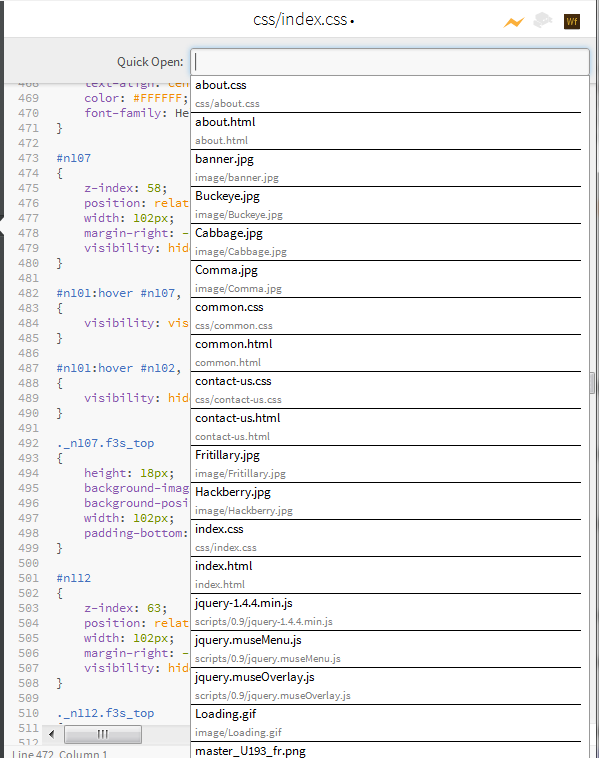
A couple of enhancements I really like are the shortcuts to quickly jump to any file Ctrl+Shift+o (or Cmd+Shift+o). In the screen capture below, you can see many of the files in this project.
Select the file, click on it and it is immediately open for editing.
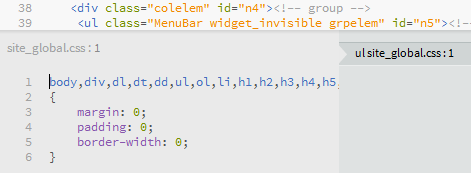
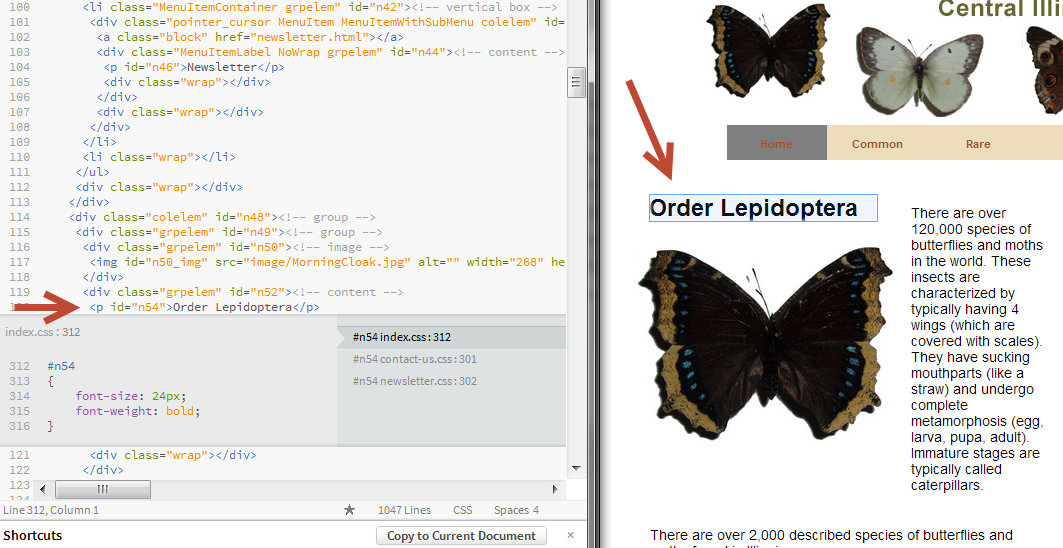
When working on a HTML file, one can use Ctrl+e (or Cmd+e) to quickly see/ edit the CSS associated with the given element. In the example below, I selected the element and then immediately saw the associated CSS (which I could edit).
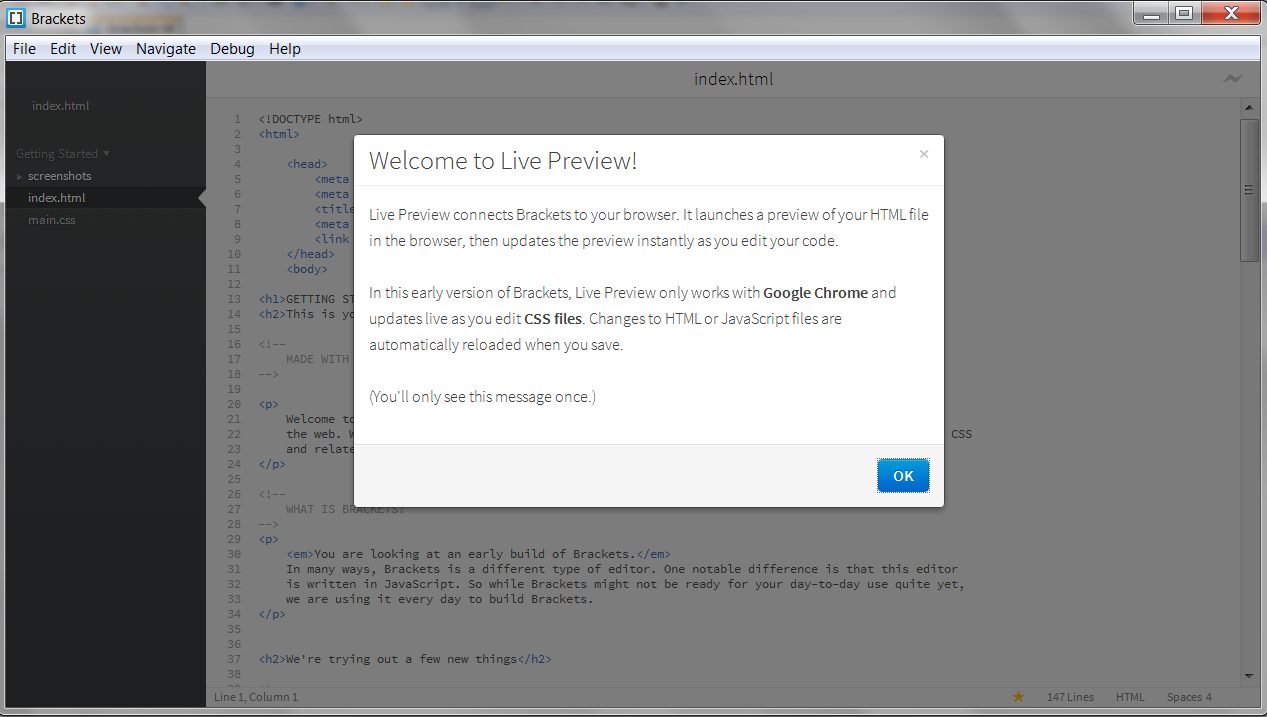
The Live Preview icon is in the upper right of the interface. The first time you select it, you are informed that it will only work in Chrome. You may also receive a message that you need to restart Chrome to enable remote debugging (Brackets will do this for you).
You will only see the messages once. You can then edit your HTML and CSS and observe the effect immediately in the Chrome browser (at the present time, only Chrome is supported). Note the screen capture below (Brackets is open on the left and Chrome on the right). The arrow (on the left) indicates the line of HTML I am examining; the other (arrow on the right) shows the highlighted view in the browser.
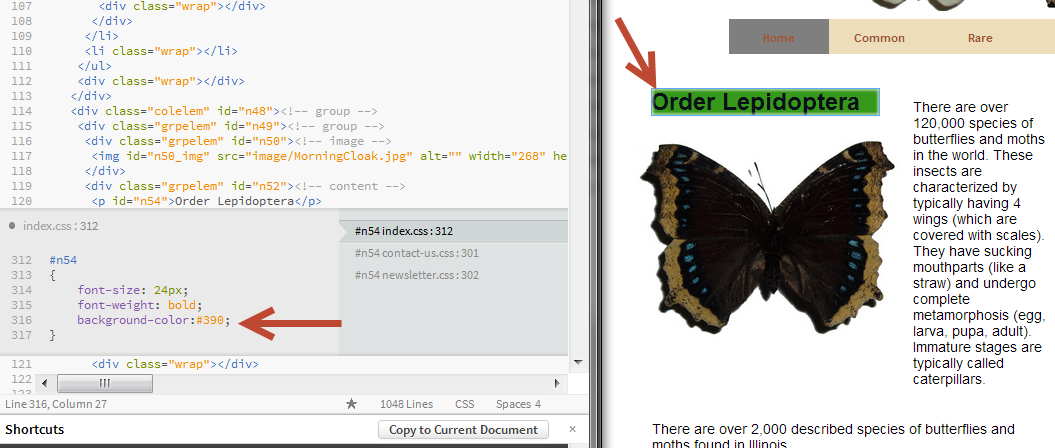
Ok, I can do the same with developer tools (or Firebug in Firefox). But, one can then change the CSS (using the quick edit feature while working in the HTML document) and immediately observe the effect in the resulting page. The biggest issue I have with tools like Firebug is when I make several changes and then can’t save my work and have to remember what I did. The result is shown below (and the update in the browser was immediate). Yes, I know that I am graphically challenged. I just wanted to demonstrate the effect by changing the background color.
So, this is a pretty impressive editor in the basic configuration. But, one can also add extensions. I recommend examining the official Brackets extensions site at GitHub and selecting those you find useful. I have selected some (listed below). You may decide that others are more useful to your workflow. Essentially, you download the zip archive, extract the contents and place each extracted folder in the Brackets extension folder. You can use Brackets to open that folder (Help > Show Extensions folder). Keep in mind you must restart Brackets in order for these extensions to become active (Debug > Reload Brackets or F5).
The extensions I have found most useful so far include:
- BracketLESS (compiles LESS files to CSS on save)
- Brackets Beautify (beautify HTML, CSS, and JavaScript using js-beautify)
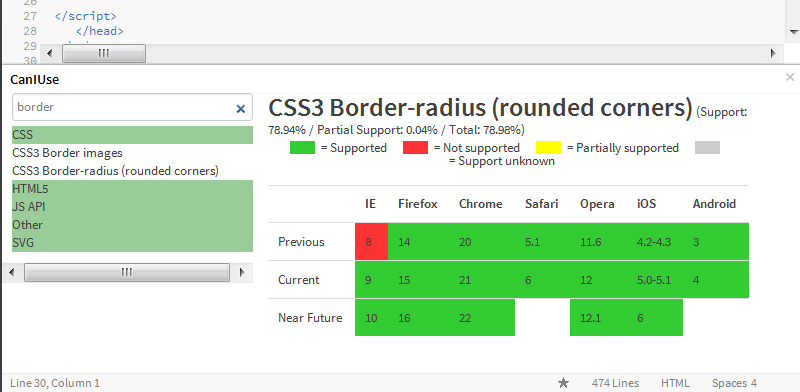
- Can I Use (inline viewer of CanIUse.com data)
- CSSLint (JSLint pre-installed)
- Display shortcute (display Brackets shortcuts)
- Edge Web Fonts (browse free fonts from Edge Web Fonts collection)
- PhoneGap (extension for Brackets to manage PhoneGap projects)
- W3C Validator (validate your HTML code as you develop it)
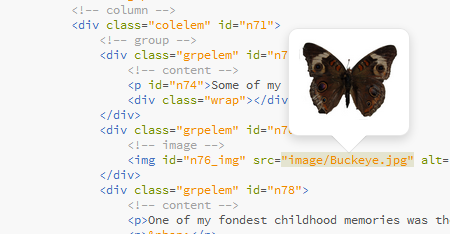
- Hover preview (display preview when hovering over color, gradient or image)
Let’s examine a few of these. Probably the most useful is the Can I Use extension (which interfaces with the CanIUse.com website). Perhaps I am working with a web page and decide a border-radius effect would be appropriate. I can quickly determine if this will work in various browsers. Keep in mind you can activate most of these extensions form View on the Brackets menu. I can see at a glance there is significant support for border-radius these days.
I also find the hover preview quite useful (in case I have not properly named my images). This also works for colors and gradients (for those who can not think in hex colors or rgb values). I know. There must be a few *grin*. An example of hover preview is shown below.
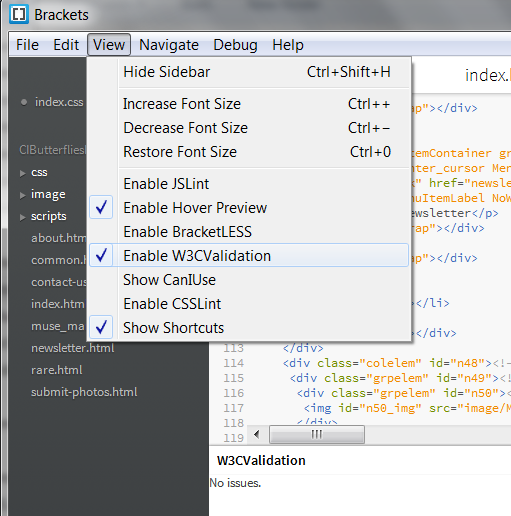
W3C validation is another useful extension. It is nice to know that your web page will pass validation before deploying it on a server. In the screen capture below, I also show the extensions presently active. If you wanted to activate others, just click on them (or click again to deactivate).
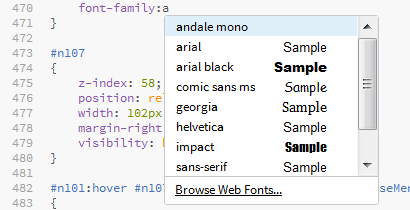
Since this is a tool created b Adobe, there is tight integration with Adobe Edge Fonts (using the Edge Fonts extension). If you are working in a CSS file and begin typing the font-family declaration, you will see that you have the choice to Browse Web Fonts. (Since this is an open source tool, you can also download an extension for the Google fonts).
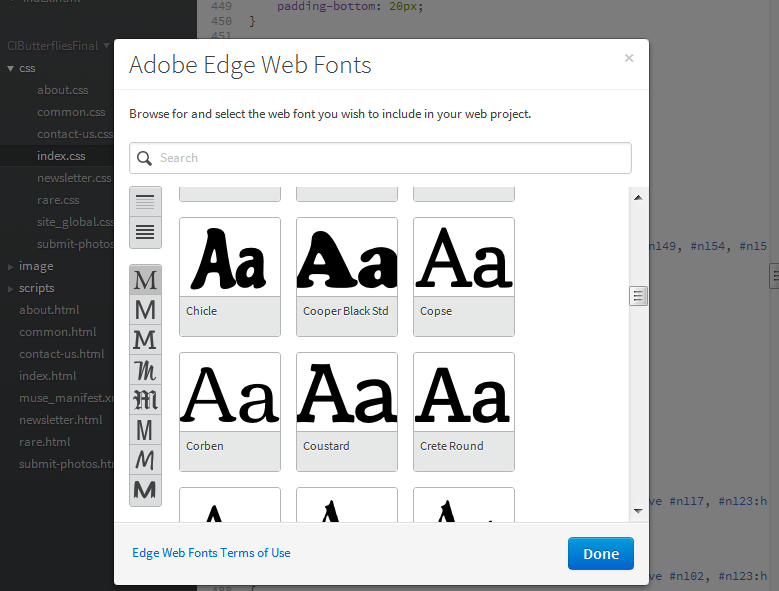
If you choose to browse web fonts, you will be presented with a number of choices. You can select the one you find most appropriate.
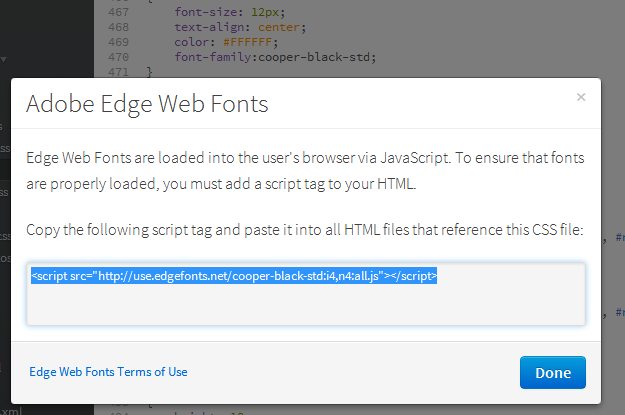
You can then click on the Web Fonts icon (in the upper right of the interface) to locate the necessary HTML code to add to your file so the font is properly loaded and available.
There are a number of additional useful extensions. I hope this weblog post gives you an incentive to download a copy and try Brackets for yourself. I am always curious if you find this information useful. I look forward to your comments below.