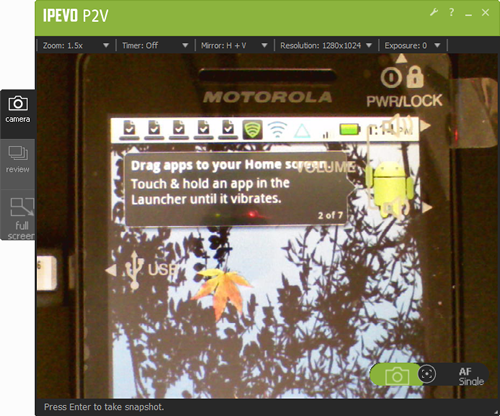
I have participated in a number of seminars this year where some sort of document camera was needed. After a little research, I decided to obtain the IPVEO P2V camera. It arrived today. I found the install to be a breeze and the interface is very intuitive. I particularly like the auto-focus feature. Since I will soon be demonstrating various HTML5 applications on different devices, I thought it would be helpful to share some of the fundamentals of this camera with others. After one runs the CD (which contains the software and drivers), one then connects the device to the computer. In a matter of seconds one can take snapshots. The initial interface is shown below. In this case, I am looking at my Droid 2 phone.
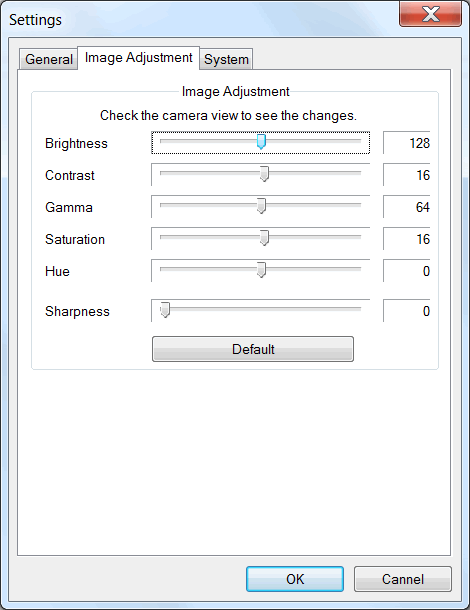
 Note the icons to review snapshots as well as go into full screen mode on the left of the interface. The camera and auto-focus controls are at the bottom right. The menu allows you to zoom, take timed snapshots, orient the image (horizontal and vertical mirroring), change the screen resolution and exposure. Settings can be adjusted per the screen capture below.
With minimal setup, I was able to take this photo of my weblog when viewed on my BlackBerry Torch (note this has a different look on mobile devices).
The image below is the same site a viewed on my Droid 2.
I plan to use this when working in various classroom settings over the summer (often a document camera is not readily available). Hopefully the device travels well.


