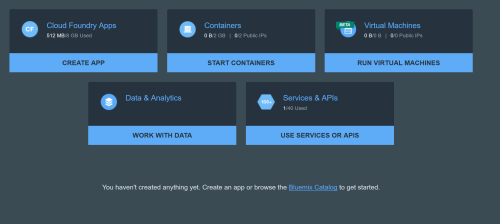
I am amazed at the different ways one can readily create apps for mobile devices these days. Adobe Phonegap (and Phonegap Build) is a great solution. IBM’s Bluemix offering with the Kinetise service is another. I previously provided an overview of Bluemix and covered Cloud Foundry integration. Using the Kinetise service allows for rapid development of an app prototype without writing a single line of code. As with PhoneGap, one simply generates a QR code which can be scanned by your mobile device to install the developed app. Alternately, a custom web address is provided so one can download from a browser on a mobile device. Let’s see how we can quickly develop a mobile app using Kinetise and Bluemix.First, you need a Bluemix trial account. One can then utilize various services. Once you access your Bluemix console, you have the option of selecting various services.
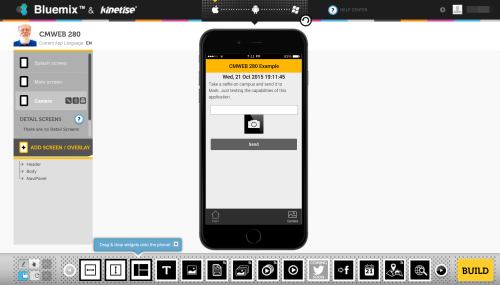
After completing an introductory tutorial, you will have access to the Kinetise app development environment. It is simply a matter of deciding what to include in your app (and then customize it). The interface as a whole looks like the following. There are a number of icons (bottom row). You select the items you wish to include and drag them to the appropriate spot on the phone image. To incorporate some items (such as camera interaction), you will need to include a form (and decide how you wish to handle the generated data).
You can create multiple pages in your app. You can customize the splash screen as well as the information which will be displayed on your device. If you wish to interact with external resources (like Google maps), you may need to obtain API certificates from the appropriate resource. Typically, instructions or an overview is provided in this environment.
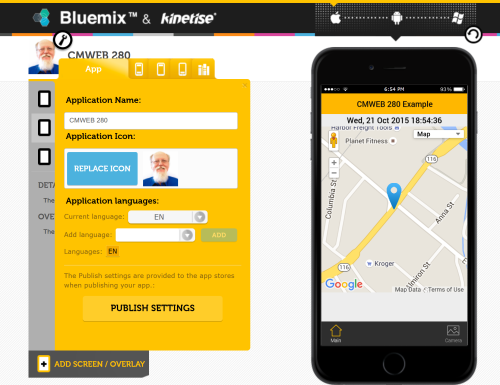
In the screen capture below, I have customized the initial app description and image.
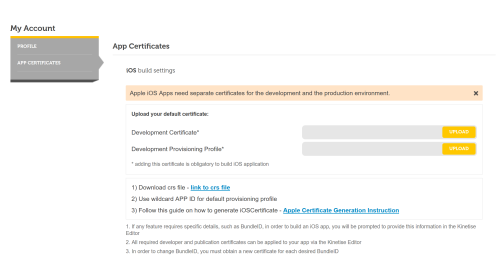
Once you are ready, you can choose build from the menu at the bottom and create your app. Keep in mind that you will need a certificate and key if you plan to develop iOS apps. This is also true of PhoneGap. You can easily insert the appropriate values (assuming you know how to generate the appropriate certificates). I covered how to do that in a prior weblog post. [The focus was on PhoneGap in that post]. A separate screen is provided for one to enter the appropriate values for iOS devices.
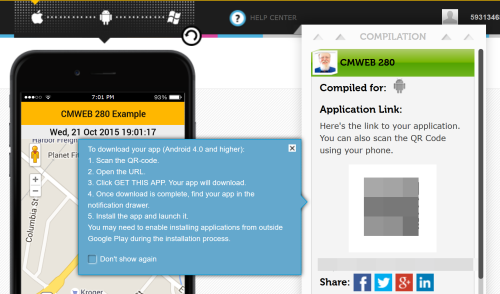
Once you have completed your work, you build your app (and can then scan the QR code to install it). Yes, I have blurred out the QR code and link in the screen capture below as the initial app I built is certainly not ready for prime time.
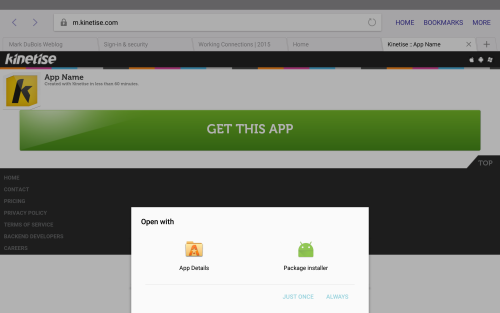
Once you install the app, it will appear on your Android device (and you can then use it). In this case, I am using an Android tablet and have just scanned the QR code. I am starting the install process.
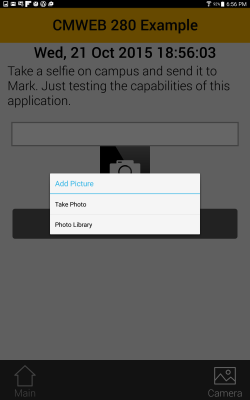
Once the app is installed (and you grant appropriate permissions – such as access to the camera), you can then use it. In this case, I am about to take a photo. This will be sent by the app to an email address (obviously you can also connect to a database or server and process the information as desired).
The app does not reveal where the email attachment is being sent, just that it was successfully sent by the app. In my case, I simply collect these as email attachments.
In terms of the overall app development process, I thought you might want to see a quick video I put together of how I work with Kinetise.
As you likely suspect, I cover the fundamentals of working with this environment (along with PhoneGap fundamentals) in our mobile app development course.
I am curious if you have used this environment (or if this is all new to you). Obviously, I look forward to your comments.