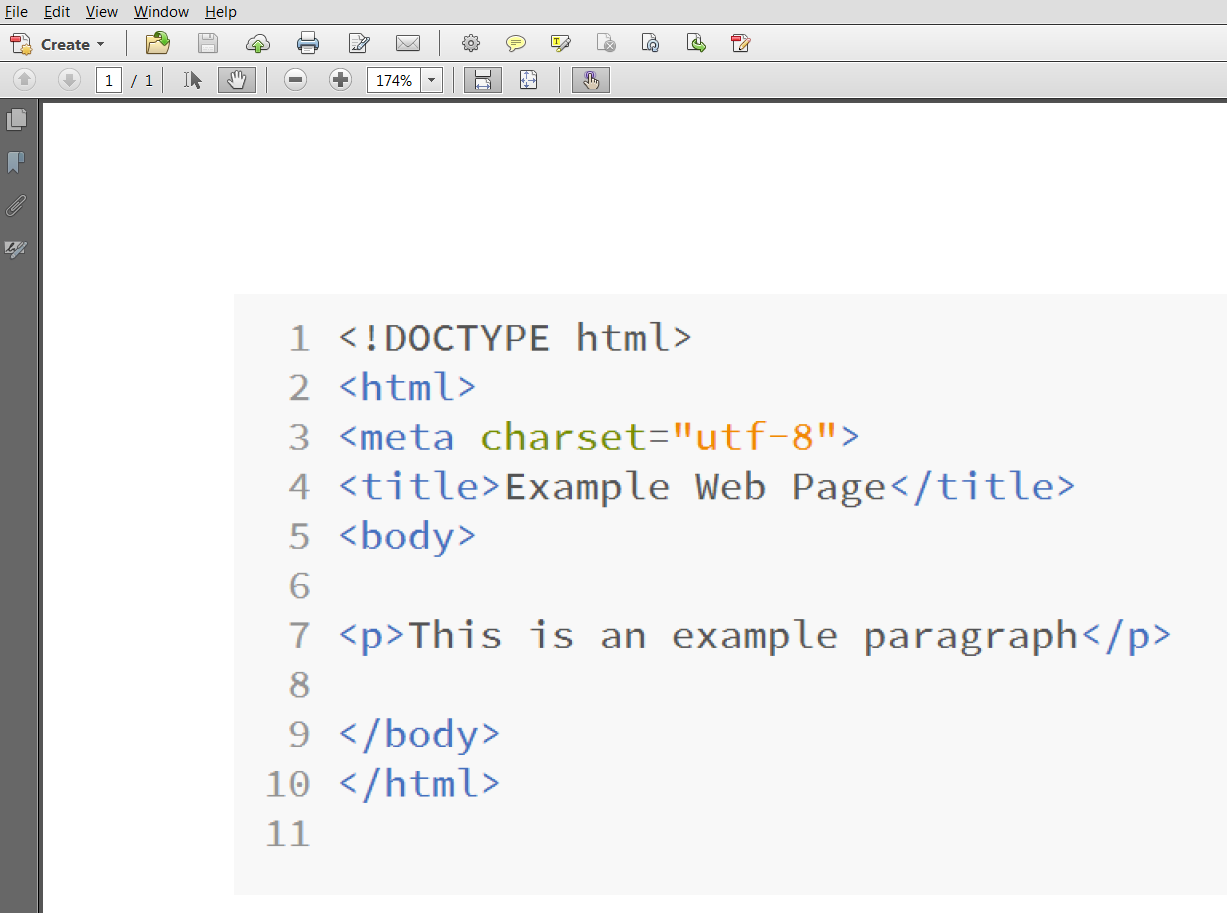
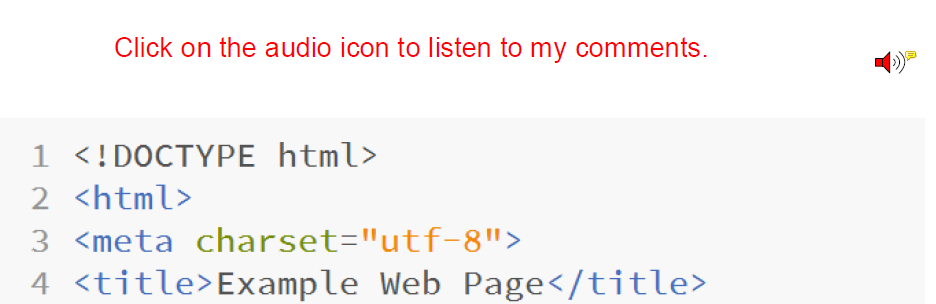
When I have the time, I try to provide feedback in the way of audio comments on student assignments. As we started the fall, 2014 semester, I also did this. Comments I have received in past semesters (from students) indicated that they prefer this sort of feedback. They have told me they feel like it is one on one review of their work. Personally, I find that I often provide more information via audio that I would typically type in a document. Essentially, I use Adobe Acrobat to create this feedback. I thought it might be helpful to share the overall process I use. Yes, there are many other approaches to accomplish this. Here is my workflow.The first thing I do is create a PDF version of the submitted assignments. In this case, I am using a contrived example just so readers can see what I do. I pretended to be a student again and created a simple web page. I then converted this web page into an Adobe PDF document with Adobe Acrobat. A screen capture of the actual document is shown below. Yes, you need the full product (part of your Creative Cloud subscription) to include these audio comments and create the appropriate PDF file. In this case, I simply did a screen capture of the HTML source code.
Next, I use an audio recording program to capture the appropriate audio. To keep it simple, I am using the default Sound Recorder in my Windows system. One could be more sophisticated and use Adobe Audition or any number of tools. If you choose to use the default Sound Recorder (shown below), remember that the files are stored as .wma files and will need to be converted.

I click on “Start Recording” and record my comments. Once I am finished, I click on the same spot which now says “Stop Recording” and store the resulting .wma file.
Now that I have the audio I want to include, I will need to convert it (I could save in alternate formats with tools like Adobe Audition, but .wma is the only output for the Sound Recorder application. I used Adobe Media Encoder to change this file format to the appropriate one. Once the app is open, I can drop the necessary file into the workspace and make the appropriate conversion. I included a screen capture below.
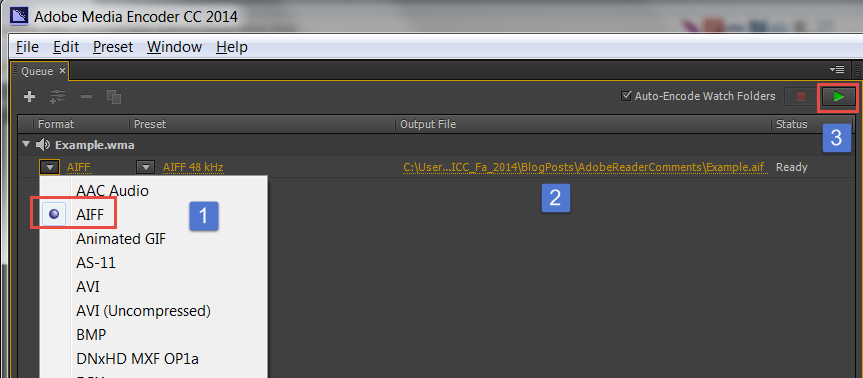
I verify the output file type is AIFF (I know Acrobat likes this type of file). The output type is highlighted near the number 1 in the above image. I also make certain the output is being placed in the proper folder (number 2 above). I then manually perform the conversion by clicking the play icon (number 3 above). Once I have confirmed the conversion is completed, I usually remove the file from the queue.

I highlight the file, then click the [-] icon to remove it from the queue.
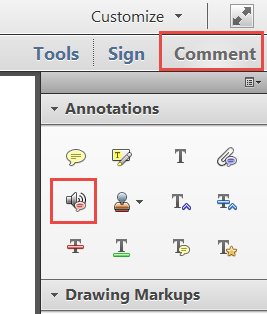
Now, I have a file I can include in my PDF document. I return to Adobe Acrobat and open the Comment panel (upper right part of interface). I then choose to add an audio comment.
I am then presented with the Sound Recorder dialog in Acrobat. Of course, you could just record the audio comment directly (instead of taking the additional steps). However I find that I like to provide feedback on all submitted assignments and then generate the PDF files. This means I assign a unique name for each student to the audio file and then do my work in Acrobat). I find it is easier for me to make consistent comments across all assignments submitted when I take the extra steps. You may well decide to do it differently. I browse for the appropriate audio file and place it on the document.
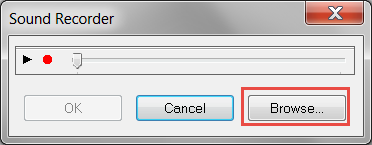
After browsing for the file, I usually listen to the contents (note play icon above) to confirm I am using the appropriate file. I then place it using the default audio icon.
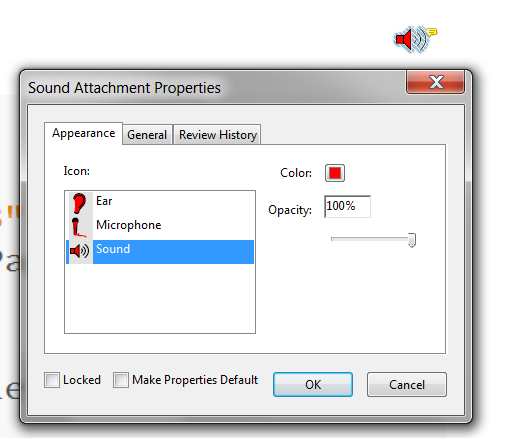
I also typically add a text comment pointing out the file. The student needs to either click or double click on the audio icon to listen to my comments.
I then save the file and distribute it to the student (I typically use Adobe Send, but one could also return these files within the appropriate Learning Management system (I use Moodle). Yes, these files are large as they do contain audio.
As mentioned, many find these audio comments helpful. If you have not experienced this before, download this example and listen to it using Adobe Acrobat Reader. Note that some academic institutions use alternate PDF readers (such as Primo PDF). These audio comments work best in the default Adobe Acrobat Reader.
I am curious if you have considered using audio comments as part of your feedback on assignments. What are your thoughts about this approach. I look forward to your comments.