Adobe released another app for iOS devices on June 15. This one is called Hue. In some ways, it is like the app Color (formerly Kuler). But it works for video. Essentially, you take a photo and select the desired color which you can then apply to a video clip (or an entire sequence of clips). You place these files into your Creative Cloud library and can then access them with tools like Premiere Clip (iOS) or After Effects (on the desktop). I thought it might be helpful to provide a quick overview of the tool.At the moment, Hue only works on iOS devices. Given that Shape and Brush are now available in the Google PlayStore for Android phones, I hope this app is also ported to Android.
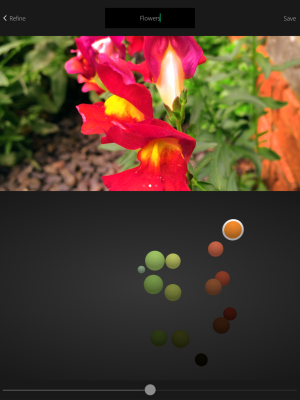
Once you open the app (and sign in to your Creative Cloud account), you can take a photo (or examine photos in your camera roll). In this case, I am looking at a photo I just took of some snapdragons. The color bubbles will move around and you tap on one to select a given shade. You can then save (and name) that moment in your Creative Cloud library.
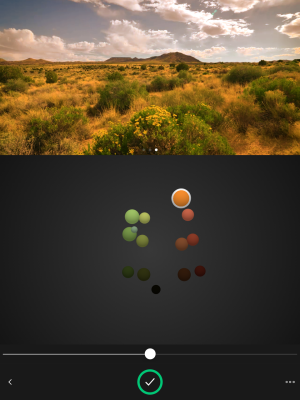
Once you have captured the moment, you can test it with one of the supplied images or video clips within Hue. If you like the results, you can then apply it to your own video using the appropriate application. In the example below, I have selected a color from the flower photo and am applying that to the supplied video in Hue. If you want to see the original video in Hue, you long tap on the video. You can select alternate color bubbles until you have the effect you desire. You then save your moment to your Creative Cloud library.
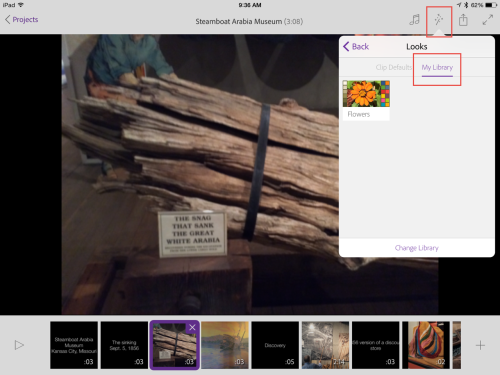
You can then apply it to a video using tools like Premiere Clip (iOS) or desktop applications (like After Effects). Moments in the library will look like the following. In this case, I have opened an active project in Premiere Clip on my iPad and am looking at the moment in my Creative Cloud library. To apply this, I simply tap on the desired moment (the one I named flowers in this case).
The result is then applied to my clip in Premiere Clip (as shown in the screen capture below). You see the tint has been applied to the clip. If this is not the desired look, I can always select another color bubble in Hue and apply that to the clip until I have the desired results. I can then publish my work.

Although I have not worked that much with video, I believe the Hue app provides me with a lot of choices. If I wanted to have a video clip appear “cooler” or “warmer,” I could apply an appropriate color using Hue as the starting point. I see a lot of capabilities with this app. I particularly like that I don’t have to worry about the specific color of the lighting when I took the original video. As long as it is “reasonable,” I can then apply a desired tint after the fact. And, I do this all on a mobile device.
As always, I am interested in your comments. What do you plan to use Hue to accomplish?