Perhaps the hardest part of working with badges was actually creating them. I decided to use Adobe Illustrator since it generates vector based images (and I haven’t used it that much in the past). I thought those reading this might like to see the process I went through. If you are curious where I got the idea for the specific form of the badge, it is based on some awards I received in grade school many years ago. I thought they looked particularly neat and tried to duplicate them in Illustrator. You will note that I did not include a photo of the original award because I can’t find them at the moment. I did refer to a number of sites on the WWW for reference from time to time. Yes, Google and Bing are my friends when it comes to learning something new. Unfortunately, I did not keep track of all the sites I referenced. Yes these steps are an accumulation of my research and i should have kept better track of which sites helped me along the way. I encourage those reading this to take better notes when they are working on their projects. Here are the steps I went through (along with screen captures).In Illustrator, I created a new file with a single artboard. I really didn’t care that much about the size as I wanted to have something which would be roughly 150 x 150 pixels as a finished product. I just needed room to work. The end result is shown below. Note that it is a lot larger than the actual badges.

Personally, I think this turned out pretty well. So, here are the steps I went through.
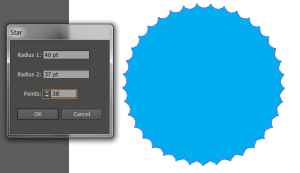
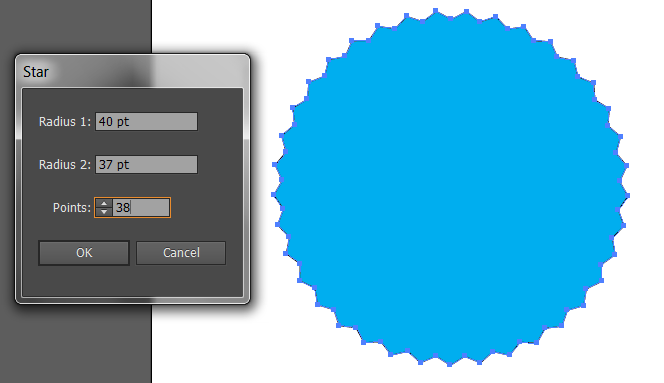
- I used the star tool to generate a single star with a number of points (and a fill color). Note that you can double click on the actual tool to open the properties. In this case, I chose a large number of points on the star.
 I also changed the stroke and fill color.
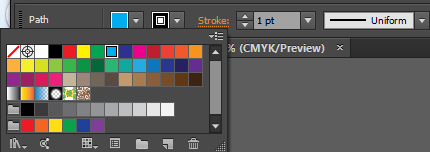
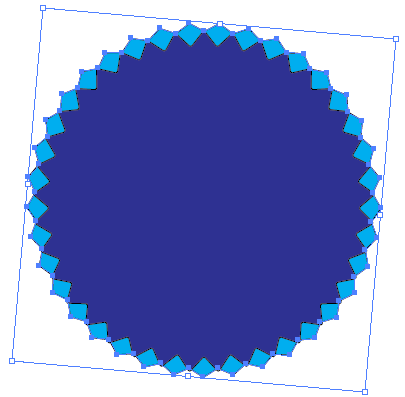
- I then drew another star with a different fill color (slightly smaller) and placed it on top of the first (after rotating it a bit).
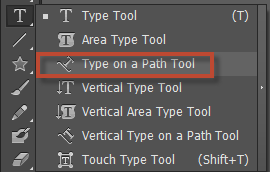
- Next, I added a couple of circles (and set the text to wrap on the circles). I wanted two separate sets of text as I plan on changing these for various badges over the course of semesters. Note the text on path tool below.
 Since I wanted the text to appear above and below, I had to flip the text at the bottom so it would look legible. I highlighted the flip box below.
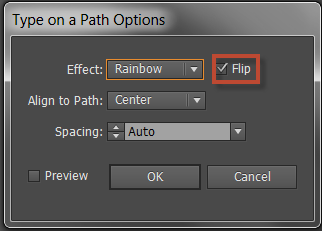
This yielded the following (with two lines of text I can now edit for each badge I need to generate.

- Next, I decided to add a couple of circles outside the text (with different stroke sizes) to separate the text from the edge of the badge.

- I then decided to add a central text field (with a different font and color. I also decided to place a single line above and below the central text. Lastly, I added a few small stars above the line. I then grouped the stars, copied and flipped them and placed them under the line beneath the text. This resulted in the following “final” badge. I next modified the text for each appropriate class (and can generate more badge images as needed).
- Ok, that is the image part of the badge. Next, there is the JSON information necessary to make this an official badge. Thankfully, Moodle now takes care of the details for you. I plan to provide a separate summary of the steps involved in Moodle to create a badge and issue it. If you are curious what is included in the JSON (JavaScript Object Notation) file, examine the details at the Mozilla GitHub site.
So, for those who are curious, in order for a badge to be issued and available for inclusion in your Mozilla BackPack as a valid badge, the following criteria must be met.
- I must issue a badge within the Moodle environment. These will either be issued manually or because you met certain criteria (such as demonstrating competency for a given task or set of tasks).
- The badge consists of both the image as well as associated JSON code with the details for this badge.
- Both the badge and JSON code must be publicly available on my web server.
- You must then connect your Mozilla BackPack (holder for your badges that you wish to share with others) in Moodle. You then also decide what specific badges you want to make available to the public (you don’t have to make any of them public if you don’t want to).
Now you should have a clearer understanding of how I created the badges. At some point, I also plan to provide a list of badges one can earn in a typical CMWEB course. Of course, these will evolve as I see how badges are utilized in the Fall, 2013 semester.
I am curious as to your thoughts regarding badges. I look forward to your comments.