I recently posted a short note about Adobe Tutorial Player. Adobe also has a Tutorial Builder on the Adobe Labs site. This product has been available for nearly a year at this point. Essentially, it allows one to create a web page which documents the tasks you performed in Photoshop. I used Photoshop CS6. In theory, one would be able to place the web page on a tablet device, select a show me in Photoshop link and have Photoshop on your laptop automatically update. Note I said “in theory.” The documentation reads that the “Show me in Photoshop” will not work unless you “build a simple Webkit based application that loads the tutorial and sends the code embedded in the HTML file to a running instance of Photoshop via the Touch SDK.” A post in the forum associated with this indicated that some source code would be available soon. That post is nearly a year old. I did a fair amount of searching on the WWW and was unable to locate a single example of this simple code. Perhaps it is not as simple as we are lead to believe? Regardless, this is a useful tool so let’s take a moment and examine how to install and work with it. In this case, I am using my Mac and Photoshop CS6.
Step 1 – You need to download the Photoshop Script Listener Plugin for CS6. You can obtain either a Mac or Windows version of this file. I unzipped the Scripting Plug-In Release.dmg file and moved the Utilities folders to the Applications\Adobe Photoshop CS6\Plug-ins\ folder.
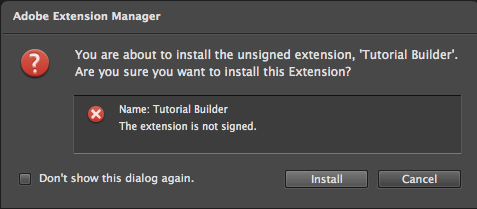
Step 2 – Download the Tutorial Builder Extension from Adobe Labs. This will be a .zxp file. Double click on it to launch the Extension Manager and install it. Note that this is unsigned (that is ok). A screen capture of the warning message is shown below.
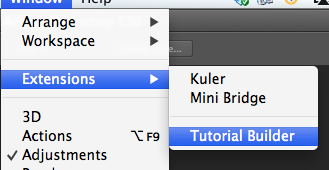
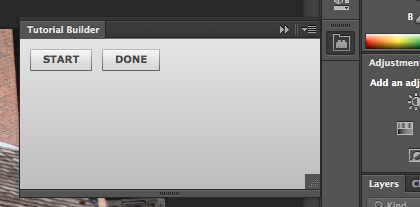
Step 3 – Open Photoshop and the Tutorial Builder panel (Windows > Extensions > TutorialBuilder). A screen capture is shown below.
Step 4 – start recoding your tutorial. I recommend having an initial image open before you start recording. You will be asked if you want to use the open image in the tutorial. I said yes.
Perform the tasks you would normally perform to accomplish a given task. In this case, I straightened an image, cropped it, etc. Once you are finished, choose done. You will be asked if you want to use the finished image in the tutorial. I affirmed this.
You next process the tutorial and save the results. Given that the “Show me in Photoshop” links do not work without that simple script that no one seems to have written, I removed those links from the finished result [this will open in a new browser window/ tab]. Note that the specific page will take a moment for the images to load as these have not been optimized for the web (they are the beginning and ending images – and the beginning one is huge). There are some minor problems with the resultingHTML, but the page does capture each of the appropriate steps.
This seems to be a very useful tool for those of us who typically create PDF worksheets to walk students through various steps in a given process. It definitely saves time and has a clean look to the resulting document. Overall, this looks to be a useful tool. I did note the following statement on the Photoshop Tutorial Builder page – “Stay tuned for an update to Tutorial Builder that will allow you to publish tutorials from Tutorial Builder directly to the Tutorial Player iPad app.” That was posted on May 2, 2012 so I am hoping this update is available soon. The ability to develop your own tutorials that synch between your tablet and desktop would be a real plus.
Again, the finished result [this will open in a new browser window/ tab] can be accessed (I would turn this into a PDF before distributing). I provide the above link in the event anyone wants to validate the resulting HTML code (there will be errors).
Bottom line, in its present state, this is a definite helper for rapidly creating Photoshop tutorials. I am looking forward to the next iteration.


