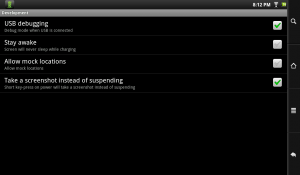
Given that I have an Archos 101 Tablet, I wanted to include some screen captures for my upcoming CMWEB 141 class on mobile and multi-screen development. Since I connected my Motorola Droid 2 to my Windows 7 (64 bit) laptop, I thought that would be the best approach. I already have the Android SDK installed and could just use ddms.bat to take my screen captures as I do with my Droid 2. Silly Mark. Let me share a bit about my recent adventure. Yes, I activated debugging mode on the tablet (and also discovered a nice feature on Android tablets – you can take screen captures natively – note the checkbox). [Click on the image if you want to see the full version.]
Ok, I can now take screen shots and share them via my DropBox folder. Problem solved. Yes, but, what if I want to do more. I really wanted the batch file to also work. I know, I should have stopped while I was ahead. I plugged in the Archos tablet to my computer via the supplied USB connection. There was the driver installation magic which resulted in… partial. success. I could share files between computer and tablet, but could not use the full capabilities of the Android SDK. That particular driver installation failed.
After a fair amount of research online (who ever said mobile development is always easy was just plain wrong), I discovered there are Archos ADB drivers [ftp://support.archos.com/ARCHOS%20it/ADB/adb_winusb_driver.zip]. Obviously, one needs to download that and unzip the USB drivers folder.
Next, one needs to modify the adb_usb.ini file to add the following line of code 0x0E79 (which is the decimal number 3705). Huh? Actually this is the Archos vendor ID. By the way, always keep a backup copy of any .ini file you modify. You will find this adb_usb.ini file in the c:\users\[username]\.android folder. Note screen capture below telling you to never edit this file. Yes, I could have run the utility, but I was in a hurry.
Next, locate the folder where you installed the Android SDK. In the platform-tools folder, you will see the adb.exe file. Navigate to this folder in the command shell (do not simply click on the file to execute it). A small screen capture is shown below. We are most interested in the following parameters. This is why you need to have the command shell open as there will be multiple parameters you need to pass in sequence. Essentially, you stop the service, start the server, and run the devices parameter again (after you have plugged in your tablet (with debugging enabled).
- adb kill-server [stops the service]
- adb start-server [starts it]
- adb devices [also starts the service]
When you plug the device in, the driver may not properly install. Ok, mine didn’t. We then need to open device manager, navigate to the problem child and search for drivers on our local system. You guessed it, we browse in the USB folder we downloaded from the Archos site. We do get a warning message that the driver is unsigned (install at your own risk). Also, once installed, you discover the driver is for a different Archos device, but it works.
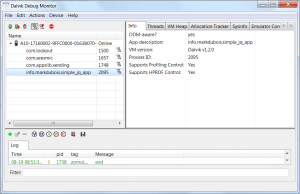
We can now run the batch file and take screen captures from the laptop. Screen captures are shown below using the Dalvik Debug monitor. First, we see the device tethered and connected.
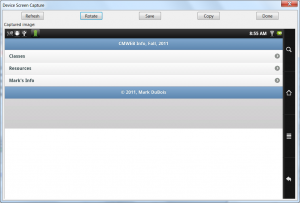
Next, we select Device > Screen capture from the menu and see the following.
Ok, I now have two separate wyas to obtain screen captures for the tablet. So why did I put this note together? 1) It is possible I will need to connect my tablet to another laptop at some point in the future and it is highly unlikely I will remember all these steps. 2) I want readers to be aware that one must have a fairly deep understanding of computers to work with mobile development in 2011. Yes, it can be relatively simple to use tools like Dreamweaver 5.5 and Flash and Flash Builder, but there are times when working with actual devices (testing before a deployment in the Android market) that you need to try things out. They don’t always work as smoothly as anticipated. Students taking the CMWEB 141 class should always keep this in mind.


